
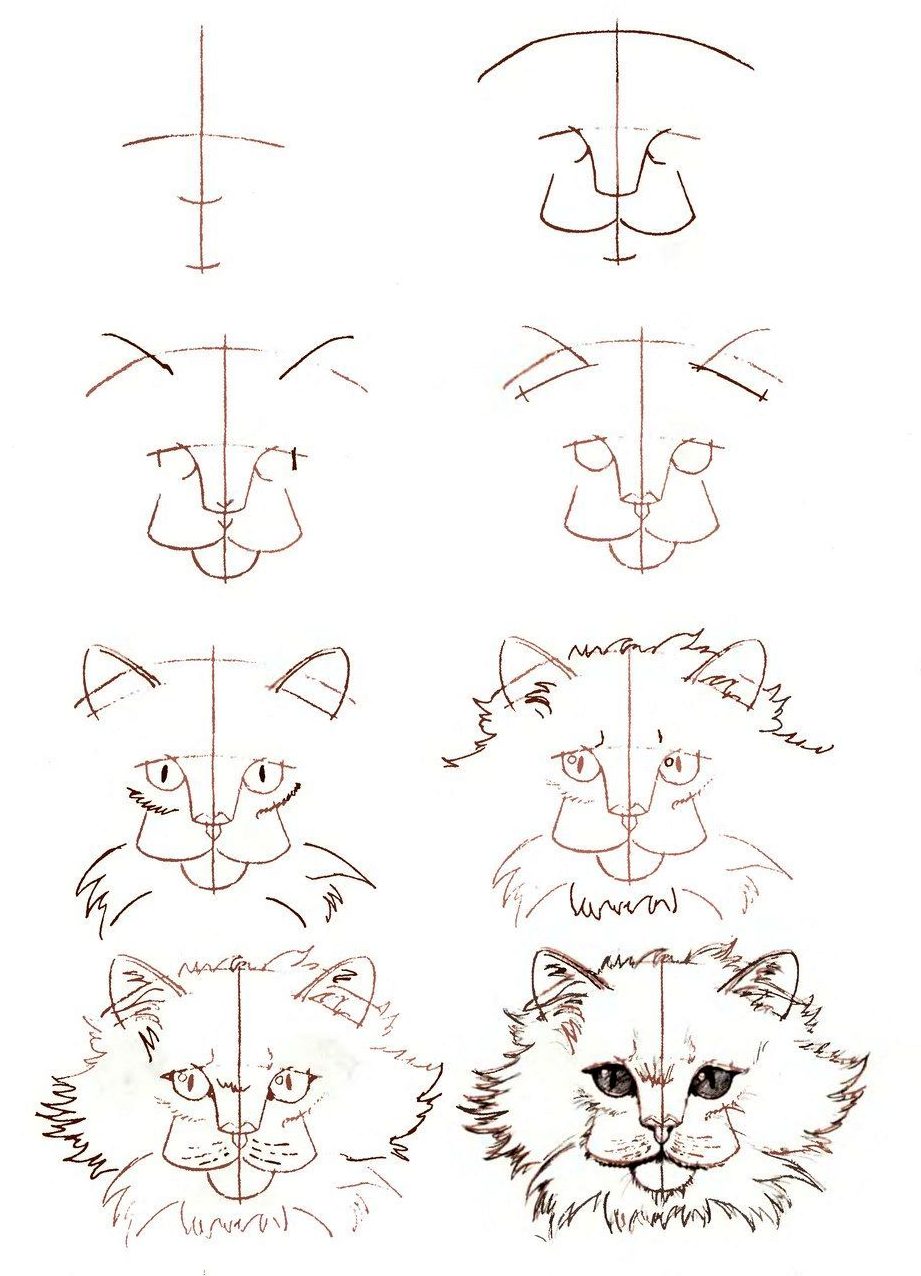
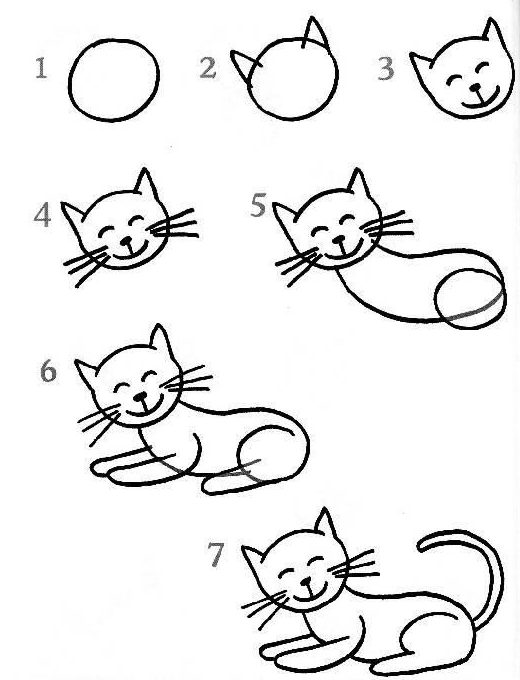
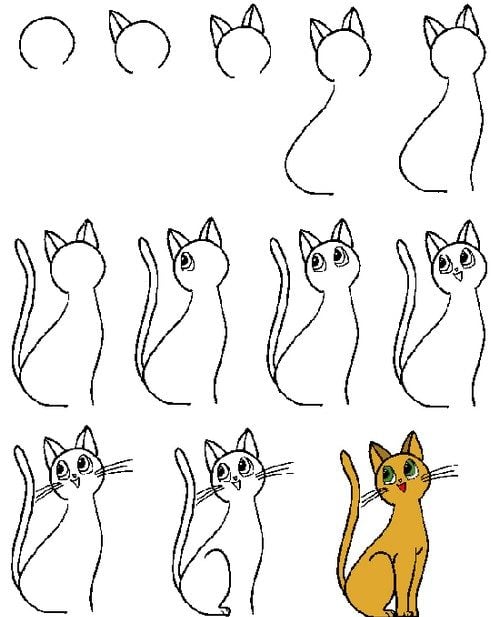
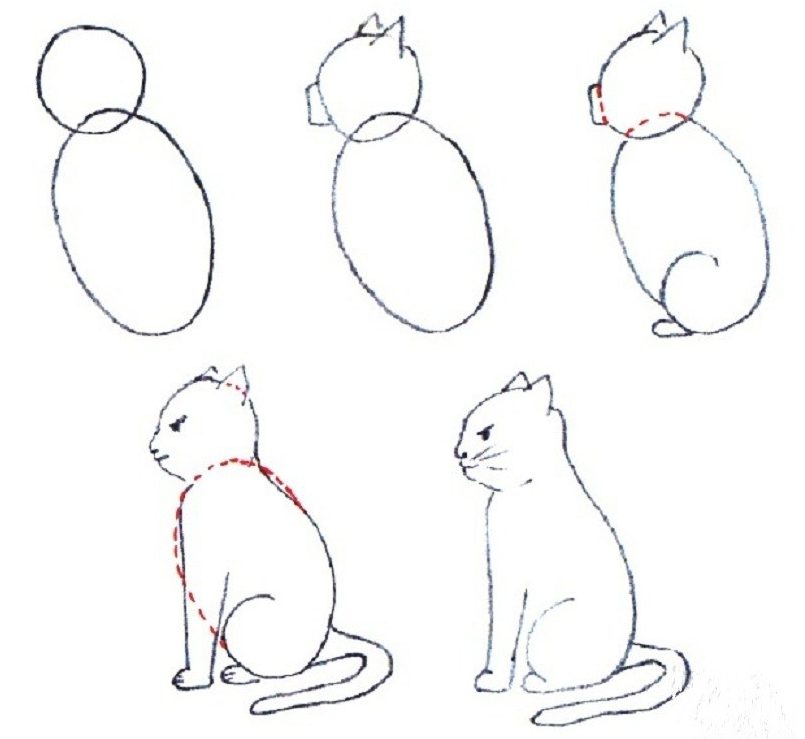
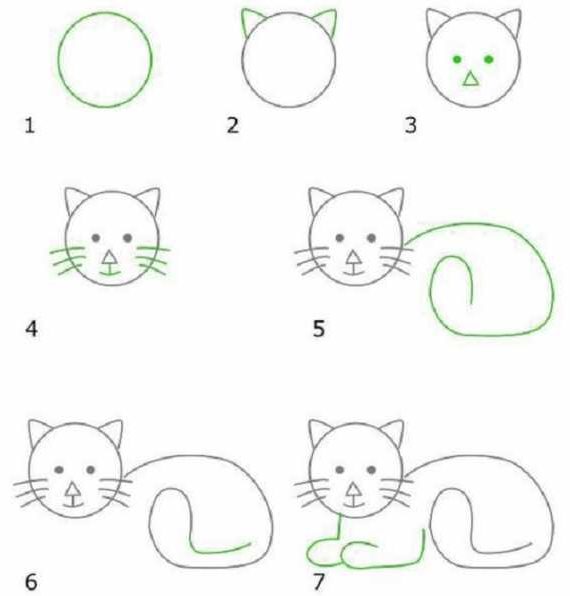
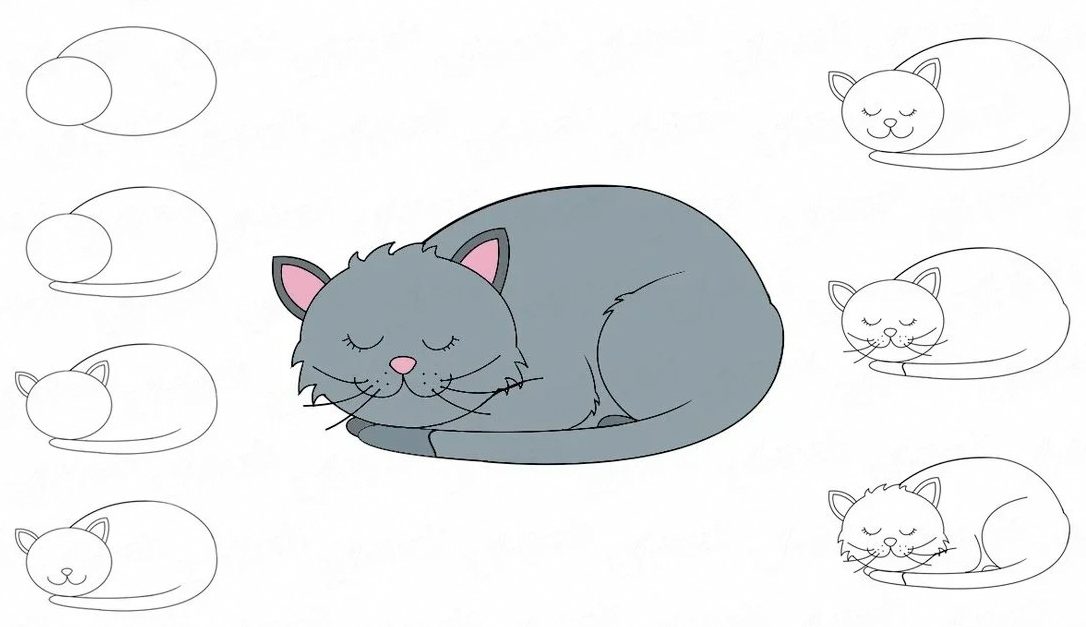
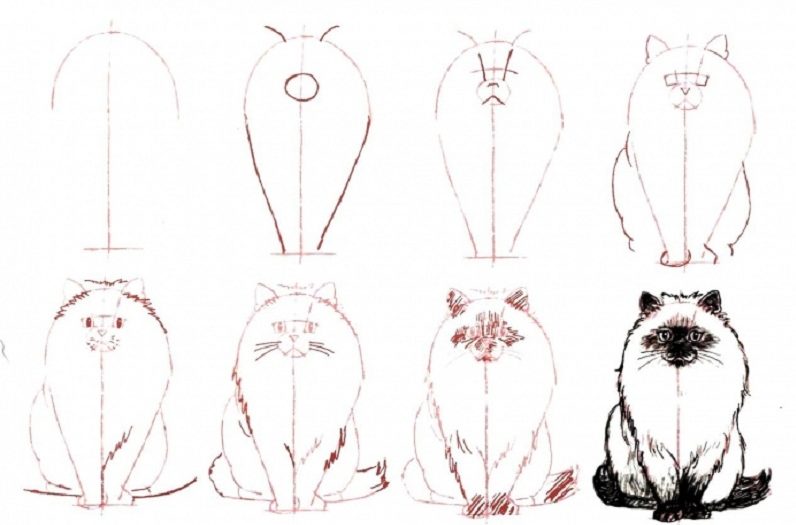
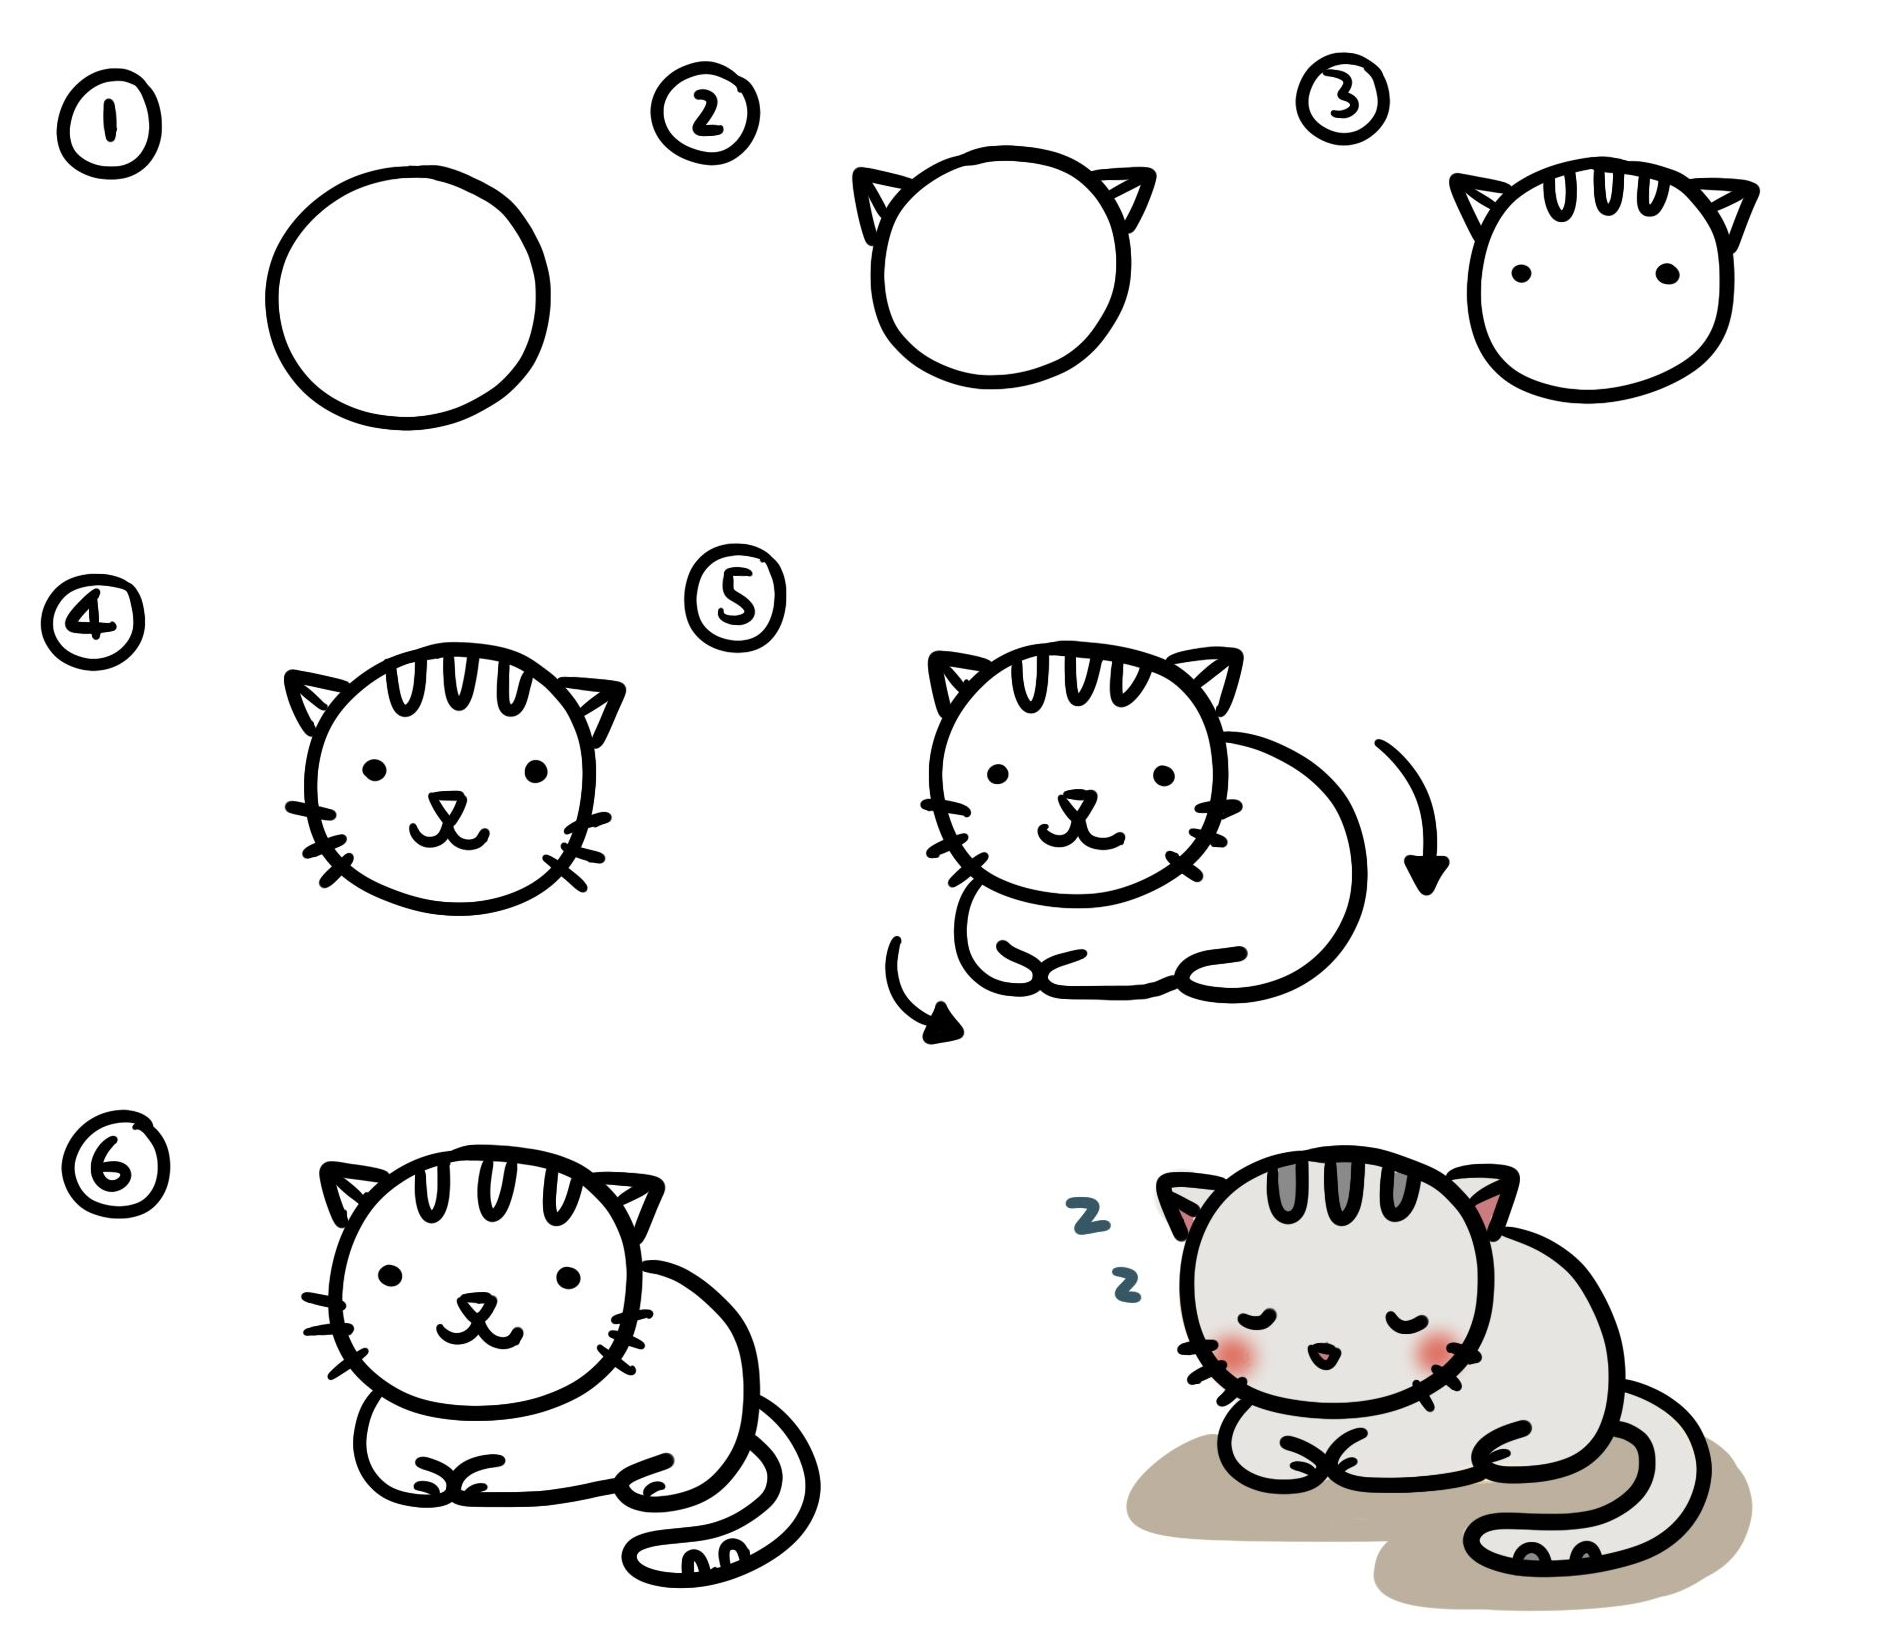
These cat drawing tutorials break the subject into simple stages so beginners can practice one part at a time. Start with the head and facial features, then add the body, paws and tail. Some examples below are quick cartoon studies, while others are better for a longer practice session.
What you need
- A pencil or drawing pen
- Paper or a sketchbook
- An eraser for construction lines
- Optional colored pencils or markers for the finished drawing
If you want more beginner practice after this tutorial, try our easy things to draw when bored or the broader easy drawing tutorials for beginners.
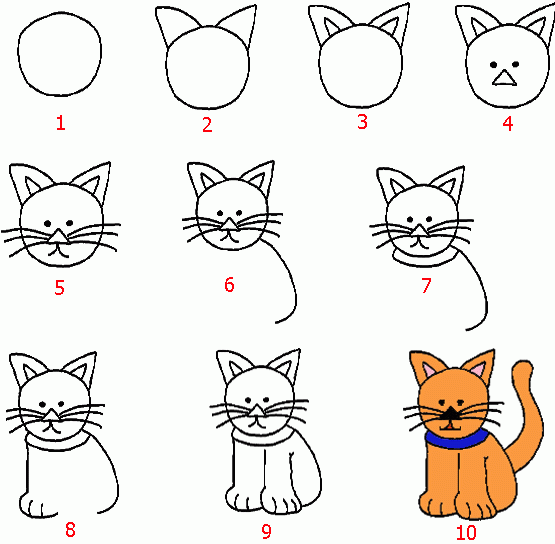
Step 1. Draw the head of the cat
In the beginning, we draw an elongated oval, but the edges of the oval should be sharp.
Step 2. Draw the eyes of the cat
On the left side of the head, just above the middle, draw the left eye: one circle, inside the second circle – the pupil and a small circle on the side of the pupil – a highlight on the eye.
Similarly, draw on the right side just above the middle of the second eye.
Step 3. Draw the nose, mouth, and mustache of the cat
In the middle, just below the eyes, draw a nose in the form of a triangle, the upper two corners with rounded edges, the lower corner – sharp. Above the nose, we draw an arc.
At the bottom of the nose from an acute angle, draw an arc to the left and an arc to the right – this is the cat’s mouth.
Now to the left of the nose, we draw three not thick lines, just as we draw from the other side – these are kitty mustaches.
How to draw a cat easy step by step
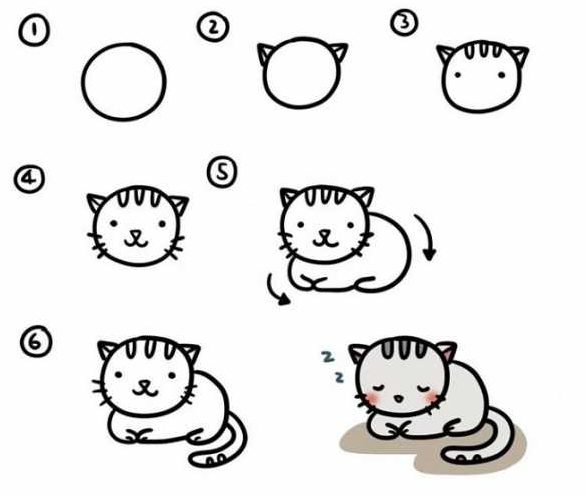
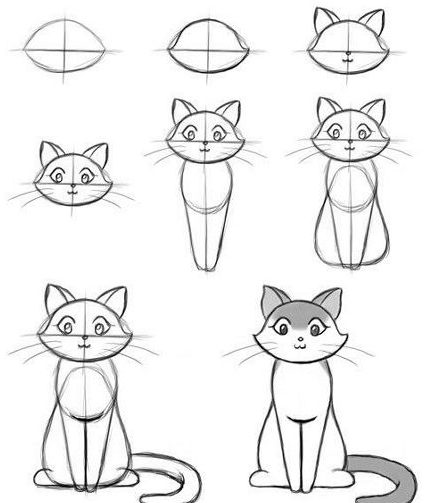
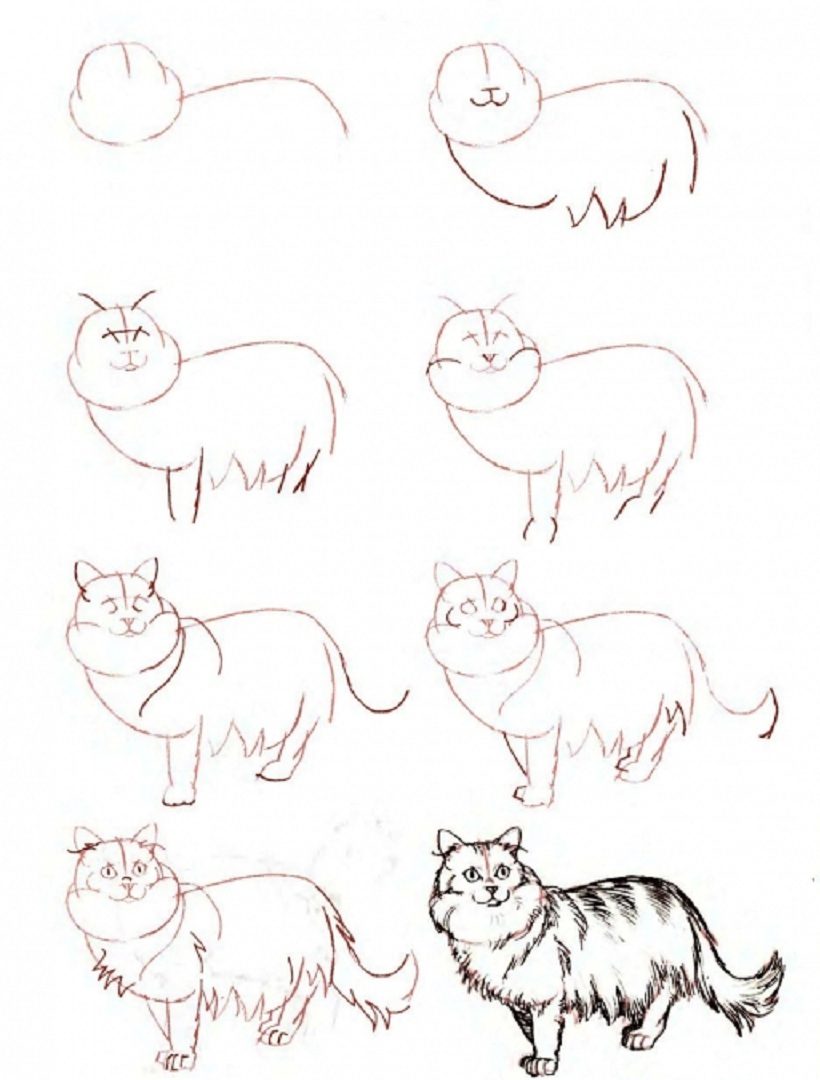

Step 4. Draw the ears of the cat
In the left part above the cat’s head we draw a triangle with a round corner, the inner part of the ear is separated by an arc.
Similarly, draw the right ear.
Step 5. Draw the neck of the cat
Under the head, we draw an arc, around the arc we draw a broken line with cloves similar to wool. When the wool is ready to the arc, which was drawn in the beginning we erase with an eraser.
Step 6. Draw the front legs of the cat
On the left, draw a long arc down from the neck, draw three small circles at the bottom of the arc — these are the pads on the cat’s legs, to the right of the pillows we draw an arc about the middle of the first arc — the left foot is ready.
In the same way, draw the cat’s right paw.
Step 7. Draw the hind legs of the cat
The hind legs are drawn almost exactly like the front legs, only the arc needs to be made more curved and half as high as the front legs. We draw the hind legs on the left and the right.
Step 8. Draw the tail of the cat
We draw the tail of the cat on the right above the right hind paw, draw a wavy line up and down to the foot, the tail at the paws should be thicker, and the tip should be thin.
Step 9. Add an optional bow or collar
If you want an accessory, add a small bow near one ear or a simple collar around the neck. For a bow, draw two rounded triangular loops with a small circle or oval between them.
Once the construction lines are cleaned up, you can leave the drawing in pencil or add color. Gray, black, cream, orange and white are easy starting points, but there is no reason the finished cat has to use a realistic coat color. For more examples, see our cat drawing ideas.
Coloring the finished sketch
Use light pressure first so the pencil drawing remains visible. Add the darker coat areas after the base color, then leave a few lighter sections around the muzzle, chest or paws. If the drawing is for a child, a simpler palette and larger color areas are usually easier to manage than trying to shade every small section.
Cat Drawing Step by Step
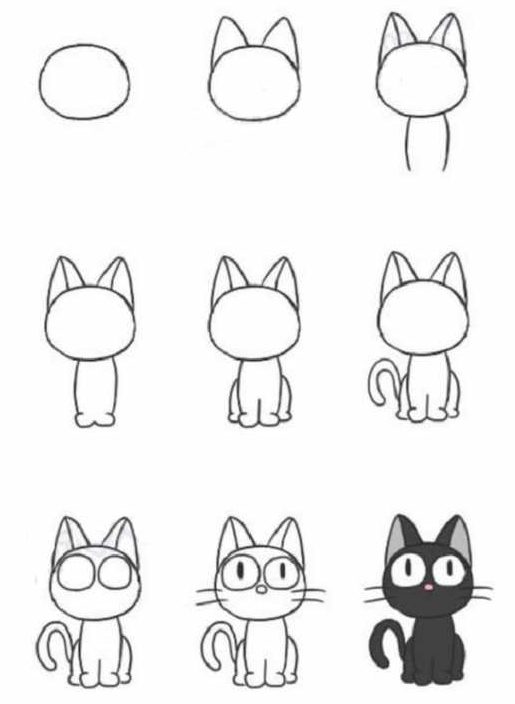
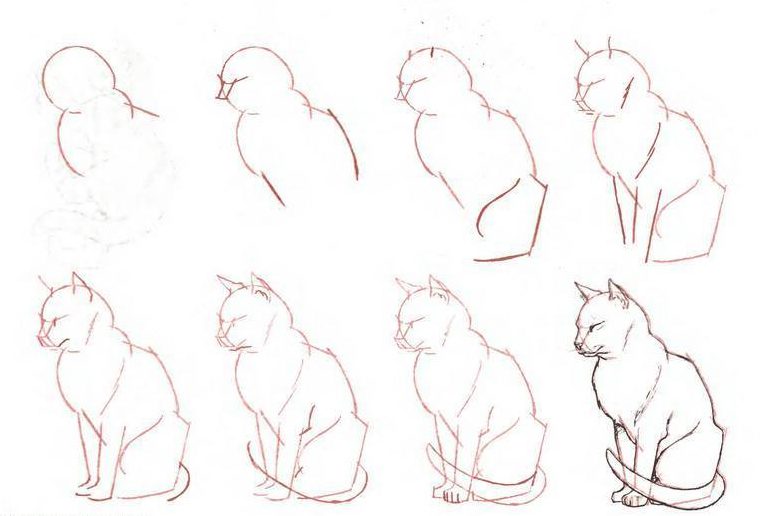
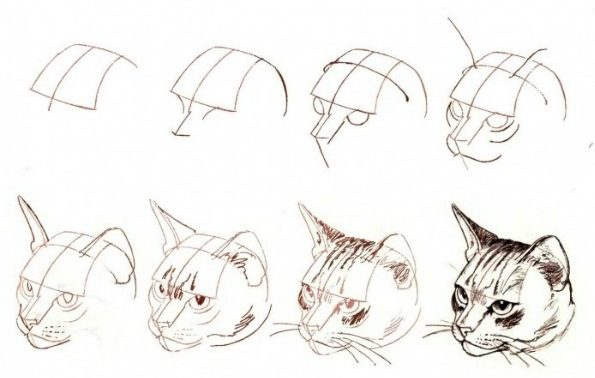
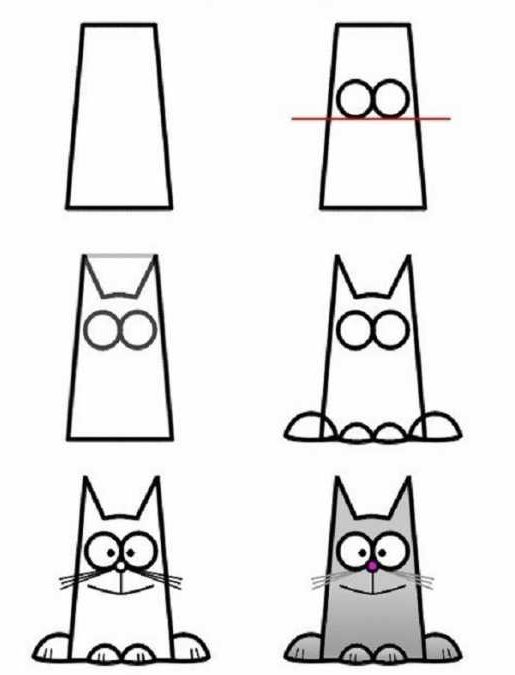
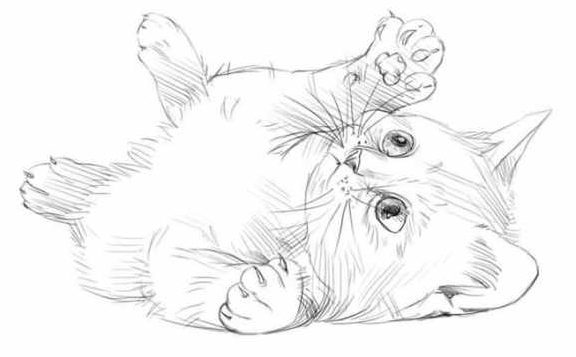


cute