
Twenty animal drawing references for kids and complete beginners, arranged from the easiest rounded shapes to pets, farm animals and slightly trickier poses. Click or tap any image to open the full-size reference.
Jump to: easy rounded animals · pets · farm animals · more animal practice · simple drawing method
Start with the easiest animal shapes — Drawings 1–5
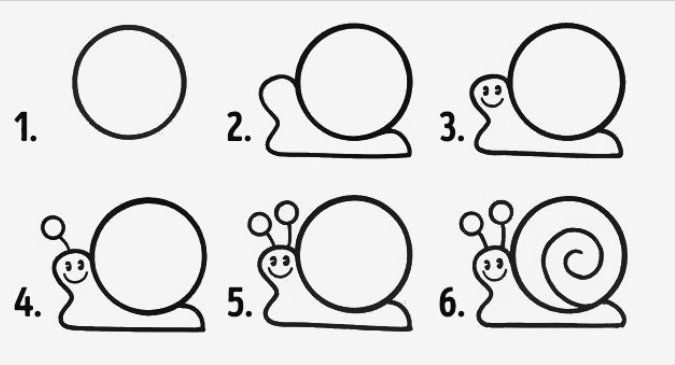
Start with the snail. The shell and body are mostly large curves, so there is less to keep track of than with a four-legged animal.
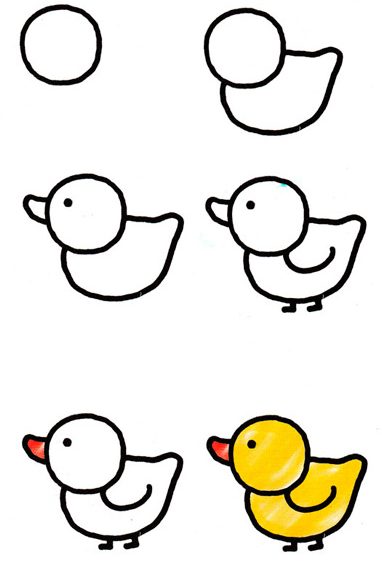
The animal recipe: six steps that work again and again
Most beginner animal drawings become much easier when you stop thinking, “How do I draw a dog?” or “How do I draw a cow?” and ask a smaller question first: what are the two or three biggest shapes?
- Block the head and body. Use circles, ovals, bean shapes or rounded boxes. Keep the lines light.
- Add a center line to the head. This shows which way the animal is looking and keeps the eyes, nose or beak from sliding sideways.
- Mark direction before thickness. Use simple lines for legs, ears, wings and tails first. Once the direction feels right, build the final shape around those lines.
- Clean the silhouette. Ask whether the animal is recognizable before adding fur, spots or facial details.
- Add the species clues. Long rabbit ears, a turtle shell, a duck beak, an elephant trunk or a sheep’s wool texture should come after the body works.
- Finish with only a few details. Eyes, toes, spots, whiskers and small textures should support the drawing, not cover a weak construction.
If the drawing looks wrong at step three, stay there. Eyes and fur will not rescue a head that is too large, legs that attach in the wrong place or a body that is stretched out of proportion.
Teach kids to spot the shape family first
A useful game is to look at an animal for five seconds and name the biggest shapes before drawing anything. You do not need the “correct” geometric answer. The point is to simplify.
- Round-body animals: ladybug, chick, mouse and many cute cartoon animals can begin with one main circle or oval.
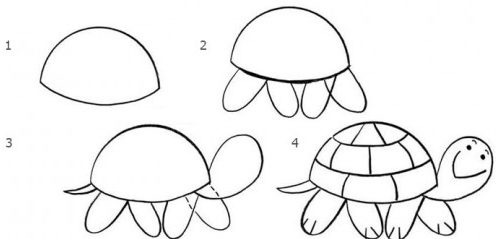
- Shell + body animals: snail and turtle are easier when the shell is treated as its own large mass instead of a detail added later.
- Head + torso animals: dog, cat, rabbit, sheep, cow and donkey work well as two main masses connected before the legs are drawn.
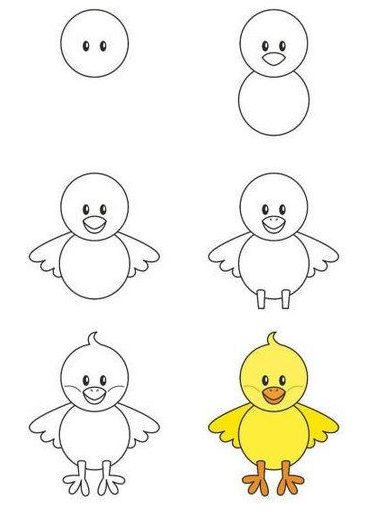
- Winged animals: chick and duck are easier if the body shape comes first and the wing is added as a smaller side shape.
- Long-feature animals: rabbit ears, donkey ears and the elephant trunk are identifying features, but they should be attached to a stable head shape rather than used as the starting point.
Once a child can see those families, a new animal feels less like a brand-new problem. The same head-and-body idea can become a dog, cat, rabbit or sheep simply by changing the proportions, ears, muzzle, tail and surface details.
Face placement: the small trick that fixes many animal drawings
Before drawing the eyes, imagine a faint line running down the middle of the head. If the animal faces forward, the line is near the center. If the head turns, the line shifts and curves with the form. Place the nose, beak or muzzle around that same direction.
This is especially useful on cats, dogs, rabbits and farm animals. Without a center line, children often place each eye independently and the face ends up looking twisted even when the head shape is fine.
Pets and familiar animals — Drawings 6–10
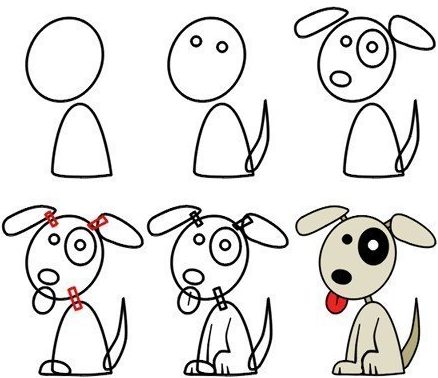
Pets are a good next step because the basic shapes are still familiar, but the ears, muzzle and leg placement start to matter more. Before drawing the face, compare the head width with the muzzle length. A dog with a short muzzle and a cat with a small triangular nose may begin from similar head shapes, but those proportions quickly separate them.
Also watch the ears as a pair. Their size, angle and attachment point change the whole expression. Draw the ear direction lightly first, then build the ear shape around it. That keeps one ear from accidentally sitting higher or farther back than the other unless the head is actually turned.
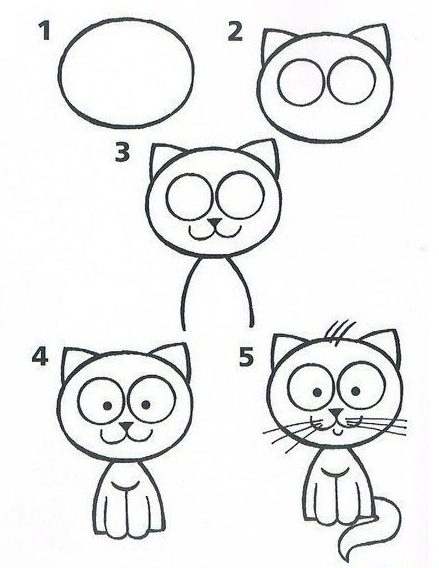
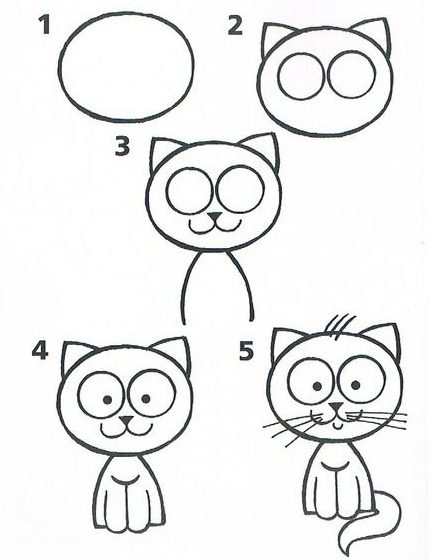
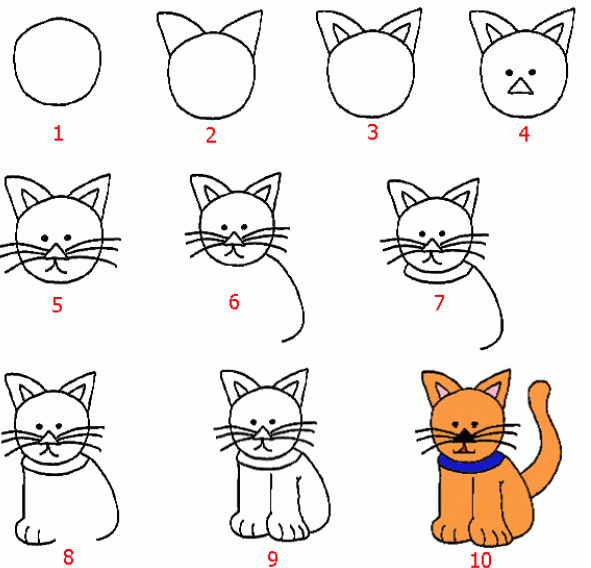
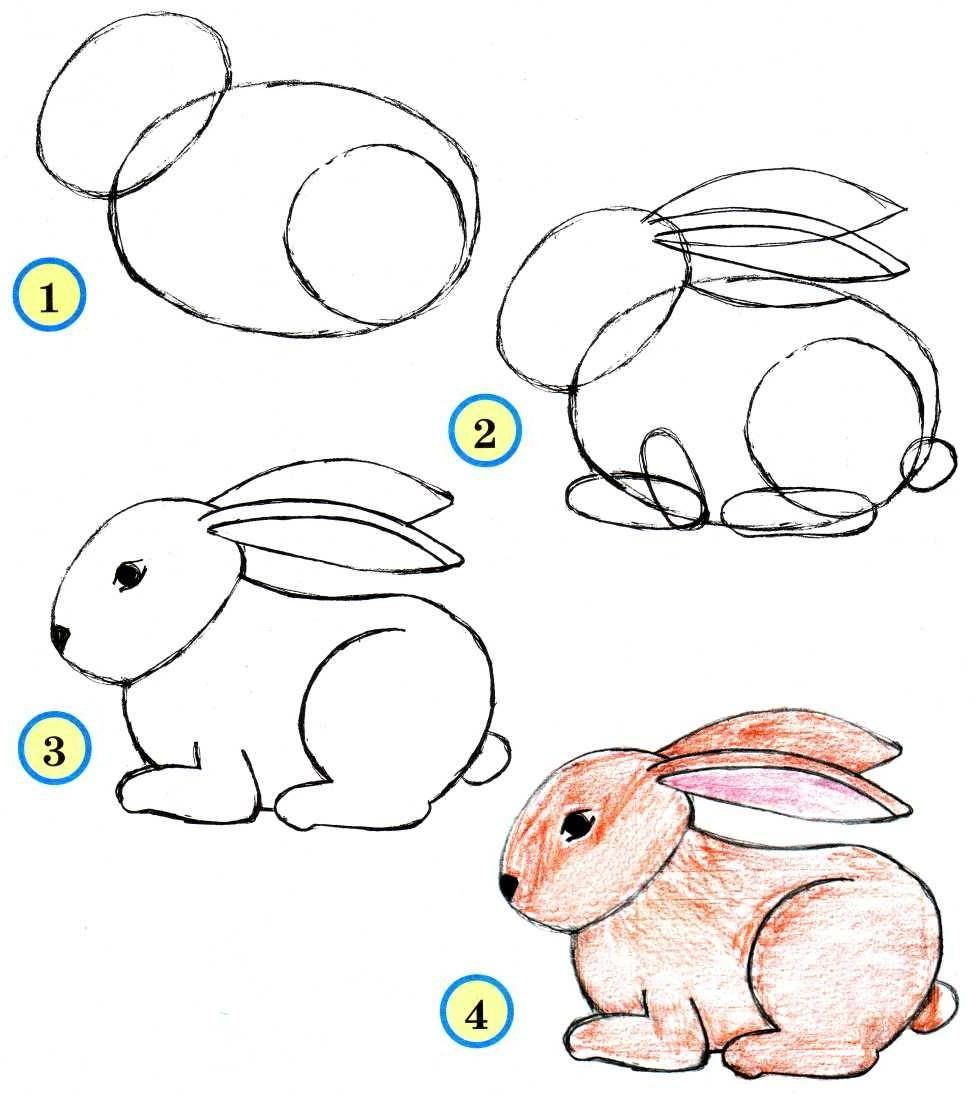
If cats are the favorite, the cat drawing tutorials give you a much bigger set without making this page cat-heavy.
Farm animals — Drawings 11–15
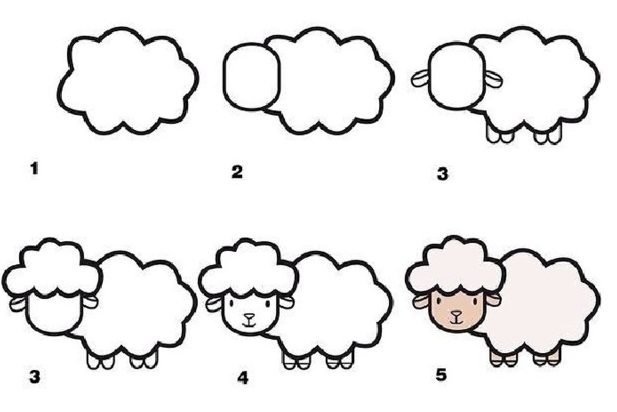
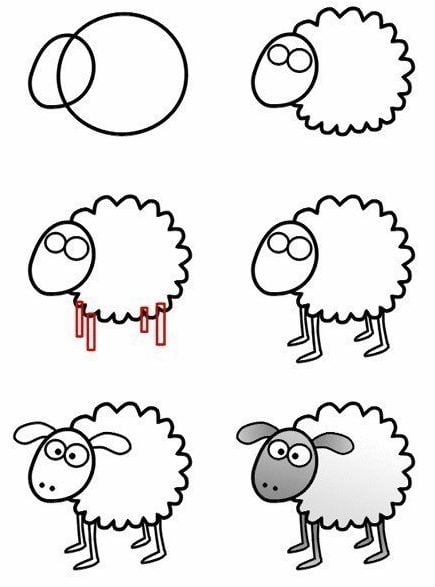
Farm animals are the point where body construction matters more than decoration. Start with the torso as one large oval or rounded box, then attach the head with a clear neck direction. Add the legs from the body—not from the ground upward. This prevents the joints from drifting into impossible places.
Use the silhouette as a test. A sheep should still read as a sheep before the wool texture is added; a cow should still feel broad-bodied before spots appear; a donkey should already have the right head-and-ear relationship before the mane is drawn. Texture, spots and fur belong at the end.
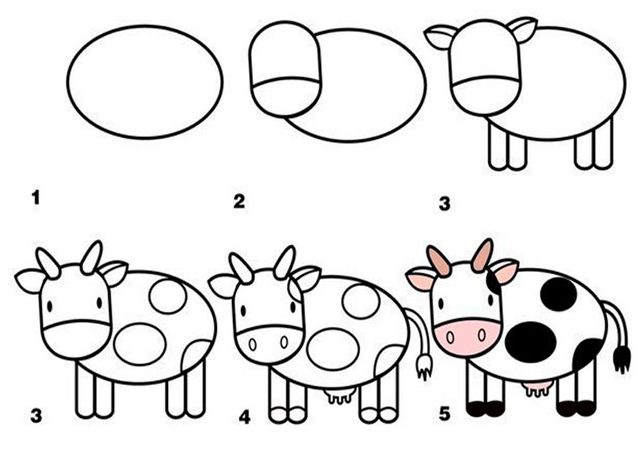
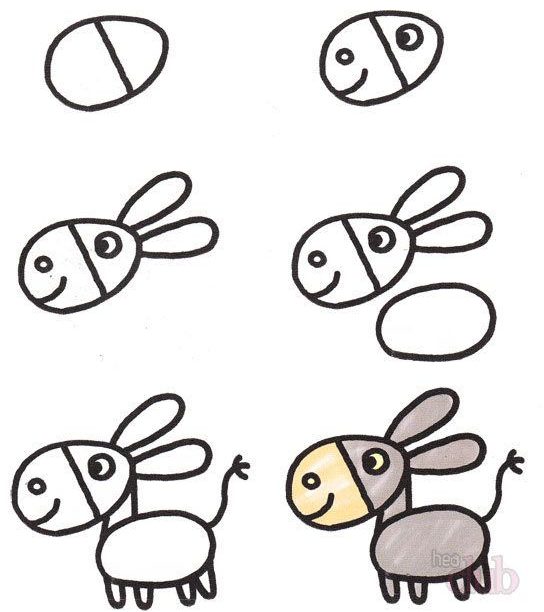
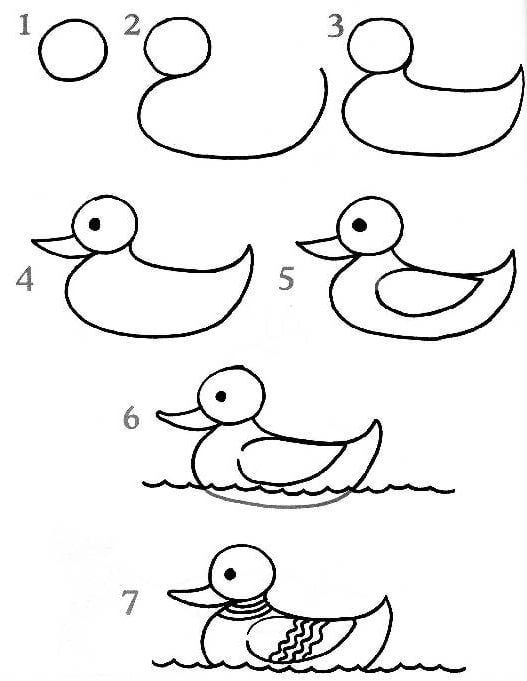
Mice, frog, elephant and character-style practice — Drawings 16–20
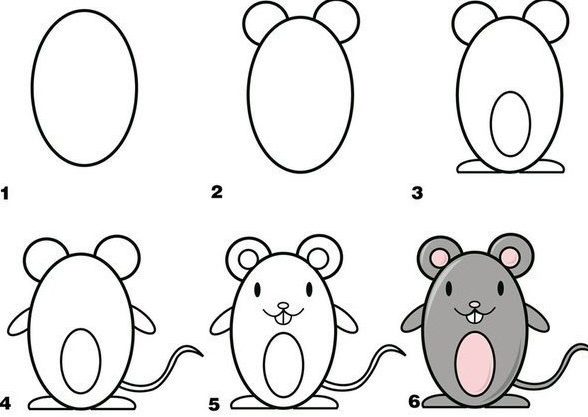
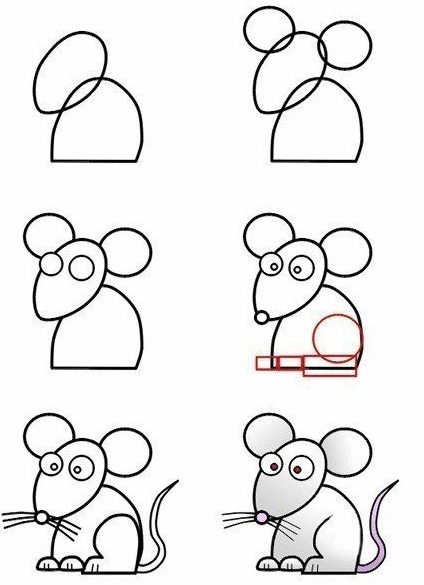
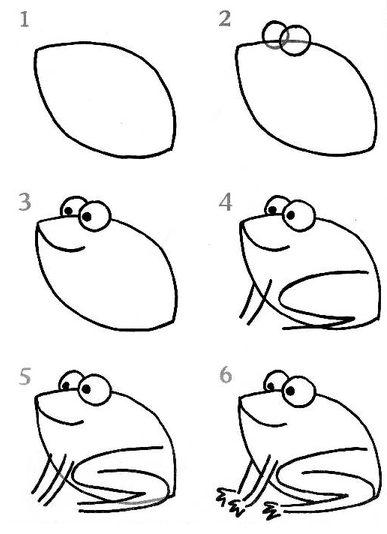
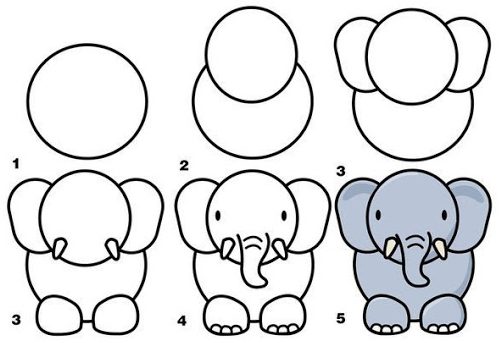
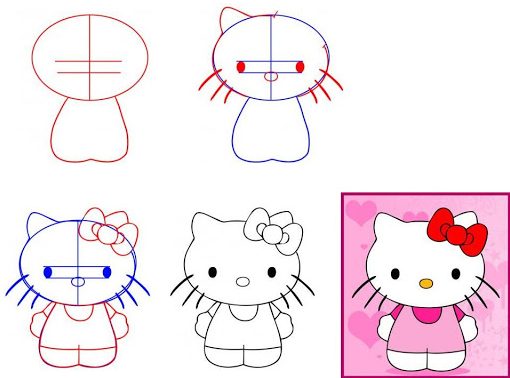
The final reference is a recognizable character-style drawing, so treat it as fan-art practice rather than an original design for reuse.
One base shape, four different animals
Try this without looking at the finished tutorials. Draw one medium oval for a body and one smaller circle for a head. Copy that same pair of shapes four times.
- Turn the first into a rabbit: lengthen the ears, shorten the muzzle and add a small round tail.
- Turn the second into a dog: change the ear shape, extend the muzzle slightly and add a longer tail.
- Turn the third into a sheep: make the body fuller, add short legs and place wool texture around the outside only after the silhouette works.
- Turn the fourth into an elephant: enlarge the ears, add the trunk from the face and make the legs heavier.
Do not redraw the original ovals to suit each animal. The exercise is intentionally restrictive. It shows how much identity can come from proportion, ears, muzzle, tail and one or two special features.
How to make an animal look like it is actually standing
Four-legged animals often look as if they are floating because the feet are placed first and the legs are invented afterward. Reverse that order. Mark where the front and back legs attach to the torso, draw a simple direction line for each leg, then decide where the feet land.
For a standing pose, compare the feet to an imaginary ground line. They do not all need to sit at exactly the same height if the animal turns in space, but they should feel as if they belong to the same floor. If one foot floats much higher without a reason, the body will look tilted even when the torso is level.
How to show movement without drawing anatomy
For a walking, jumping or swimming animal, begin with one action line through the body. Make that line lean, curve or stretch in the direction of the movement. Add the head and torso around it. Limbs and tails should support that direction rather than fighting it.
A running animal usually becomes longer and lower than a standing one. A jumping animal may have the legs tucked or stretched. A swimming duck or turtle can be simplified to a body shape with a clear forward direction. Children do not need muscle anatomy to make a pose feel active; they need the big directional idea first.
Which animal should a complete beginner draw first?
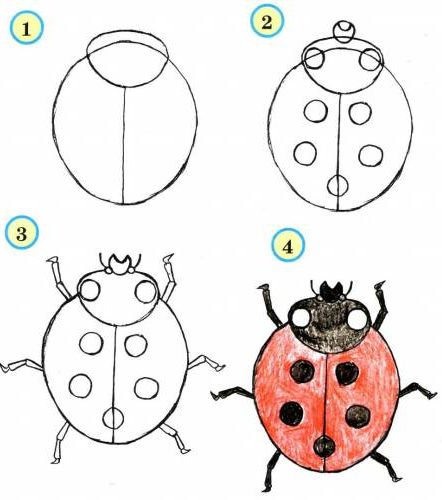
If a child is nervous about drawing, start with the snail or the ladybug. Both rely on large, forgiving curves and have very few parts to organize. Next, move to the chick or duck. After that, try a pet such as the dog, cat or rabbit. Save the cow, donkey and more complicated four-legged poses until head-and-body proportions feel easier.
Motivation matters too. A child who loves dogs may learn more from struggling happily with the dog than from completing an easier snail they do not care about. Use the difficulty order as a guide, not a rule.
A four-level animal drawing path
- Level 1 — one main shape: snail, ladybug, chick. Practice large curves and simple face placement.
- Level 2 — two connected masses: turtle, duck, mouse, rabbit. Practice head-to-body proportion and one identifying feature.
- Level 3 — pets and farm animals: dog, cat, sheep, cow, donkey. Practice leg attachment, muzzle length, ear placement and silhouette.
- Level 4 — variation: redraw one animal from a different angle, make it walk, sit or look the other way, or turn the same base shapes into another species.
Level 4 is the important one. Copying a tutorial once shows that a child can follow steps. Changing the pose or species shows that they understood the construction underneath the steps.
A 12-minute practice loop
- Minutes 1–3: draw only the head and body masses. Compare their sizes before adding anything else.
- Minutes 4–6: add leg, ear, wing and tail directions with light lines.
- Minutes 7–9: place the face using the head center line and add the main species clue.
- Minutes 10–12: draw the animal again at half the size without checking every line of the tutorial.
Keep both drawings. The smaller second version may look rougher, but it is more useful for learning because it reveals which shapes and relationships the child actually remembered.
Common animal-drawing problems and the fastest fix
- The head keeps becoming huge. Draw the head and body at the same time, then compare them before adding the face.
- The legs look pasted on. Mark where each leg starts inside the torso shape before drawing the outer leg contour.
- The face looks crooked. Add a light center line to the head and place the nose or beak on that direction before the eyes.
- The animal looks flat. Use overlap. Let one leg sit behind another, one ear pass behind the head, or the head overlap the torso instead of outlining every part separately.
- It looks furry but not like the right animal. Remove the texture mentally and check the silhouette. Species identity should work before fur or spots.
- The child keeps erasing every line. Use lighter construction lines and finish the attempt. Redrawing once is usually more useful than correcting the same curve ten times.
Simple shading for kids: use only three values
Once the animal construction works, add depth with three simple values instead of trying to blend everything smoothly.
- Light: leave the paper mostly white on the top or light-facing side.
- Middle: add a soft pencil tone to the side turning away from the light.
- Dark: save the darkest marks for pupils, the inside of ears, under the chin, where legs overlap the body, or beneath the animal.
This is enough to make a simple animal feel more solid. If the entire drawing is shaded the same gray, the big shapes become harder to read. Keep most of the animal lighter than you think.
How adults can help without drawing it for the child
The most useful help is usually a question, not a correction. Instead of saying “that leg is wrong,” ask, “Where does the leg begin on the body?” Instead of redrawing the face, ask, “Which way is the head looking?” That keeps the child making the visual decisions.
- Point to relationships: “Is the head bigger or smaller than the body?”
- Use the reference: “Which ear is higher in the picture?”
- Ask for the next big shape: “What would you draw if you were not allowed to add eyes yet?”
- Limit corrections: choose one structural thing to fix rather than correcting every line.
- Keep failed attempts: put the date on them and redraw the same animal later. Visible progress is more useful than pretending every attempt should be display-ready.
If frustration rises, shrink the problem. Draw only the head, only the silhouette or only the two largest shapes. Finishing a smaller version is usually better than forcing a complicated drawing to the end.
A five-day animal drawing plan
- Day 1 — easy curves: draw the snail and ladybug. Focus on large shapes and smooth lines.
- Day 2 — head + body: draw the chick, duck and mouse. Compare head size with body size before adding the face.
- Day 3 — pets: choose the dog, one cat and the rabbit. Pay attention to muzzle length, ear angle and tail shape.
- Day 4 — four-legged bodies: draw the sheep, cow or donkey. Start every leg from the torso and check the ground line.
- Day 5 — transfer: pick one animal from earlier in the week and redraw it in a new pose or turn its base shapes into a different species.
Keep the first and final drawings next to each other. The useful change is not prettier coloring; it is faster shape placement, fewer corrections and a clearer silhouette.
Animal drawing questions
Should children trace these drawings?
Tracing once can help with proportions, but the better exercise is to draw the same animal again beside the reference without tracing.
Why do the legs often look wrong?
They are usually added as finished shapes too early. Mark the leg direction with a simple line first, then add thickness around it.
Do we need colored pencils?
No. Pencil and paper are enough. Color is more useful after the construction works.
What if the animal does not look exactly like the reference?
That is fine. Check whether the head, body and main identifying feature read clearly. Exact copying is not the goal.
More drawing practice
For a broader beginner library, use the 43 drawing tutorials. For a smaller kid-focused set with objects and fantasy subjects as well, use the 9 drawing tutorials for kids.


Good afternoon sir/ma’am, can we print and distribute this to kids for their worksheets at home?
i love this app
gooiggg gghf good
bla
hi how can I get in touch with you.Pls reply to my email address. Thank you
Its so cool im in year five and i have to draw somthing for my buddy really recommend this app
cool
i like ur pp julian