
If you are genuinely new to drawing, the order matters more than the subject. A coffee cup teaches proportion and ellipses. A simple animal teaches how to combine large shapes. An eye introduces landmarks and value. Hands, horses and full characters become much easier once those earlier decisions stop feeling unfamiliar. This page uses 43 step-by-step references as a practice library rather than a list to finish in order. Click or tap any tutorial image to open the full-size reference.
Start by skill: shape & proportion · how to use a tutorial · animals from simple masses · faces & hands · objects & construction · stylized characters · practice plan
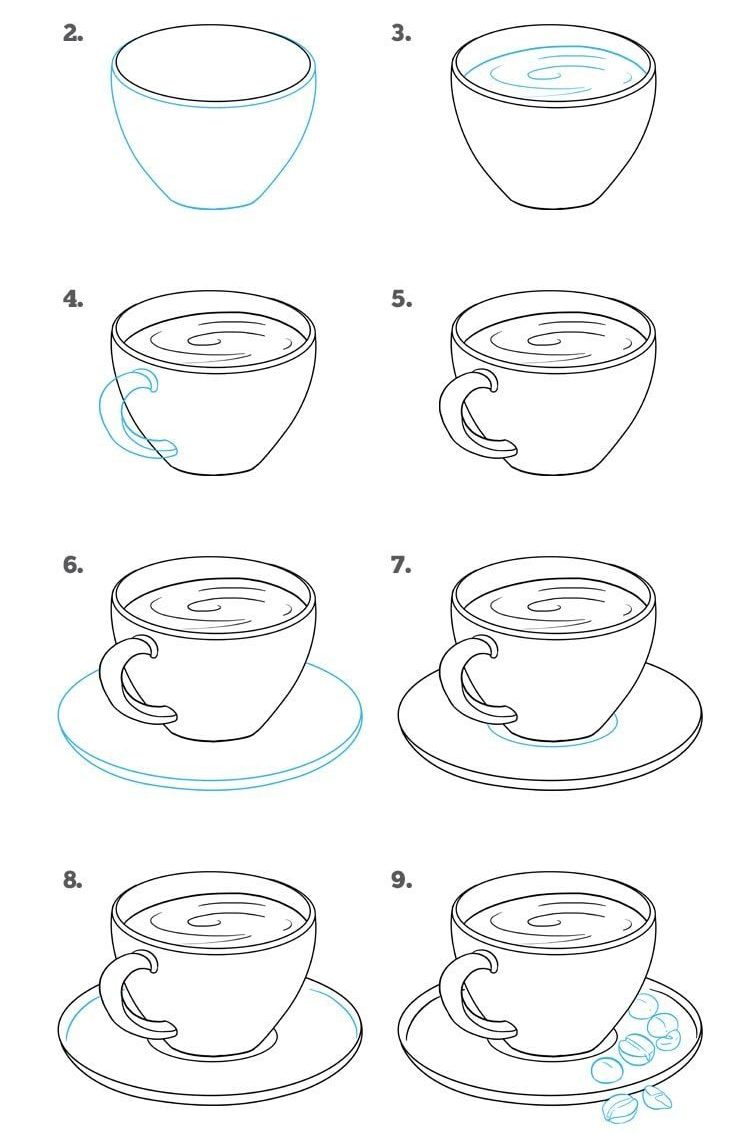
If you want one first exercise: draw the coffee cup below. Do it once from the steps, then once again from memory. That second drawing will tell you more than spending an hour polishing the first one.
Start with simple objects and compact shapes
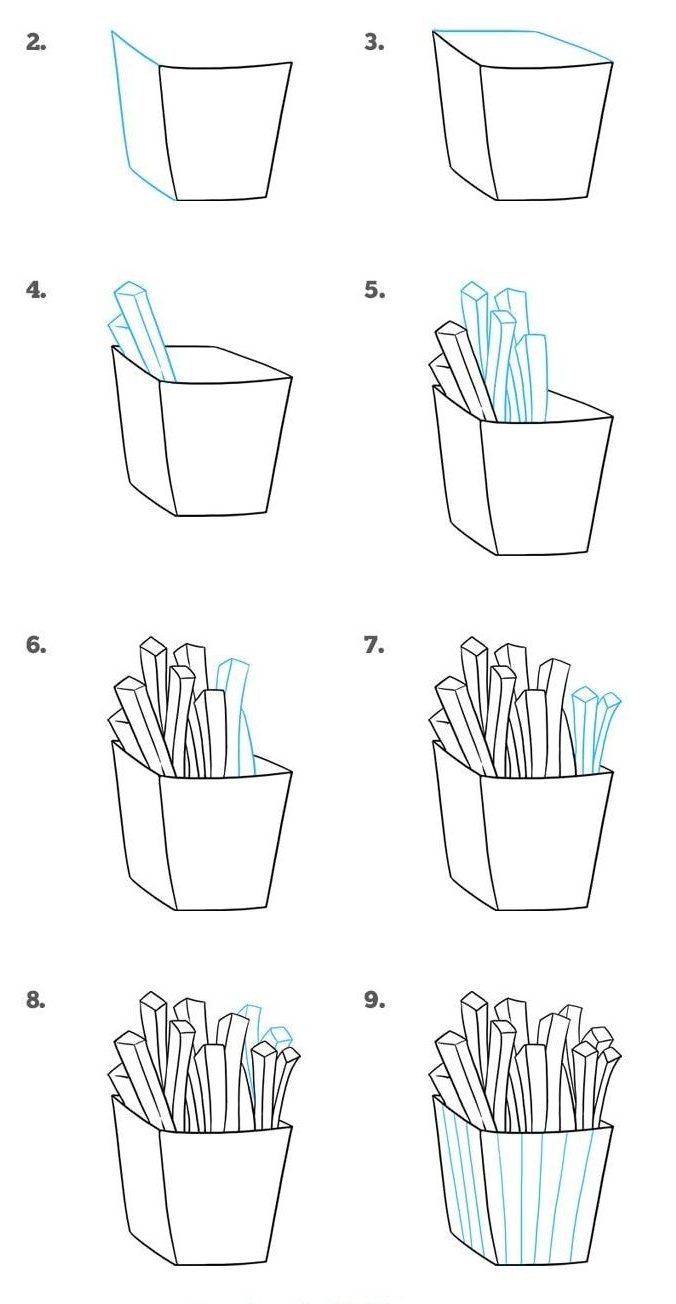
The coffee cup and fries are better first exercises than a hand or full character. They let you practice curves, ellipses, spacing and proportion without anatomy getting in the way.
How to use a drawing tutorial so you actually learn from it
A step-by-step image can make drawing feel easy because somebody else has already decided what comes first. The danger is copying the sequence without understanding the decisions underneath it. For each tutorial, try to identify four layers:
- Envelope: what is the overall width, height and tilt of the subject?
- Construction: which circles, boxes, center lines or large masses organize it?
- Contour: which construction lines survive into the visible outside edge?
- Finish: which small details, line weights or shadows are added only after the structure works?
On the coffee cup, for example, the useful lesson is not the handle. It is the relationship between the top ellipse, the side walls and the base. If the ellipse is too flat or the sides lean inconsistently, a perfect handle will not save the drawing.
Use light construction lines longer than feels necessary
Beginners often erase guides as soon as they have a recognizable outline. Keep them until the big relationships are correct. A faint center line can tell you whether two sides are balanced; a light box can stop an object from stretching; a circle can keep an animal head from changing size while you add ears and features.
Draw the first pass lightly enough that you can correct it without digging grooves into the paper. Commit to darker lines only after the proportions make sense. Clean drawing is usually the result of better decisions underneath—not of never making exploratory marks.
A fast proportion check before you add detail
- Compare width to height. Is the subject twice as tall as it is wide, roughly square, or wider than tall?
- Check the halfway point. What important feature crosses the vertical or horizontal middle?
- Compare negative spaces. The gaps around a handle, between legs or inside a bent arm often reveal proportion errors faster than staring at the outline.
- Flip your attention. Look at the largest wrong relationship first. Do not fix eyelashes while the head is too narrow.
Get into the habit of stopping for this check before every detail pass. It saves more time than careful erasing later.
Three low-risk exercises for line control and spacing
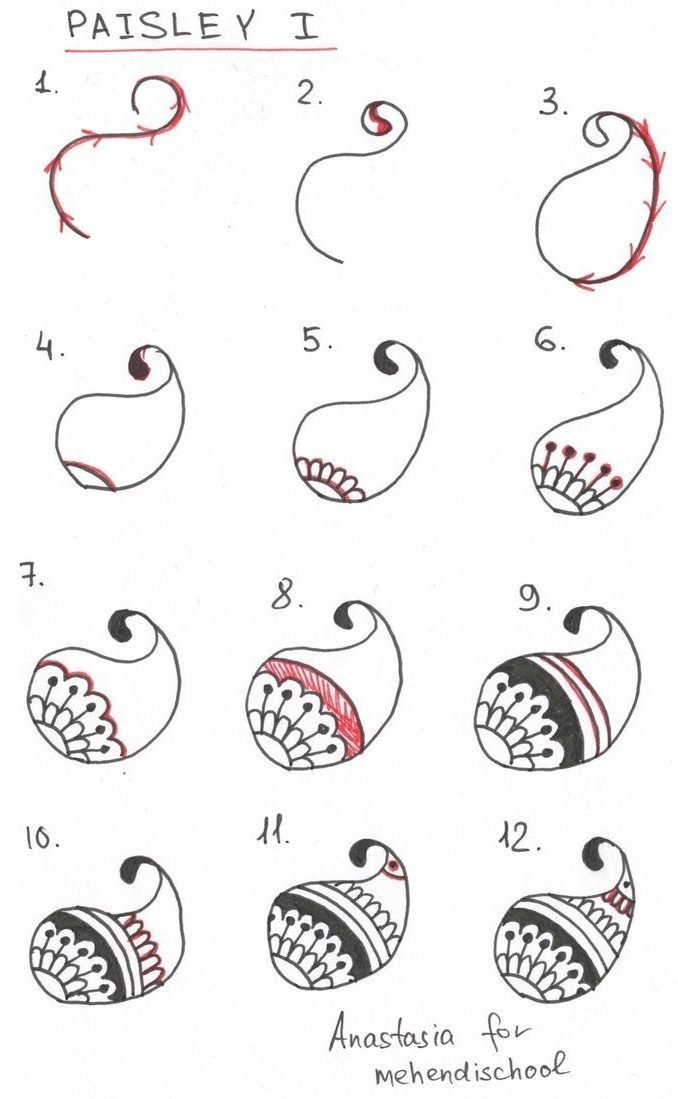
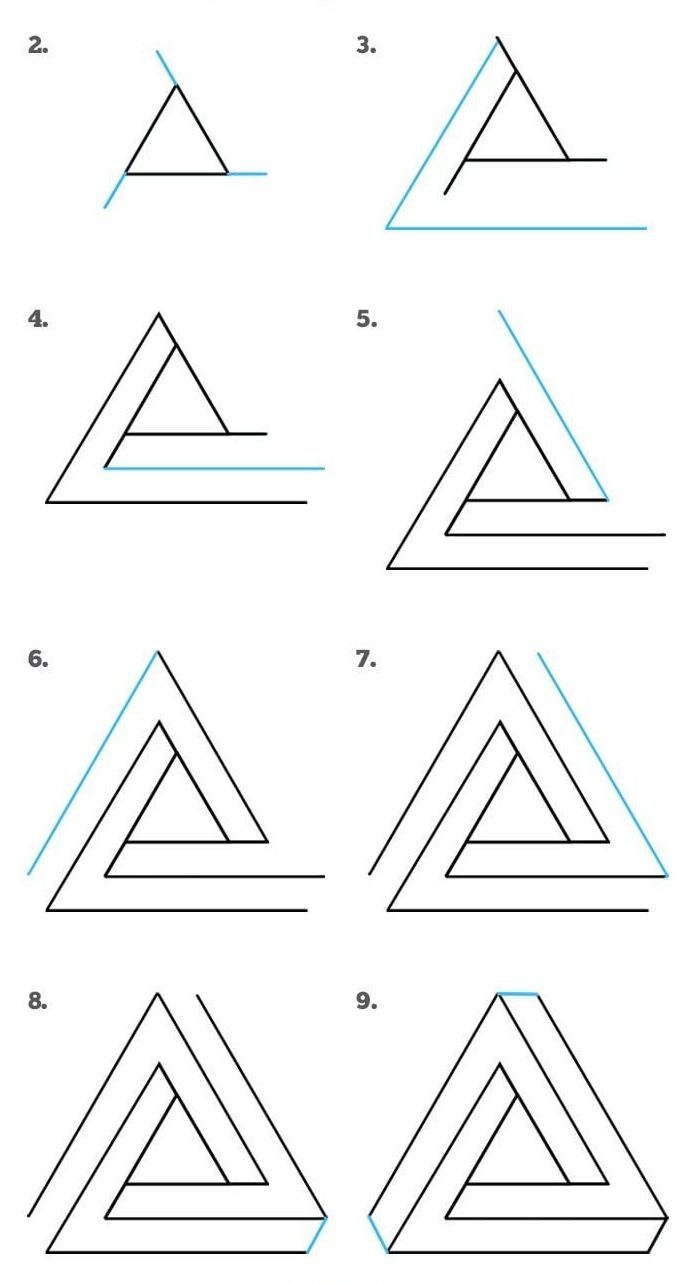
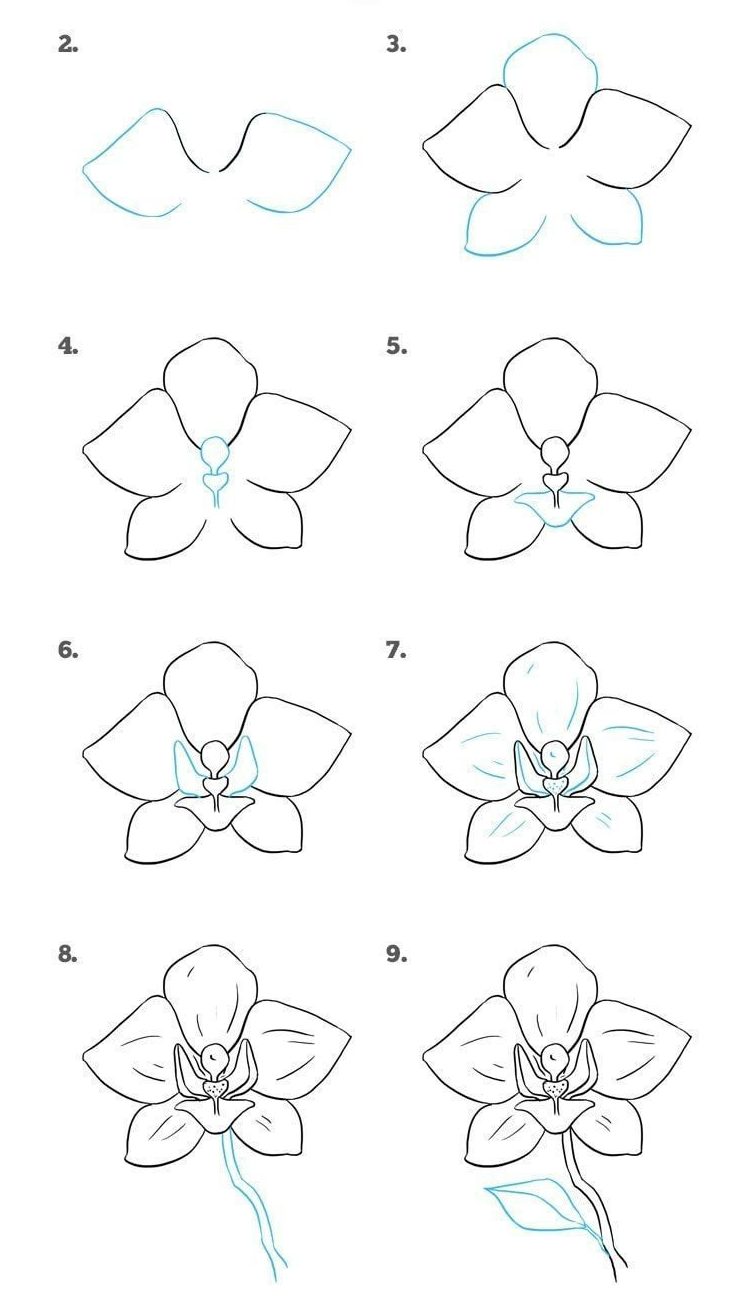
These references train different things without requiring anatomy. The paisley pattern is about repeated curves and spacing; the impossible triangle is about keeping straight edges and corners consistent; the orchid introduces organic asymmetry and overlap.
Do not try to make the paisley units perfectly identical. Aim for a shared rhythm. On the optical shape, slow down at corners and check that parallel edges stay visually related. On the flower, notice which petals sit in front instead of outlining every petal with equal emphasis.
Hands, faces and character construction

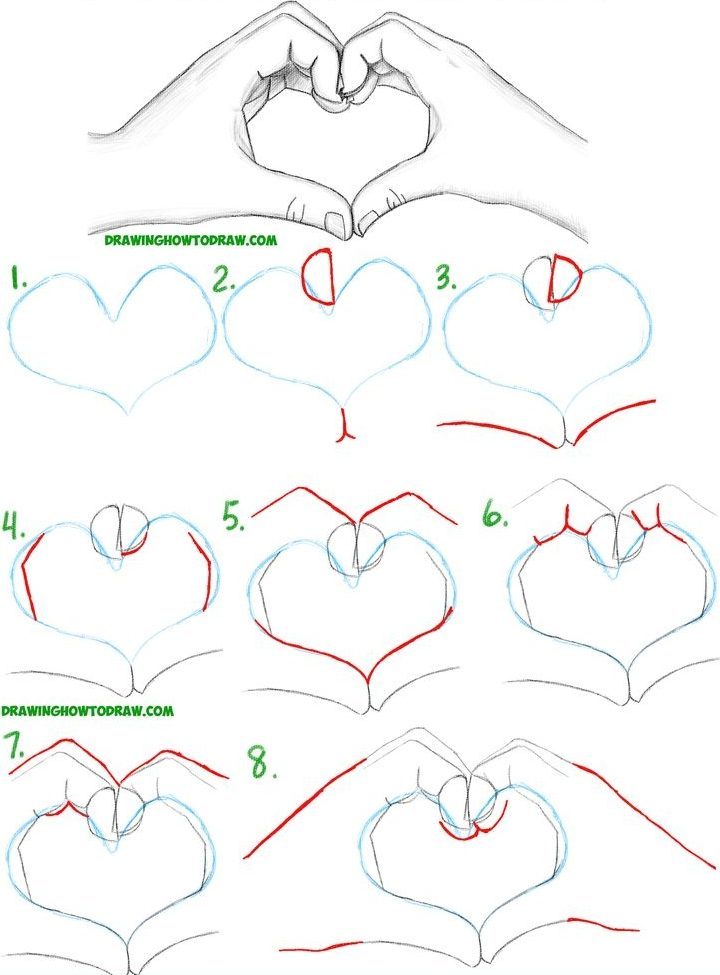
Hands are not a beginner-friendly warm-up, but they become much less mysterious once you stop treating them as five separate fingers. Block the palm as one mass, place the thumb as its own wedge, then mark the finger directions as a group before giving each finger thickness.
Check the knuckle arc instead of lining all four finger bases up in a straight row. Let fingers taper, vary their angles and overlap when the pose calls for it. Nails and skin creases are finishing information; if the palm-to-finger proportion is wrong, those details only make the mistake more convincing.
For faces, use the same principle. Place the head mass and center line first, then the eye line, nose and mouth landmarks. Features belong to a turning head, not to a flat sticker. If the head turns, those landmark lines curve and compress with it.
Animal drawing: build the body before the fur
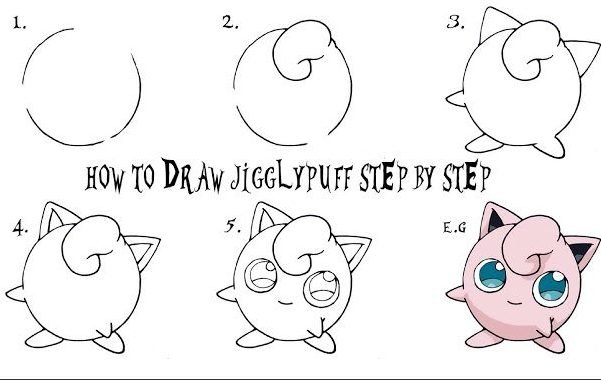
Animals become much easier when you stop drawing the species and start drawing the masses. Block the head, ribcage and pelvis first. Connect them with the spine direction, then add limbs as simple tapered forms. Fur, eyes, hooves, paws and markings come after the body already reads.
A useful test is to ignore all interior detail and look only at the silhouette. If you can still tell what the animal is doing—standing, crouching, turning its head—the construction is probably carrying enough information. If the pose is unclear, adding fur will only hide the problem.
For four-legged animals, check where the legs attach to the torso rather than where the feet happen to land. Beginners often place the feet first and then invent legs to connect them, which makes the joints drift.
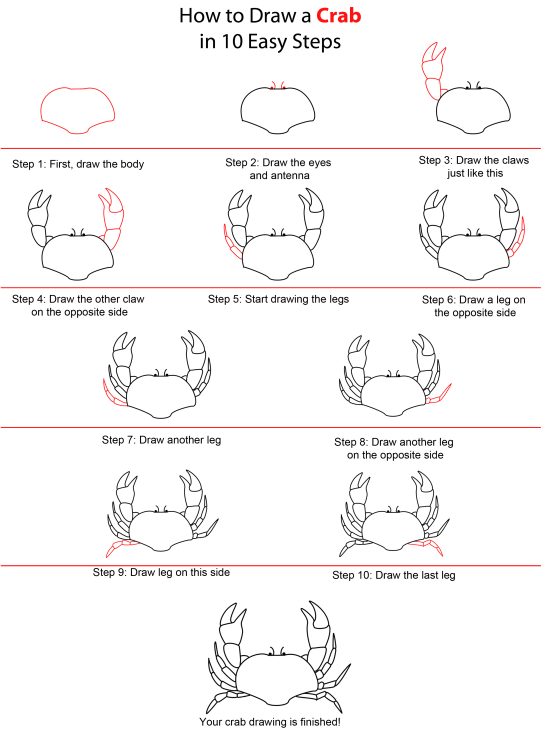
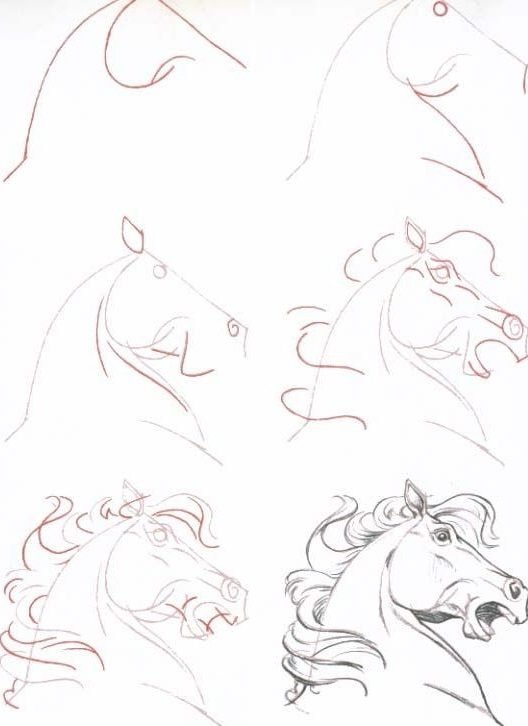
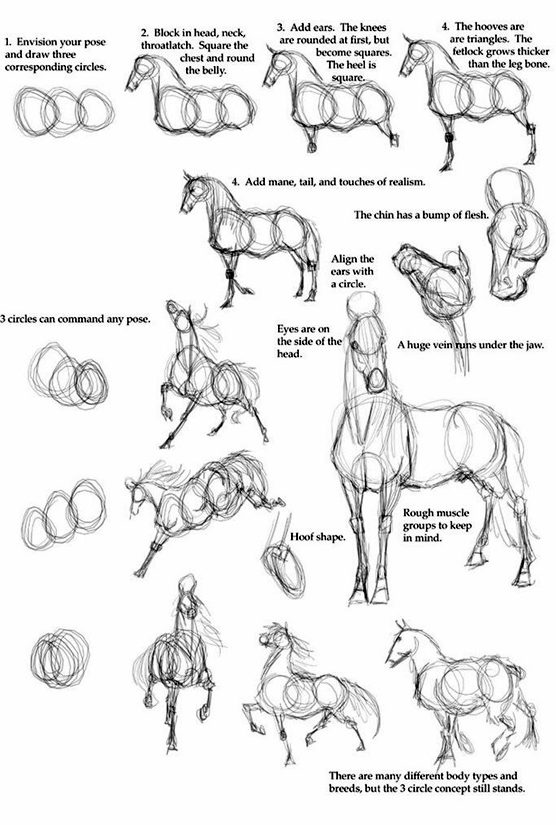
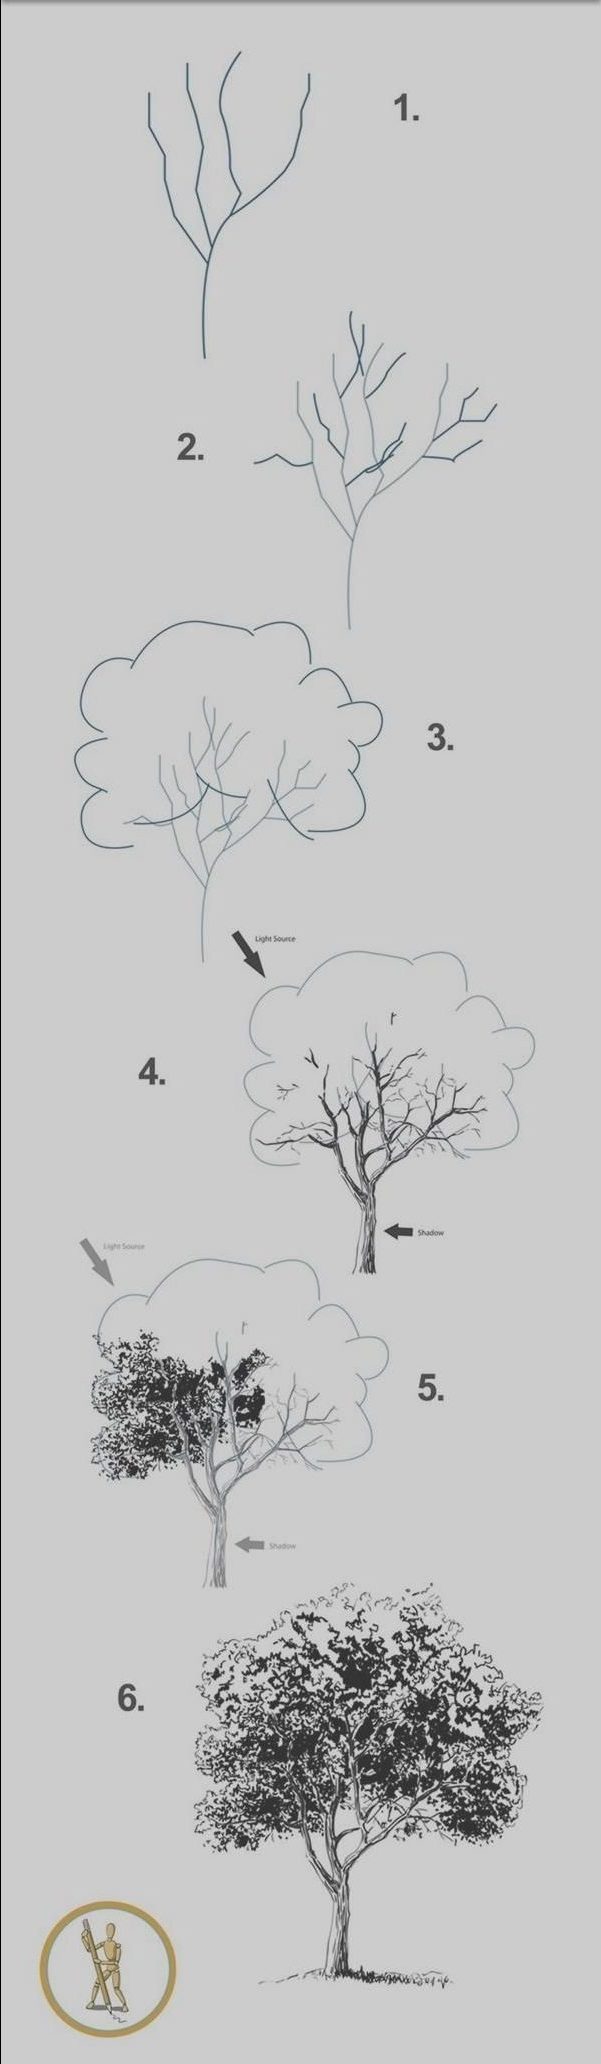
Objects, trees and focused skill studies
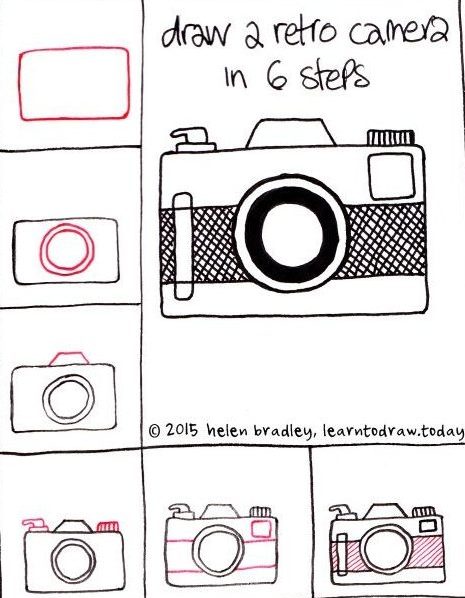
A camera is a useful object study because it combines boxes, circles and small repeated details without needing anatomy.
Eyes, animals and stylized figures


Use every tutorial in three passes
- Pass 1 — understand: follow the tutorial, but pause before each new step and predict what will be added next. Keep construction lines light and do not worry about a clean final drawing.
- Pass 2 — remember: put the tutorial beside you but try to redraw the subject without checking every panel. Look only when you genuinely cannot remember the construction.
- Pass 3 — transfer: draw the same kind of subject from a different photo, object or angle. The cup becomes another mug; the cat changes pose; the eye turns slightly; the hand opens instead of closing.
The third pass is where a tutorial turns into a skill. If you can reproduce only the exact example, you learned a sequence. If you can use the same construction on a new reference, you learned the idea behind it.
When should you stop fixing a drawing and start again?
Start a fresh attempt when the problem is structural: the head is too narrow, the body is too long, the cup ellipse is tilted incorrectly, the hand gesture is wrong, or the animal’s legs attach in the wrong places. Repeated erasing often leaves you polishing a compromised foundation.
Keep working when the structure is sound and the problem is local: one eye is slightly high, a curve is stiff, a shadow is too dark, or a contour needs cleaning. Learning to distinguish a structural error from a finishing error is one of the most useful beginner skills.
What tools do you actually need?
An HB pencil, a softer 2B pencil, an eraser and ordinary uncoated paper are enough for almost everything on this page. Use the HB for light construction and the 2B when you need a darker final line or shadow. A ruler can help you study perspective, but avoid using it to solve curves or proportions that you should be learning to judge by eye.
Extra pencils, blending stumps and expensive sketchbooks can be pleasant to use, but they do not correct a weak envelope, a misplaced center line or an unclear overlap.
Stylized characters: exaggerate after the structure works
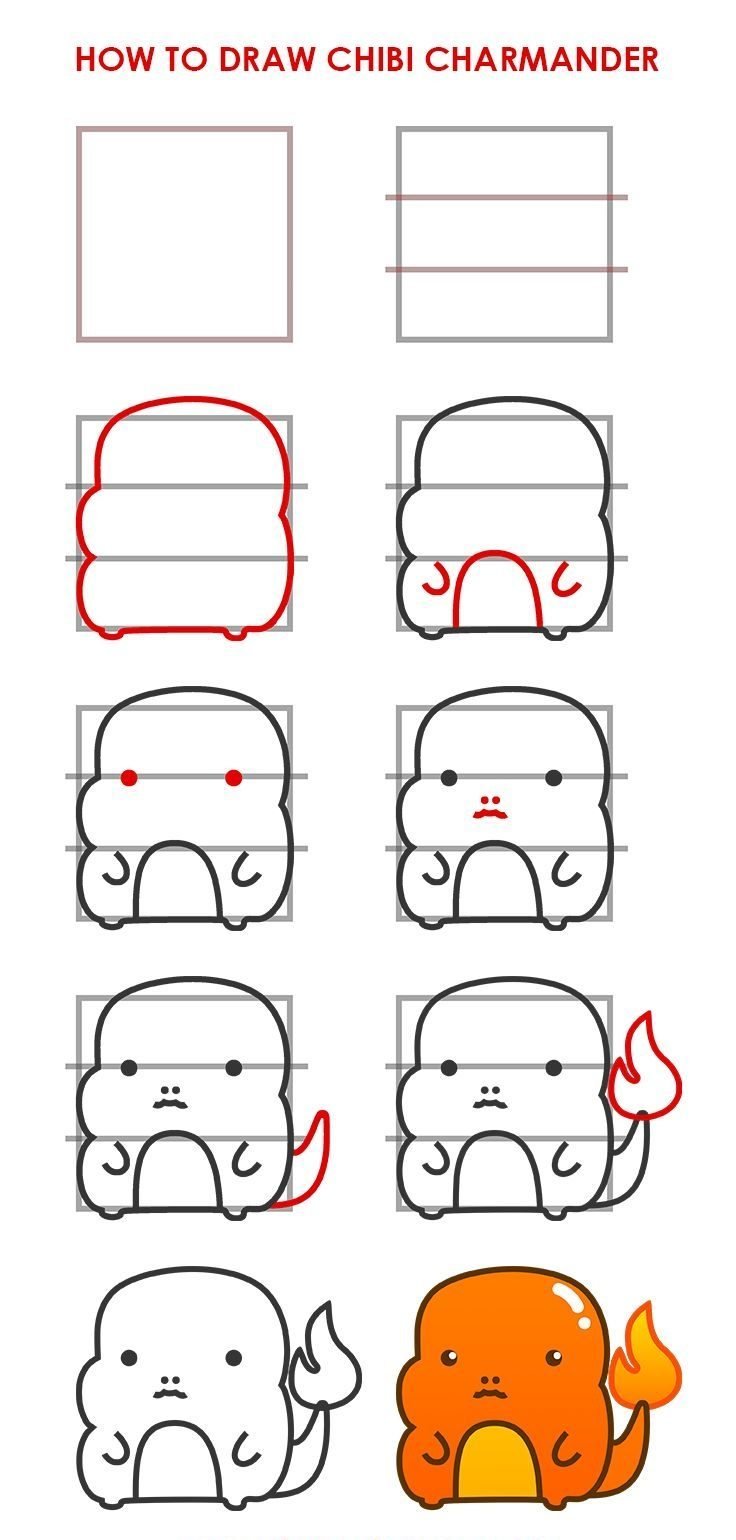
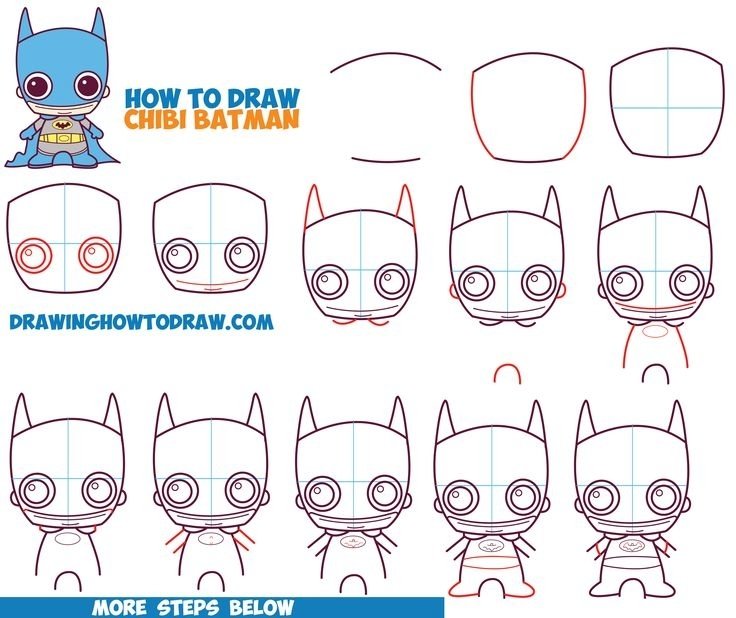
Cartoon and anime tutorials can look easier because the shapes are simplified, but the simplification is deliberate. Start by finding the head mass, center line, eye line and body gesture. Then notice what the style exaggerates: a larger head, shorter jaw, wider eyes, smaller torso or simplified hands.
If a stylized drawing feels wrong, do not immediately redraw the eyelashes or hair. Check whether the face is turning consistently, whether the eyes sit on the same perspective line, and whether the head connects naturally to the neck and body.
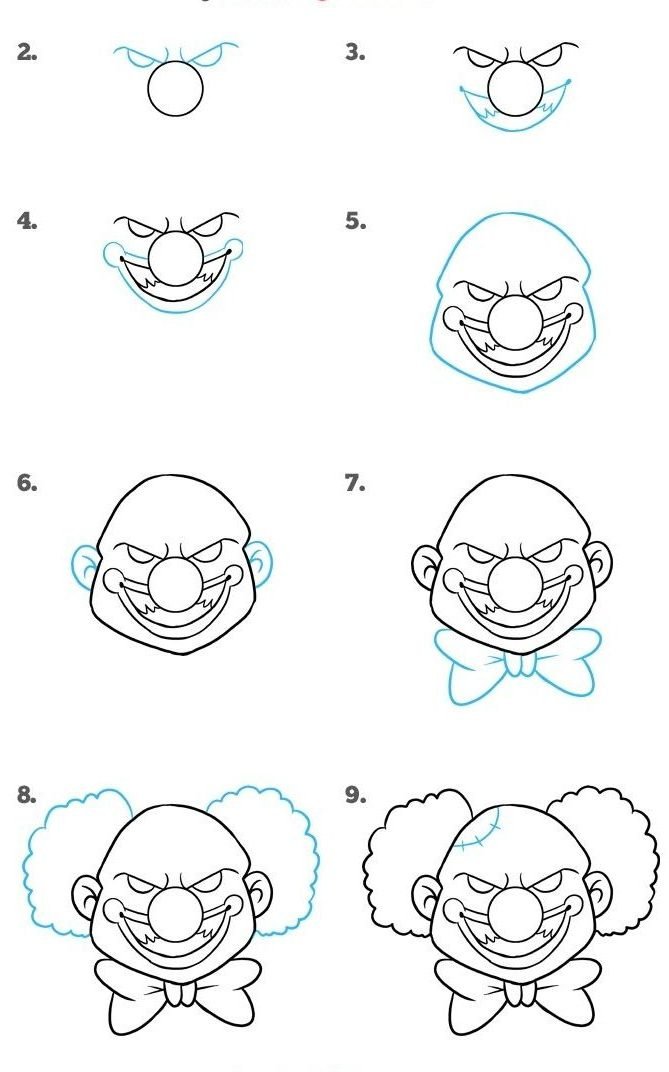
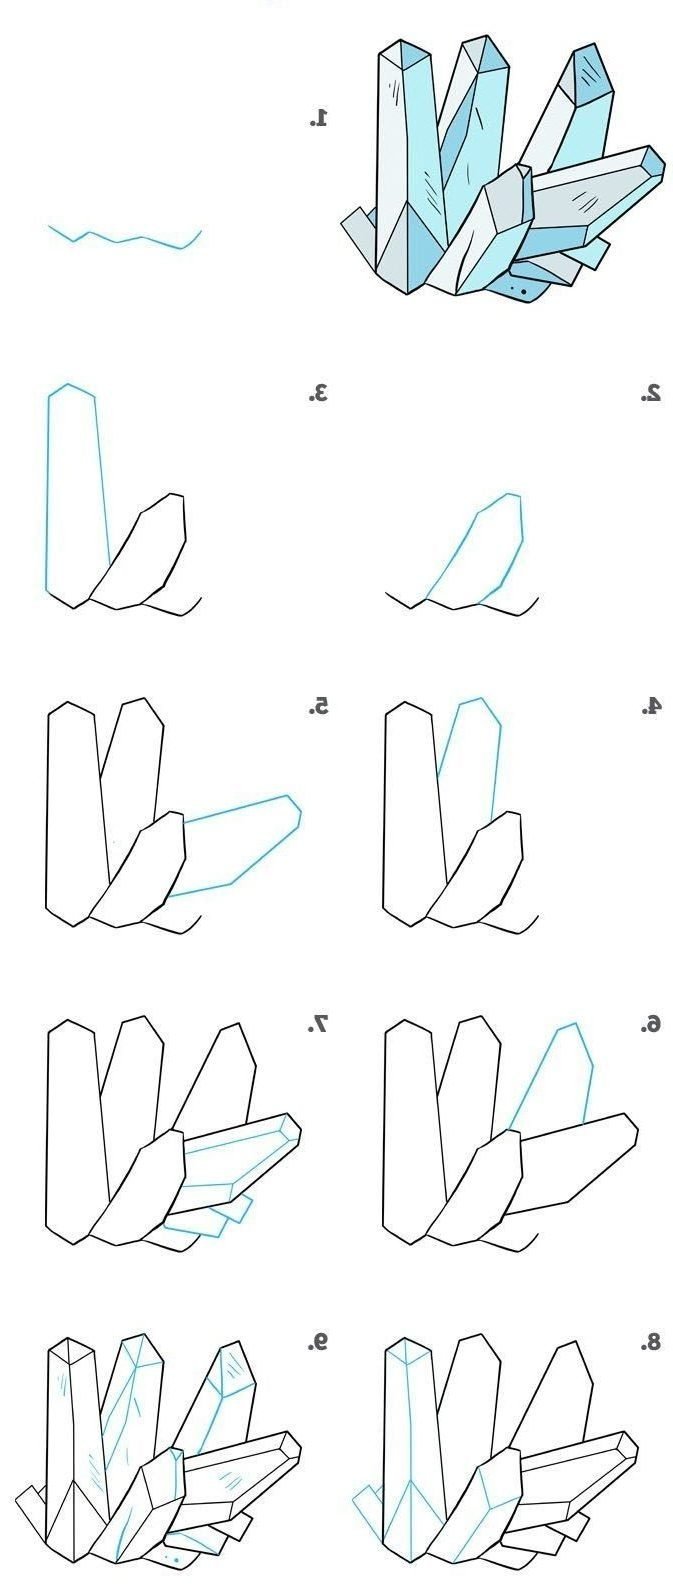
Crystals, eyes and an easy animal
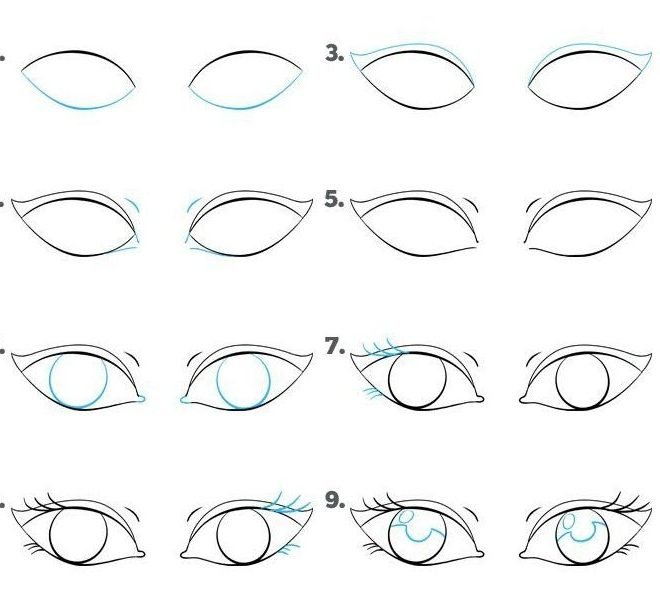
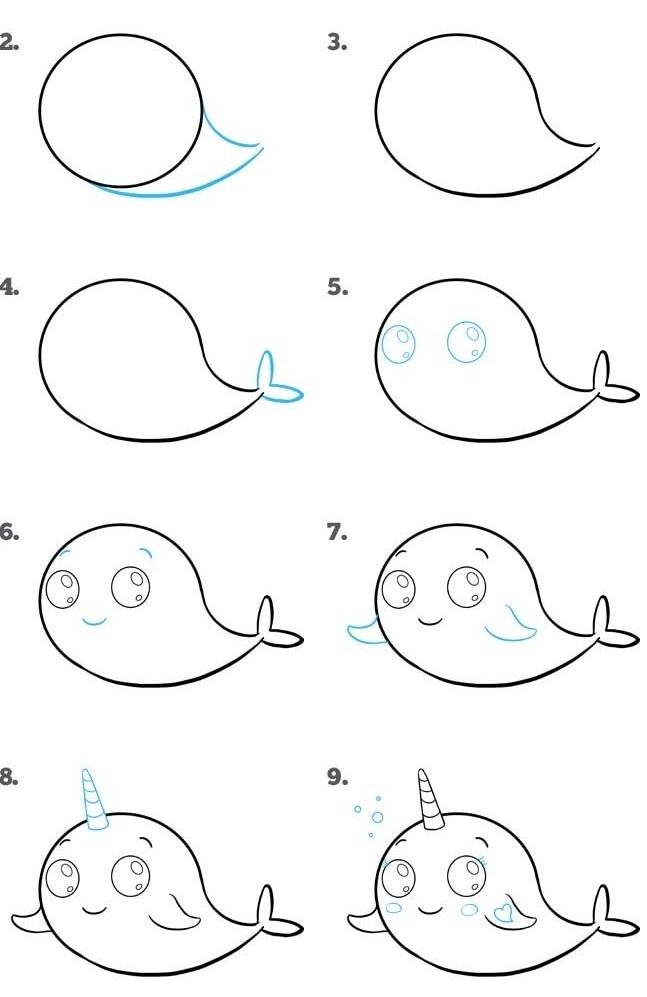
More animal tutorials
Hands, eyes and mouth studies
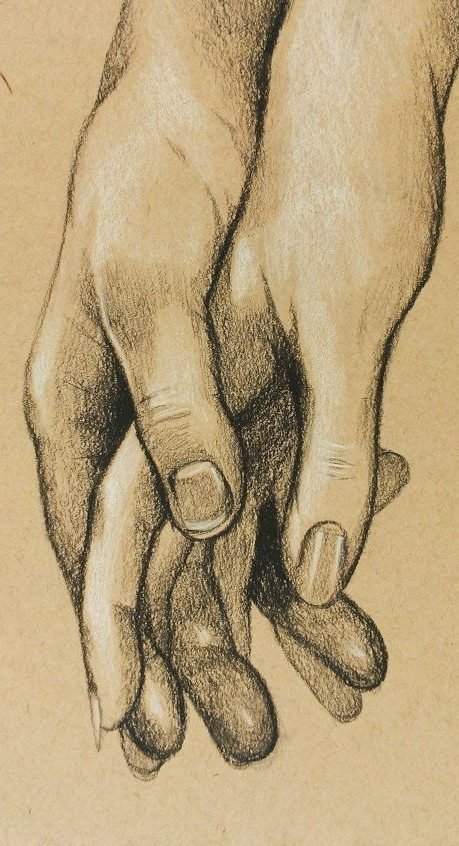
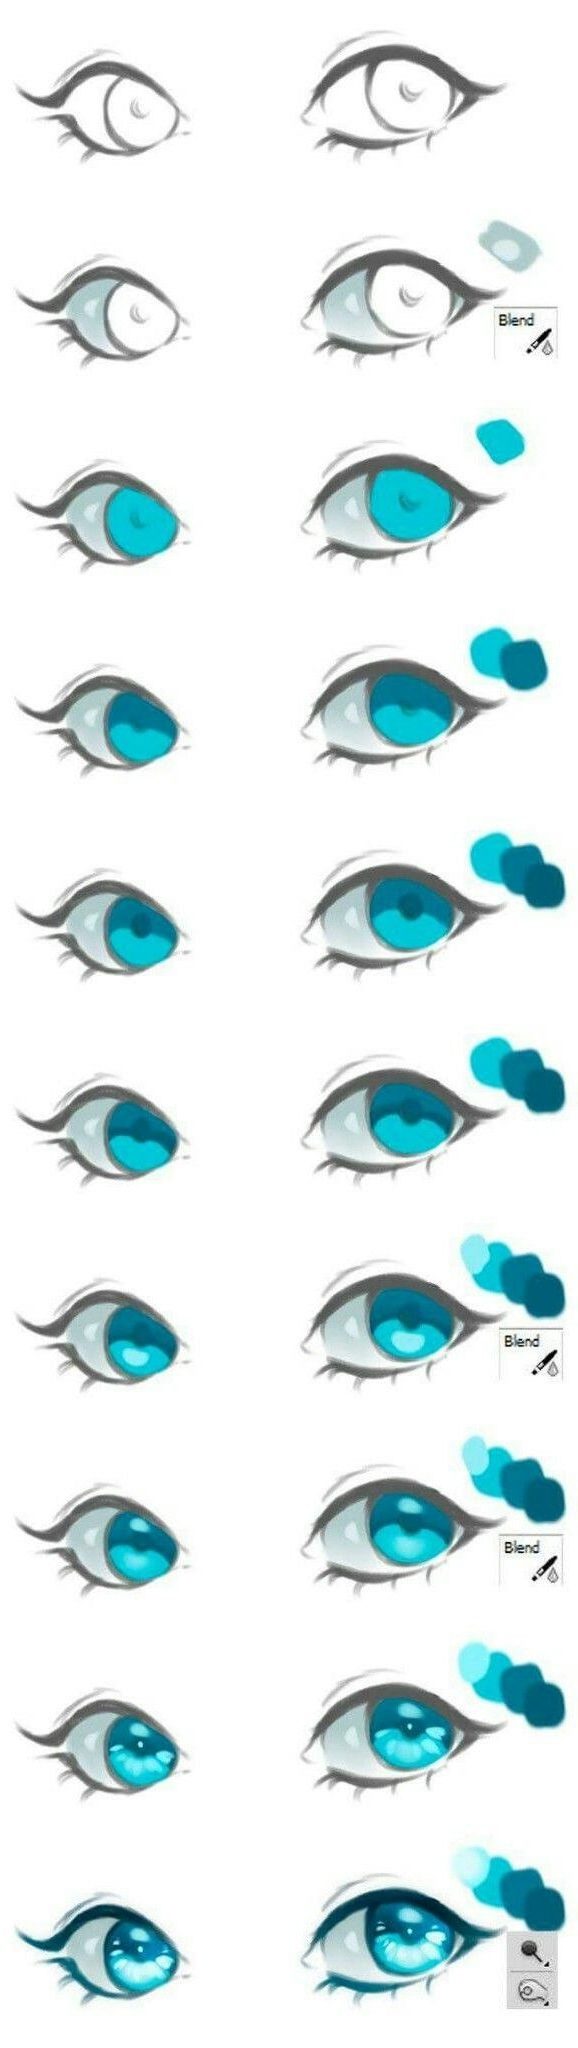
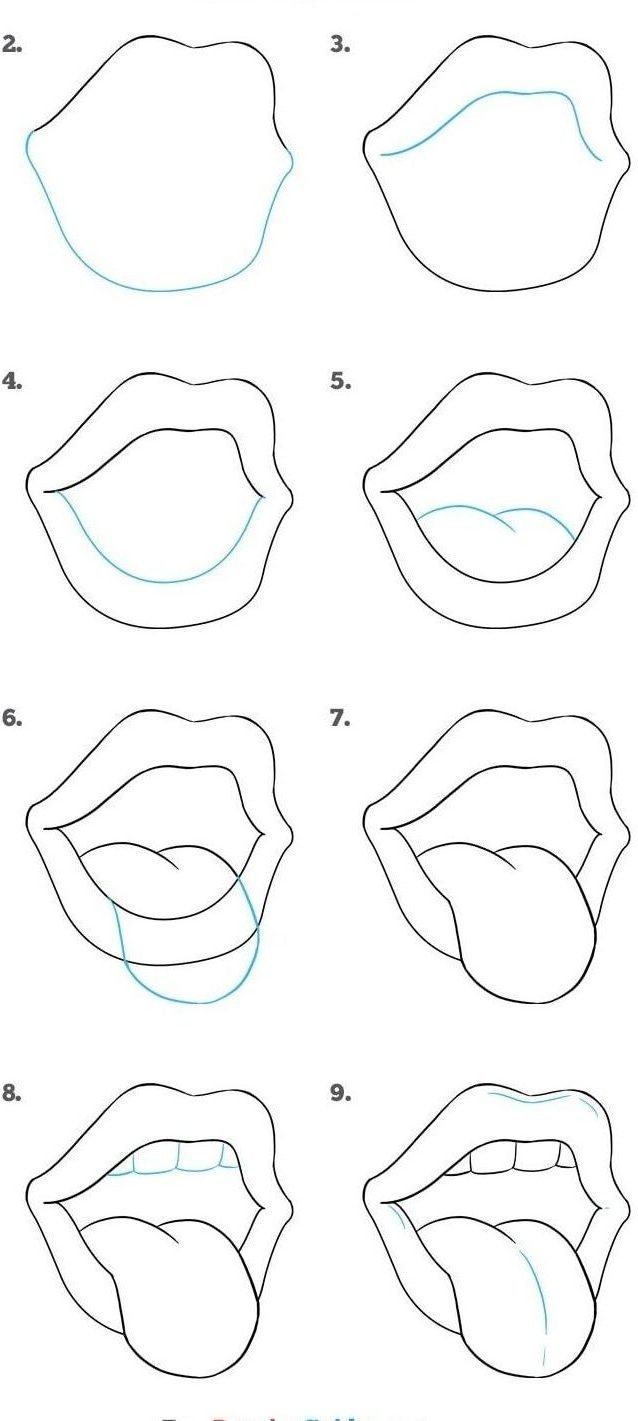
Objects and geometric drawing
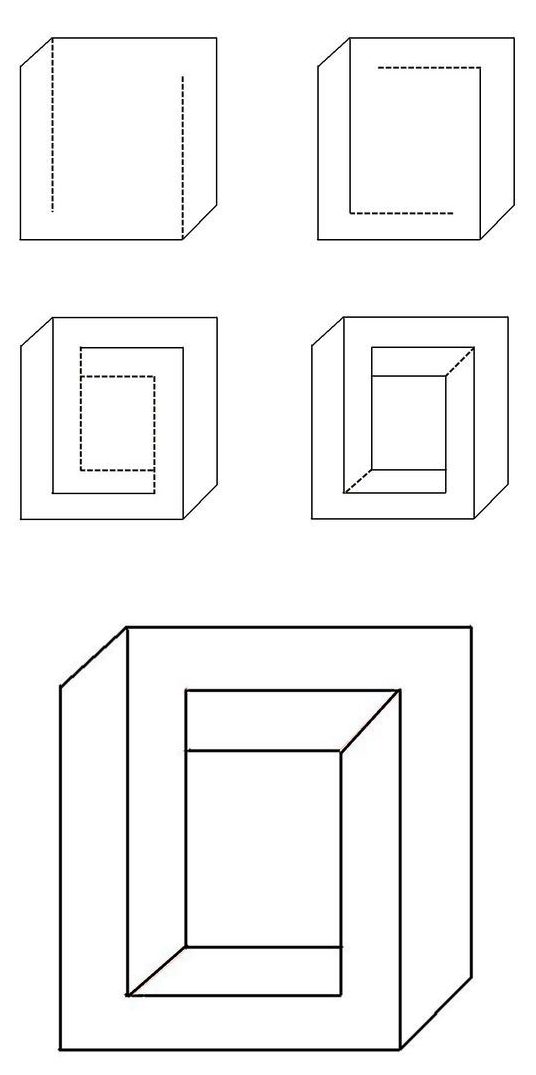
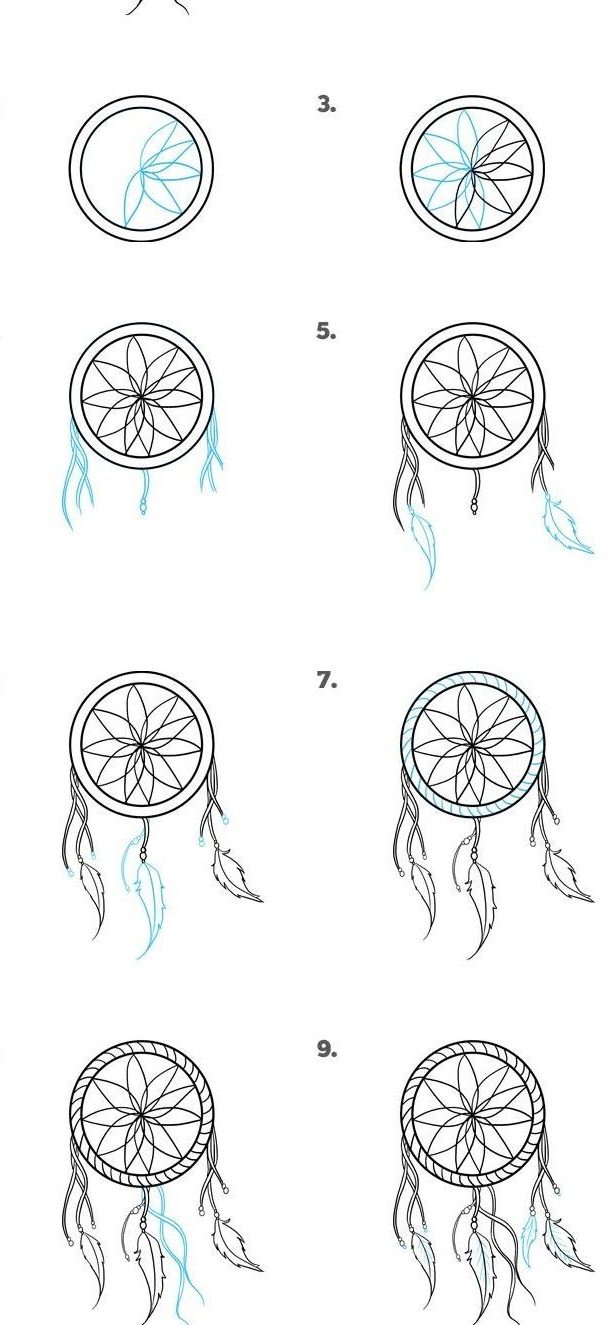
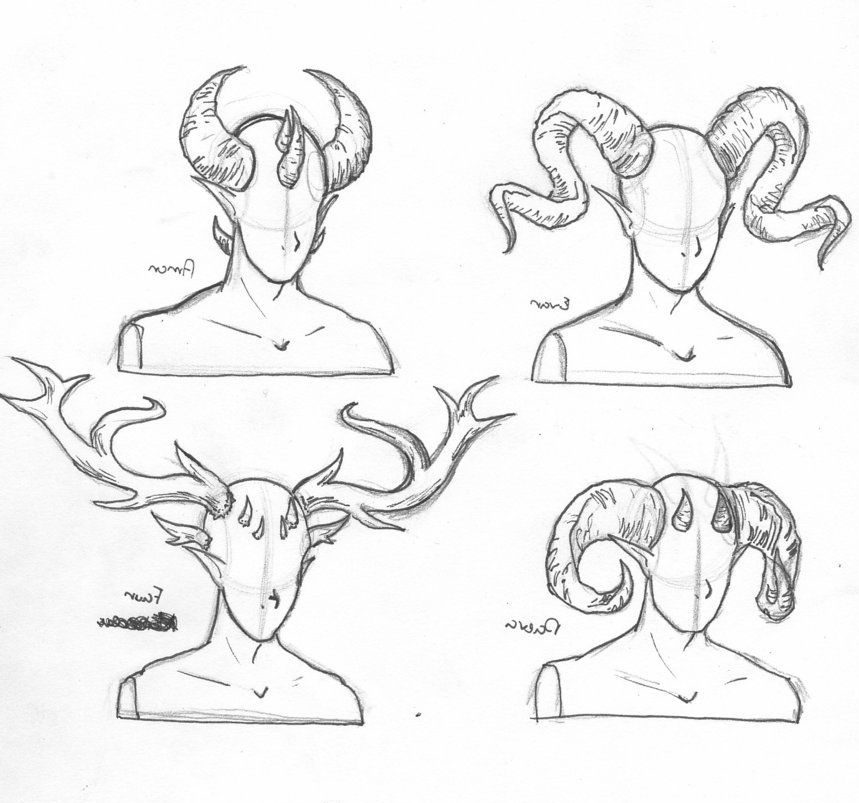
More stylized characters

A seven-session beginner drawing route
- Session 1 — proportion: draw the coffee cup. Measure width against height and check the top ellipse before touching the handle.
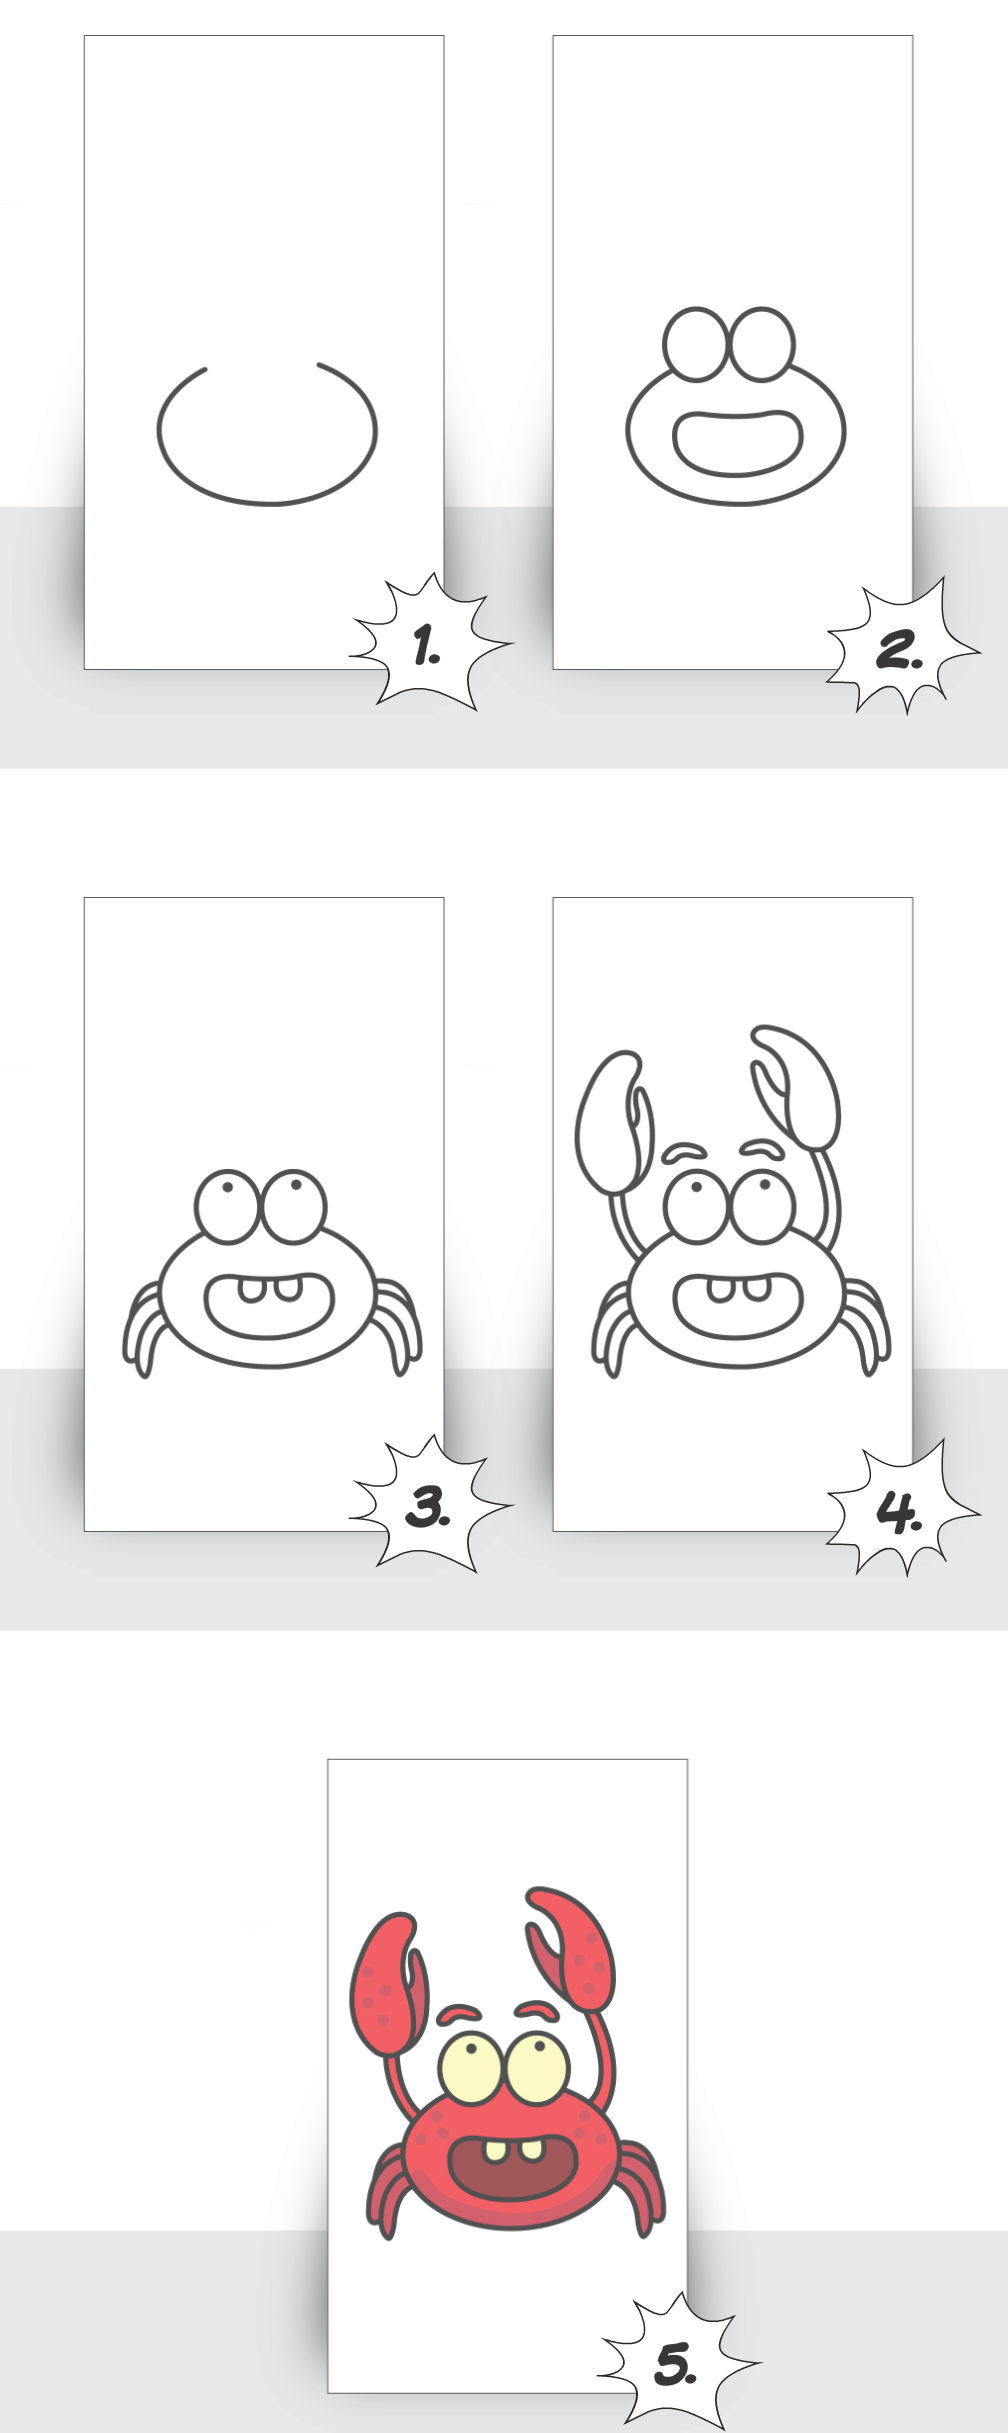
- Session 2 — simple shape assembly: choose the fries, whale or crab. Reduce the subject to two or three large shapes before adding features.
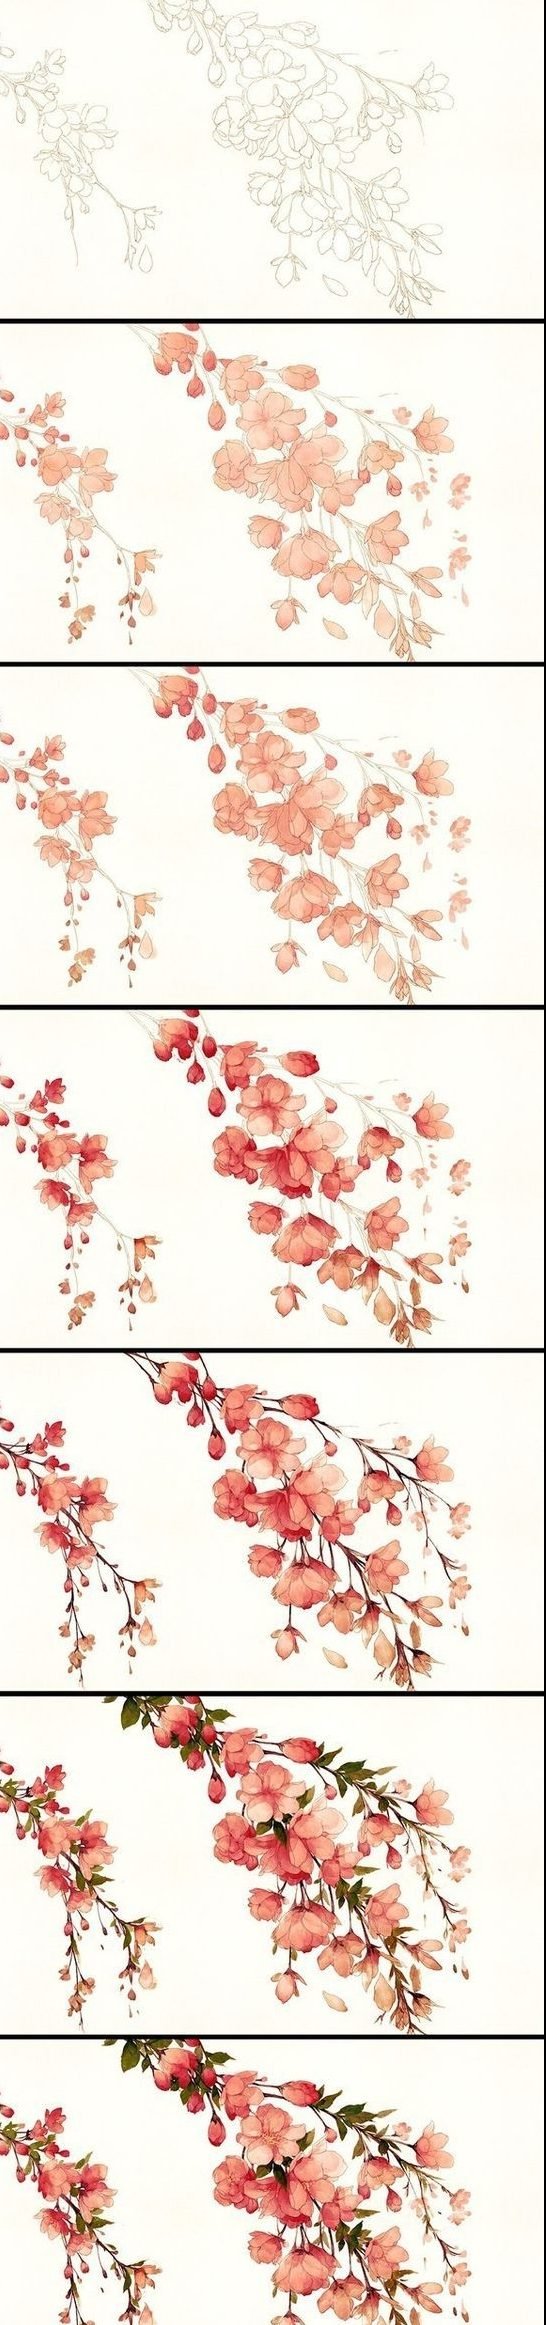
- Session 3 — organic rhythm: use the orchid, flowering branch or tree. Practice curves, branching and repeated shapes without cloning every petal or leaf.
- Session 4 — animal construction: choose the cat, panda or cartoon dog. Build head and torso masses first, then connect the limbs.
- Session 5 — landmarks: draw an eye. Place the outer shape, iris, pupil and lid thickness before eyelashes or shading.
- Session 6 — difficult anatomy: try one hand tutorial. Treat the palm as a block, place the thumb separately and group the fingers before drawing individual knuckles.
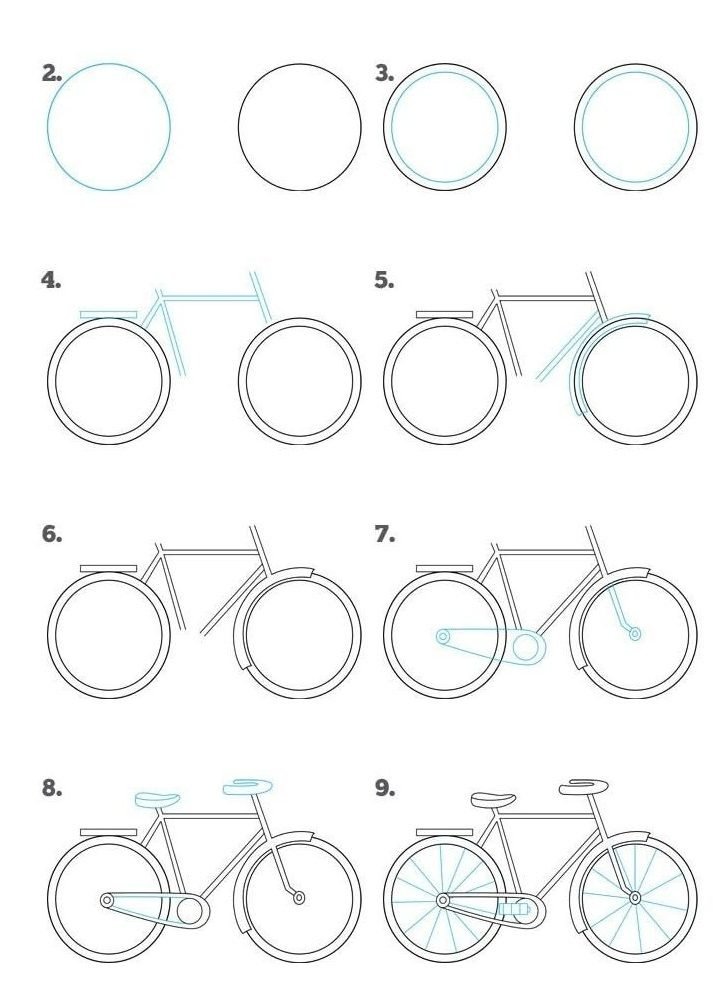
- Session 7 — construction under pressure: choose the impossible cube, bicycle, camera or a character. Keep the large geometry correct while managing more parts.
Do not judge the seven drawings as finished artworks. They are diagnostic samples. Keep them, then repeat Sessions 1, 4, 5 and 6 after a week. Look for fewer searching lines, better spacing and faster correction of large errors—not prettier shading.
How to critique your own drawing without just saying “it looks wrong”
Put the drawing beside the reference and ask the questions in this order:
- Overall shape: is the whole drawing too tall, wide, narrow or tilted?
- Major placement: are the head, center line, wheels, eyes, limbs or other large landmarks in the right places?
- Negative space: do the empty gaps between parts resemble the reference?
- Overlap: is it clear what sits in front of what?
- Value: are the darkest darks in roughly the right areas, or did you shade everything equally?
- Detail: only now ask whether small contours, texture or line quality need work.
This order prevents a common beginner trap: noticing a small attractive detail first and spending ten minutes fixing it while the whole drawing is still proportionally wrong.
One useful progress test
Choose any tutorial you completed two weeks ago and redraw it from memory for five minutes. Then reopen the tutorial and compare. You are not testing whether you memorized every line. You are checking whether you remember the construction: what shape came first, what attached to it, and which proportions mattered most.
If the memory drawing is rough but structurally recognizable, that is real progress. If you can only draw the subject when every panel is visible, repeat the second and third passes rather than searching for a new tutorial.
Learn three-value shading before chasing smooth gradients
Beginners often try to make shading smooth before the light-dark structure makes sense. Start simpler. Reduce the reference to three broad values: the white of the paper, a middle graphite tone and a small group of true darks.
- Light: leave the paper alone where the form faces the light.
- Middle: use a light, even layer where the form turns away.
- Dark: reserve stronger graphite for pupils, deep overlaps, cast shadows, cavities and the few places that genuinely need contrast.
If the drawing reads at three values, you can soften transitions later. If it does not, blending more graphite usually makes the structure harder to see. Squinting at the reference is a useful test because small details disappear and the main value pattern remains.
Use line weight to show structure, not to decorate every edge
A darker line can clarify an overlap, anchor a form in shadow or emphasize the focal area. A lighter line can let an edge turn into light or recede. Drawing every contour with the same heavy pressure often makes a subject look flat even when the proportions are correct.
Try finishing one tutorial with only three line strengths: light construction, normal contour and a few dark accents. That is enough to make the drawing feel deliberate without tracing every edge twice.
When should you stop using step-by-step tutorials?
Keep using them while they help you understand the order of construction. Start moving toward ordinary photo or real-life references when you can predict the first few construction steps yourself.
A simple test is to choose a tutorial subject you have already drawn and find a different reference of the same thing. If you can identify the envelope, major masses and landmarks without a panel telling you where to begin, you are ready to practice from references more often. You do not need to abandon tutorials completely; use them when a new subject introduces a construction problem you have not solved before.
Choose your next subject
- Hands and figures: use the hand drawing guide for construction, or the gesture drawing page when movement is the problem.
- Animals: continue with cats, dogs, lions or the elephant pencil guide.
- Flowers: use the flower tutorial collection for several species, or the rose guide for one slower study.
- Perspective and objects: try one-point perspective, 3D houses, sofas or cars.
- Anime and character work: start with the anime tutorials, then move into anime-girl faces, anime-guy references or character design.
If you are not sure what subject you want yet, the easy things to draw page is the better place to browse rather than forcing yourself into a tutorial.
Beginner drawing questions
Which tutorial should I do first?
Start with the coffee cup or fries. Both let you practice proportion and clean curves without anatomy, fur or perspective making the exercise harder than it needs to be.
How long should I spend on one tutorial?
Ten to twenty minutes is enough for a first pass. If the construction is wrong, spending another hour polishing it usually teaches less than drawing the same subject again.
Should I trace the steps?
Tracing can help you notice proportions once, but redraw the subject afterward without tracing. That second attempt is where you find out what you actually understood.
What if my version looks different?
That is normal. The useful question is whether the large shapes, angles and overlaps make sense. Exact copying is not the goal.
Reference-use note
This is a legacy tutorial collection assembled from older examples, including recognizable fictional characters. Original creator and reuse rights are not documented for every image. Use the references to study construction and sequence; do not assume they are licensed for republication, resale or commercial source art.


Thanx
This have the steps for the one I wanted
wolf pls
I would like to share the drawings with my friends
These are not exactly what I understand what cool is
I tried the hand drawing so hard but the result is this:
dont give up hope
I have done a lot of them and they are turning out well
That was fun, thank you for these steps and for the horse one, really funny lol
I did a couple of them and some were hard like the impossible triangle and square but others were easier. I just got a new sketchbook for my birthday so I used a couple pages of it. Thanks.
i have dyslexia i cant draw anything i look for easy drawing but its not easy
Try the horse one, that one’s really easy. I’m dyslexic too btw.
Try the horse one. It’s really easy. Not the three circle one or the unicorn one. The cartoon looking one. I’m also dyslexic btw.
I think some of the drawings were hard but it was fun to try I drew some that ended REALLY good and some not so good but it is all a bit of fun really in my opinion the web sight is not bad and just a bit of fun.
Awesome thanks
These are all really fun and they are all turning out really well
The impossible triangle was AWESOME ?
This was great for getting back into drawing! Thank you!
could you do the one that you have the pic of? i would love to draw that. thank you!
this is amazing
Wow! That was a really helpful
Can u do a call of duty one