
Ten anime drawing tutorials for practicing faces, expressions, hair and full-body characters. Pick one thing to study at a time instead of trying to copy every line. Click or tap any tutorial to open the full-size reference.
Jump to: faces & head construction · expression & hair · full-body characters · practice method
The tutorial artwork on this page is credited to beq_art. Credit does not itself grant permission to republish or sell the source images; use them as study references unless you have separate permission from the rights holder.
Anime faces and head construction — Tutorials 1–4
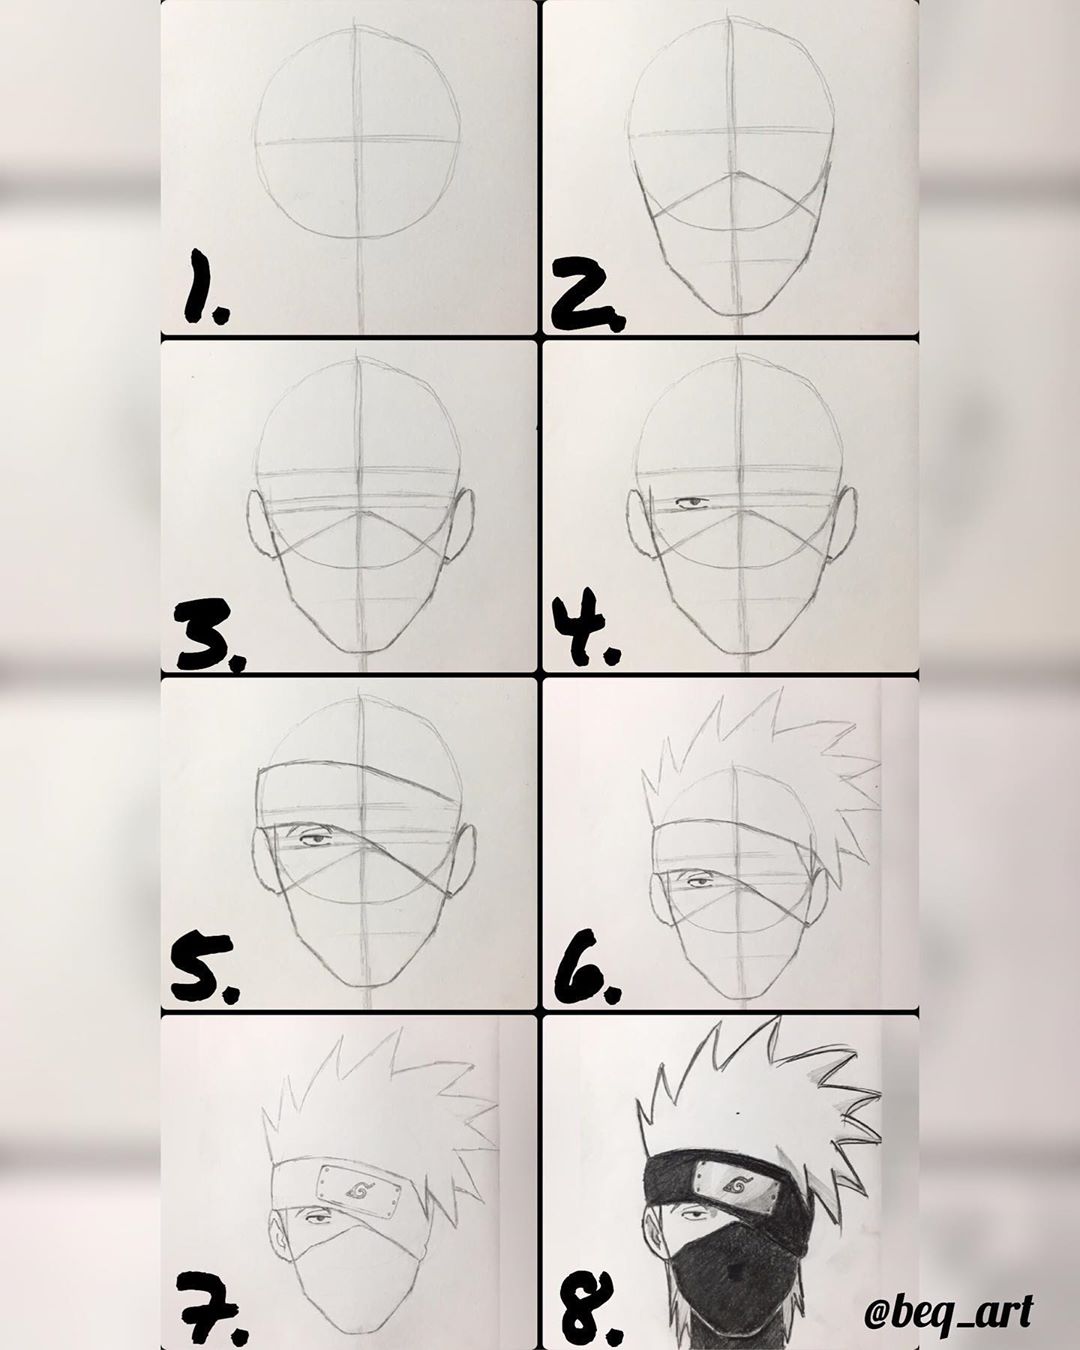
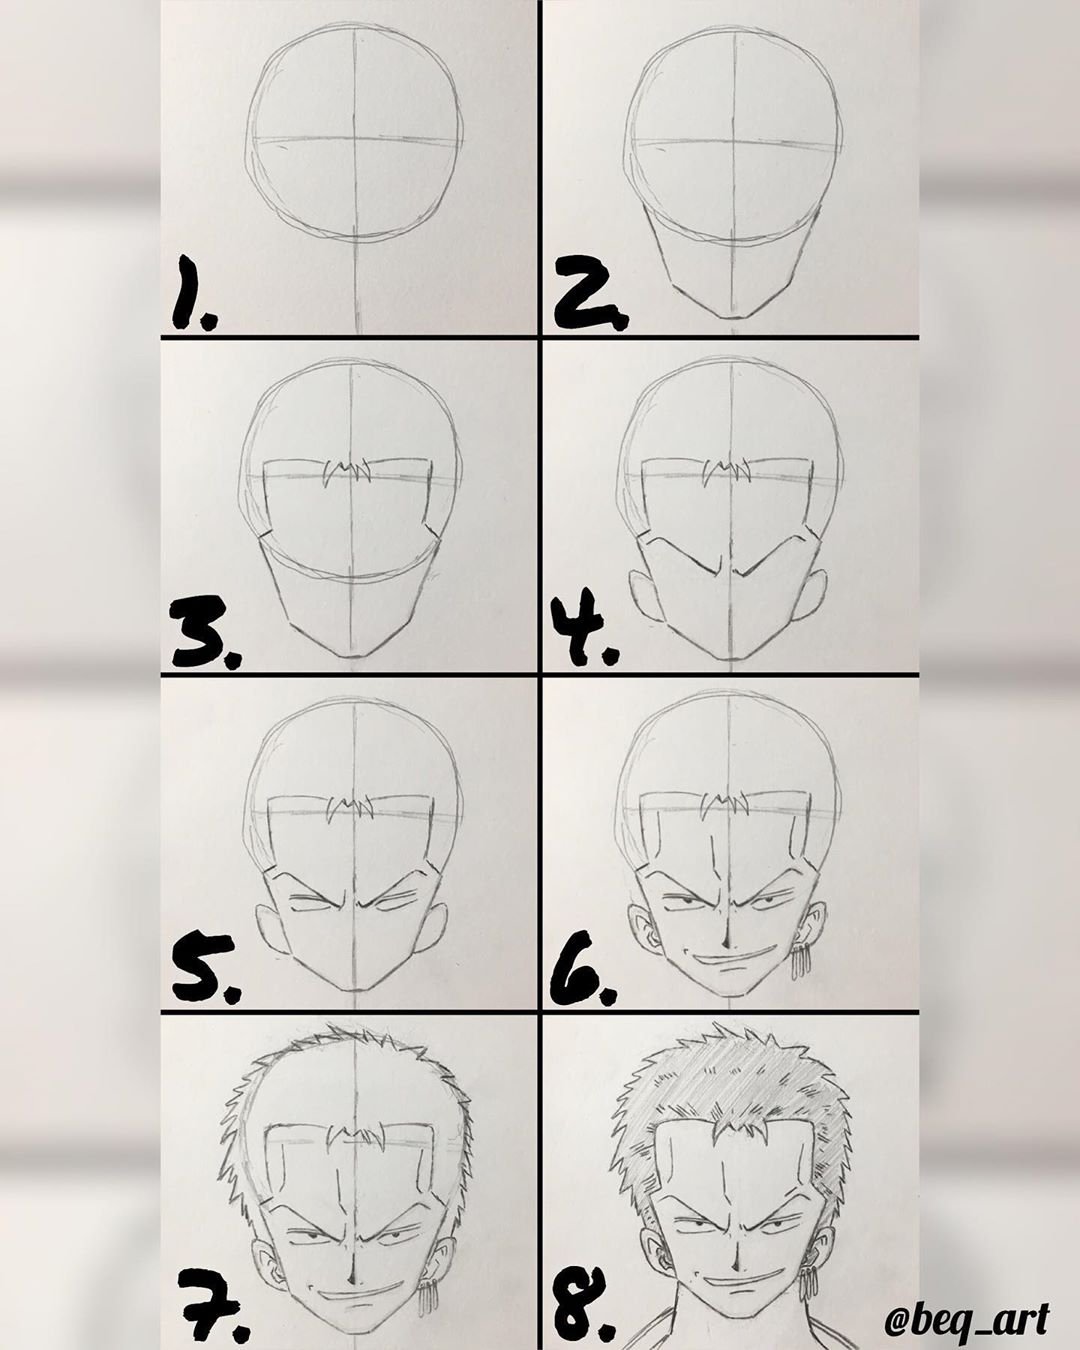
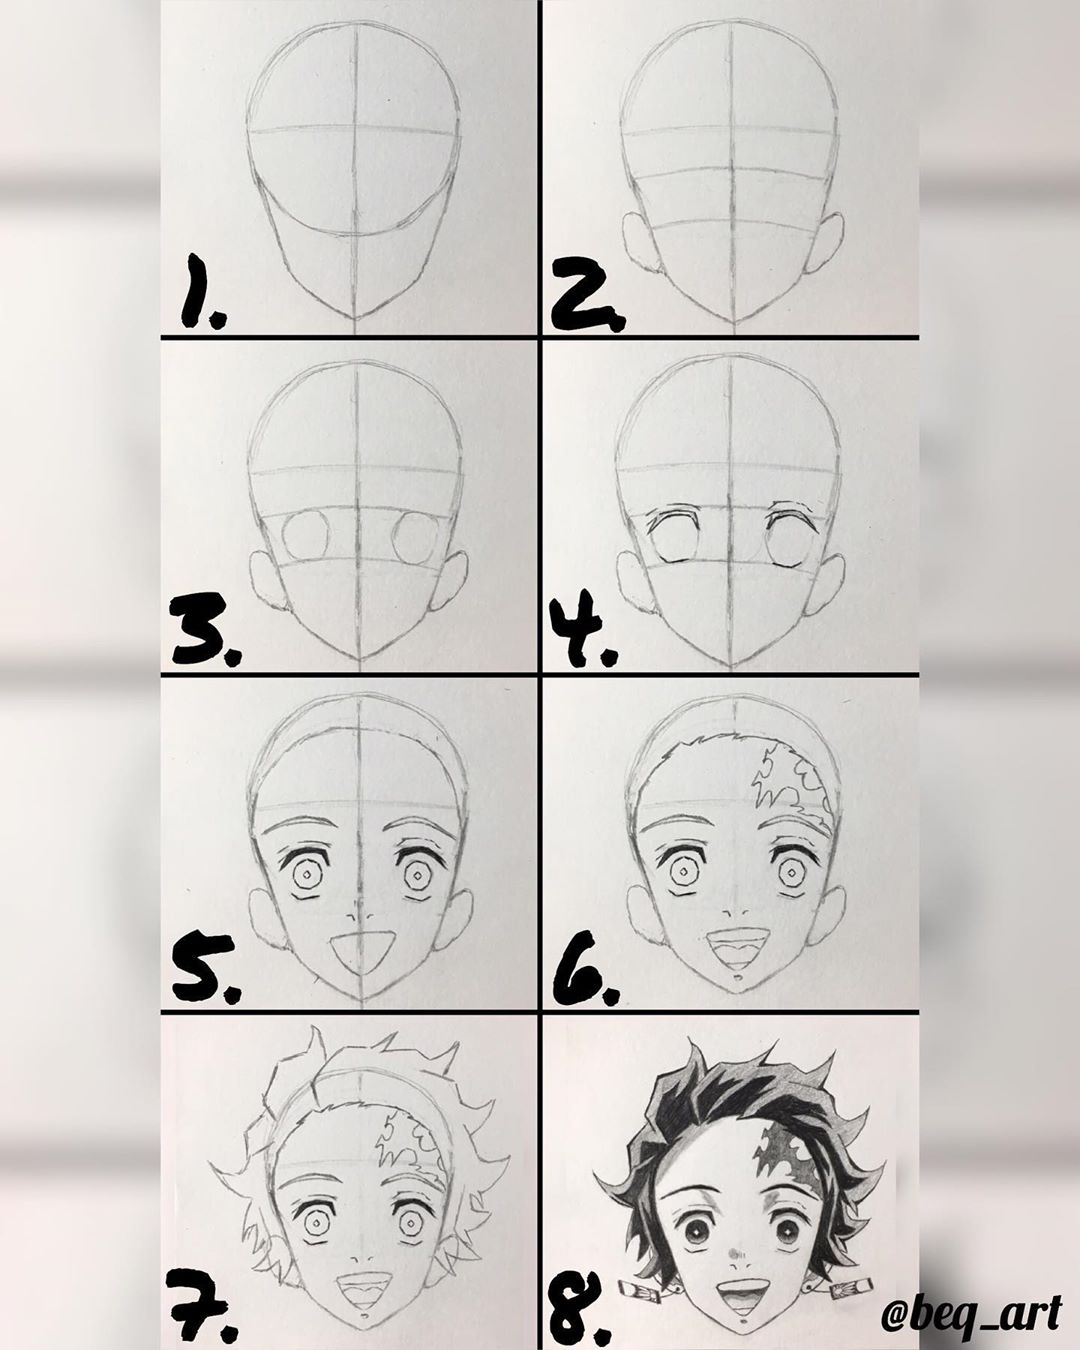
This is the best place to start if faces keep drifting. Put down the head shape and center line first, then place both eyes before refining either one. Hair can hide mistakes, so leave it until the face already sits correctly.
A reliable anime head construction
Do not begin with the jaw or the eyes. Start with a simple cranial mass, then attach the lower face to it. The exact stylization can change, but the order stays useful:
- Draw the cranium. Use a light circle or slightly flattened sphere for the top and back of the skull.
- Add the center line. This line shows which way the face is turning. On a front view it sits near the middle; on a 3/4 view it bends and shifts toward the far side.
- Mark the eye line. Treat it as a band wrapping around the head, not as a flat horizontal ruler line.
- Attach the jaw. Build the cheeks and chin under the cranium. Anime jaws are often simplified, but they still need to connect believably to the skull.
- Place the features as a group. Put both eyes, nose and mouth into the same perspective system before refining any one feature.
- Add ears and hair last. They should sit on a head that already turns correctly in space.
The most common beginner mistake is treating the face as a flat mask inside a circular outline. The head is a volume. When it turns, the center line curves, the far side compresses and feature spacing changes with the turn.
Front view, 3/4 view and profile are different spacing problems
In a front view, the two eyes can appear similar in width and distance from the center line. In a 3/4 view, the far eye usually becomes narrower and moves closer to the bridge of the nose. In profile, only one eye is clearly visible and the forehead, nose, lips and chin create the outer silhouette.
Do not simply slide the same pair of eyes sideways when the head turns. Compress the far side of the face. That one change fixes many anime heads that otherwise look as if the features were pasted onto a rotating ball.
Anime eye placement: stylized does not mean random
Large anime eyes give you more room to stylize, but they still need a shared eye line and consistent spacing. Place the eye sockets first as simple shapes, then decide the lid curve, iris size and lash thickness.
- Front view: compare the gap between the eyes before drawing eyelashes or irises.
- 3/4 view: make the far eye narrower and slightly more compressed.
- Looking up or down: curve the eye line with the head rather than keeping it perfectly flat.
- Expression: change the upper lid and eyebrow relationship before changing decorative details.
If one eye looks wrong, resist the urge to redraw only that eye. Recheck the center line, head turn and eye band first. The feature may be fine; the construction underneath it may be the real problem.
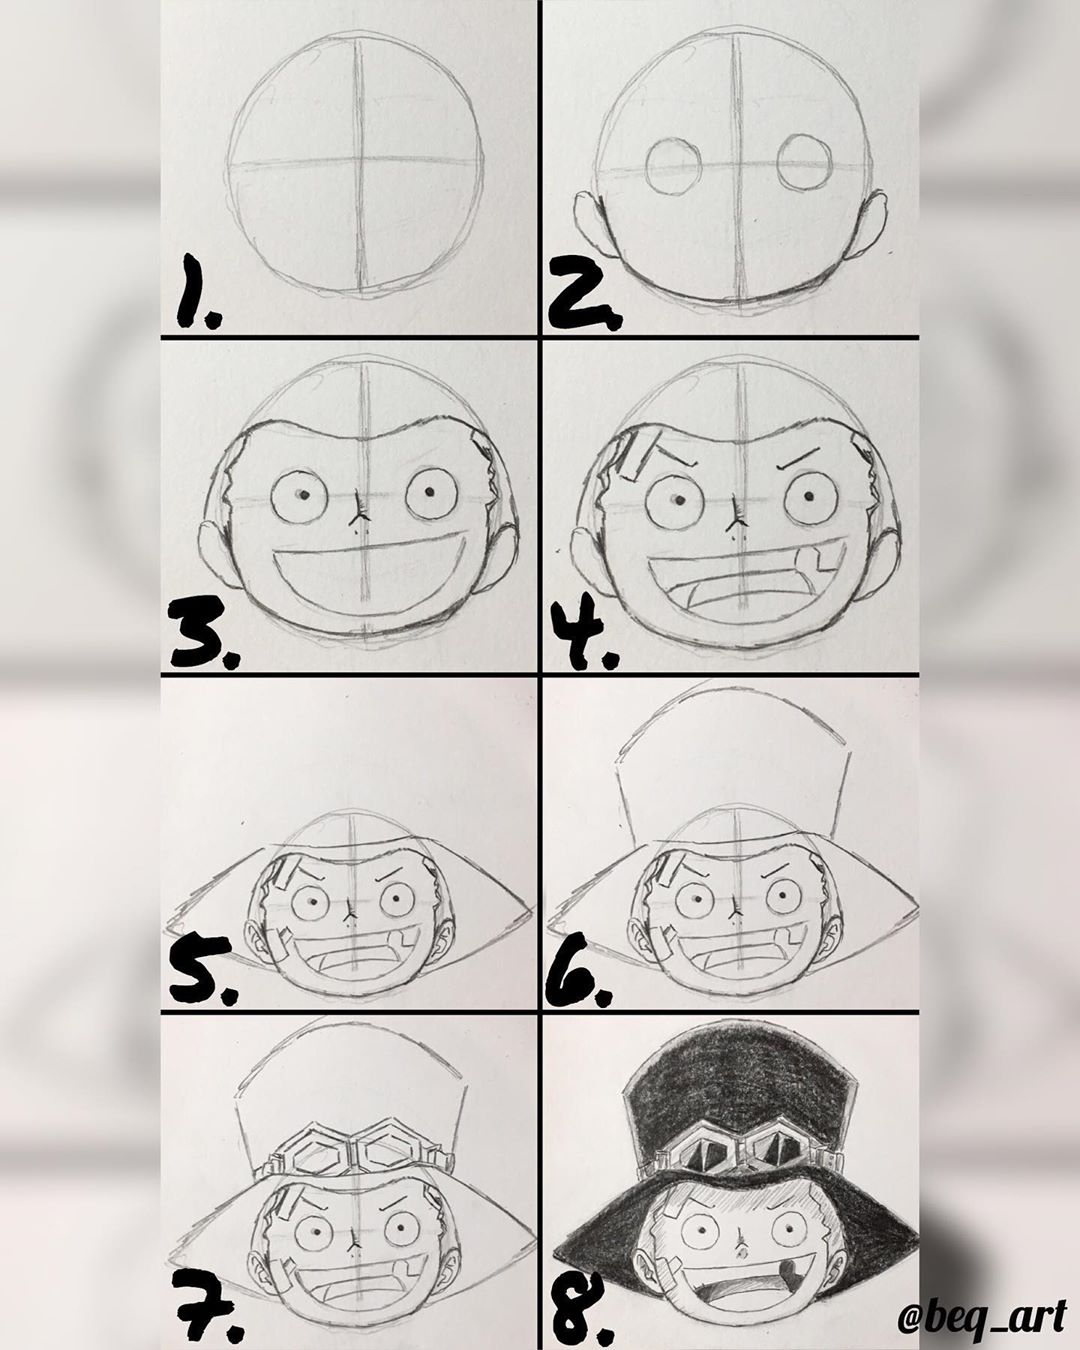
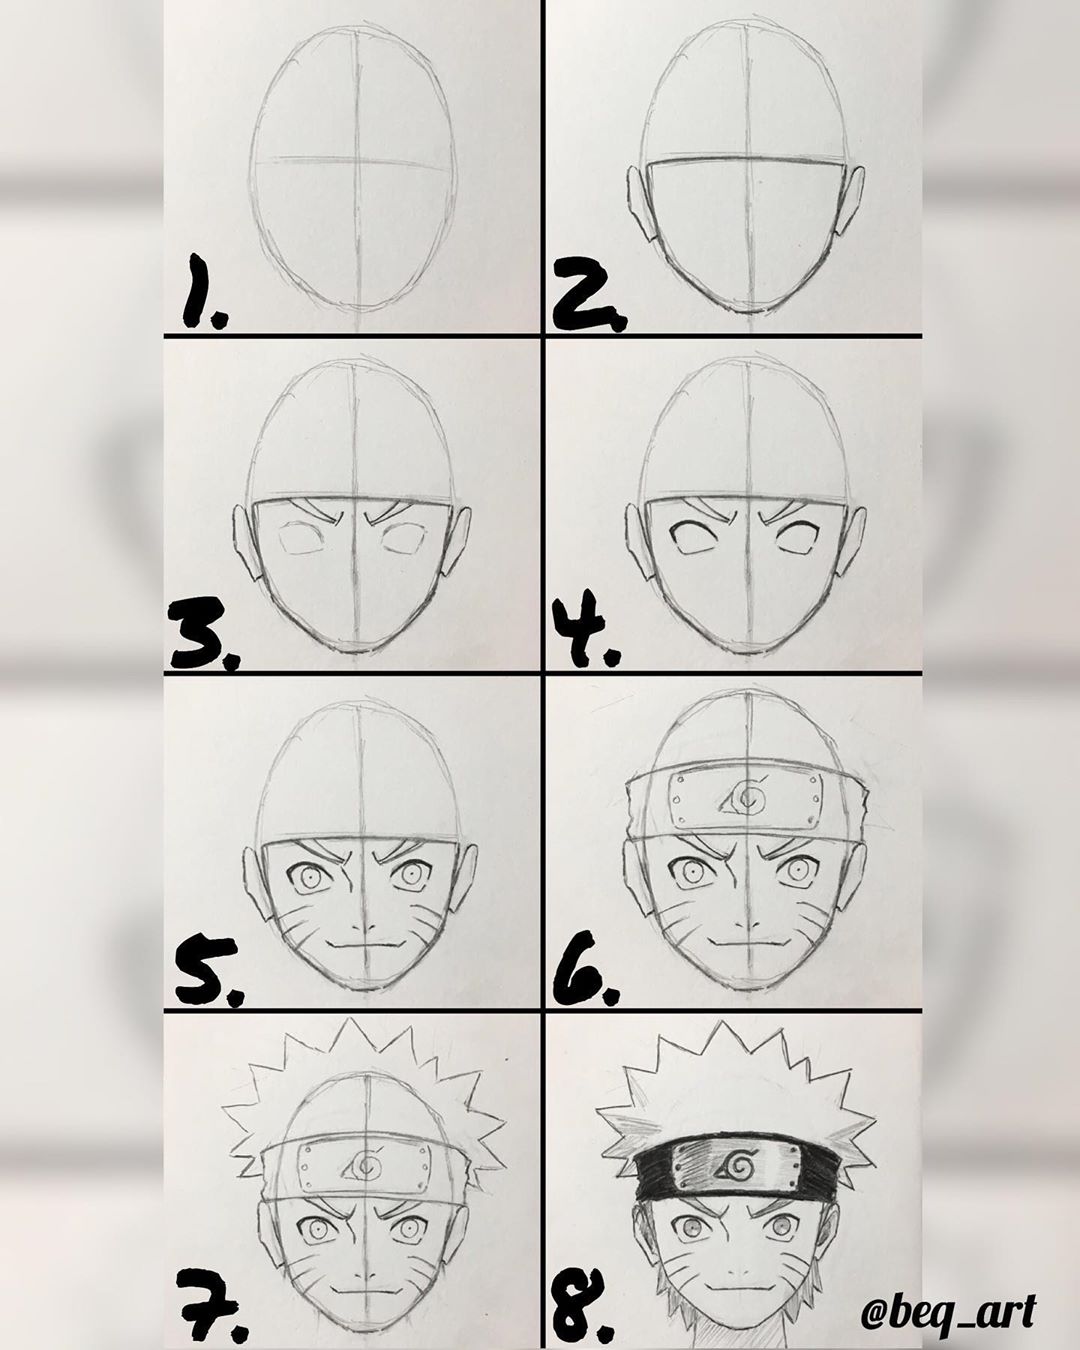
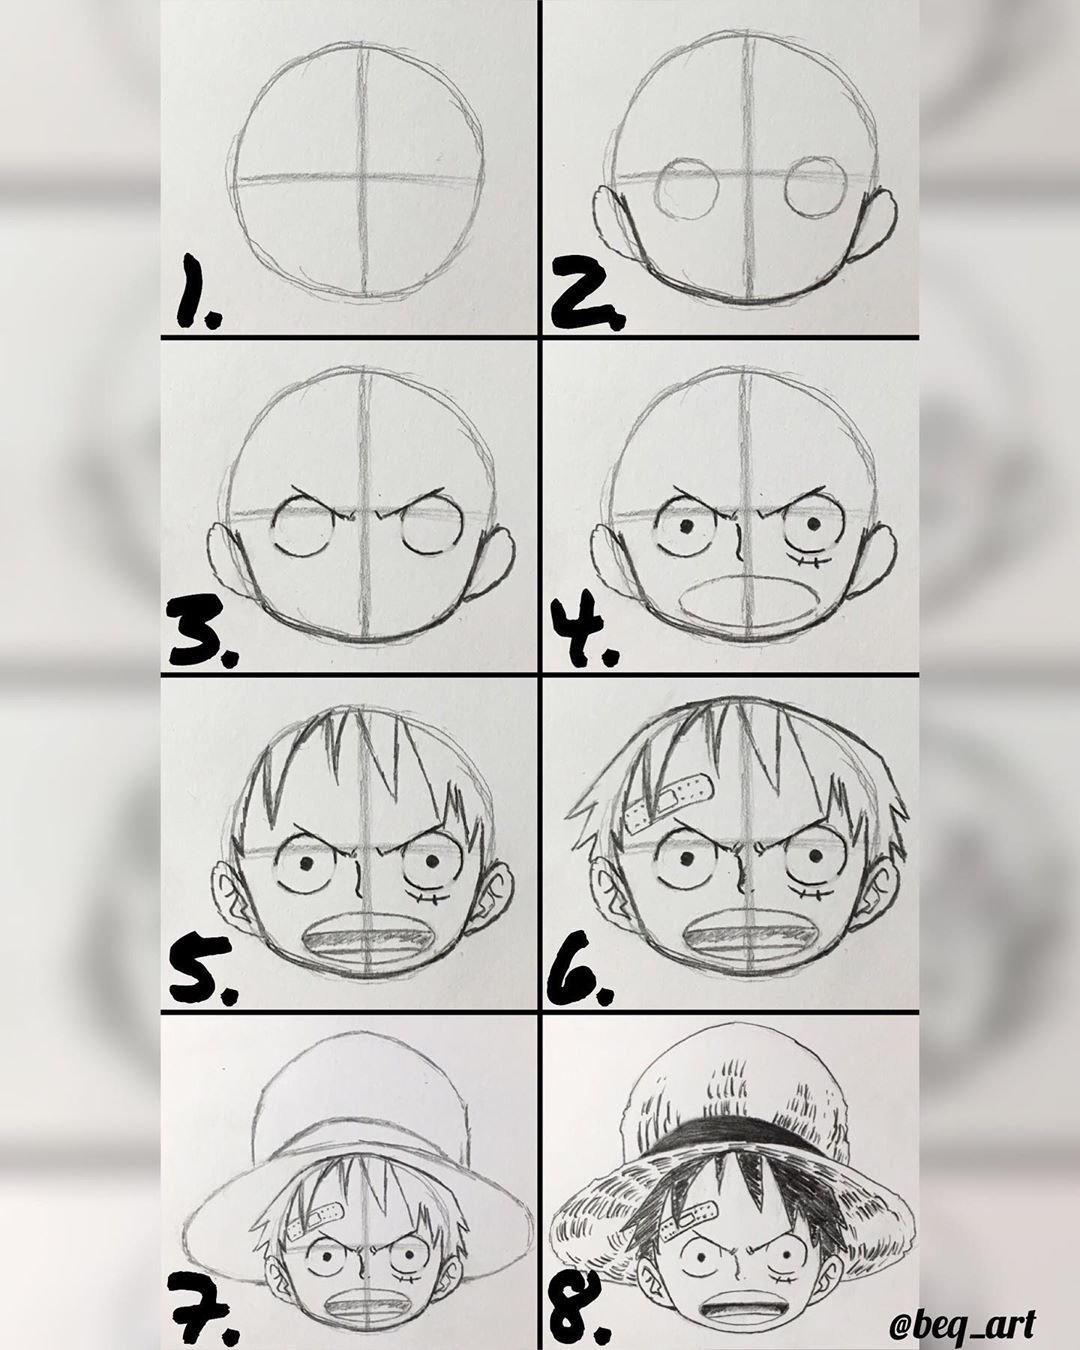
Expression and hair — Tutorials 5–6
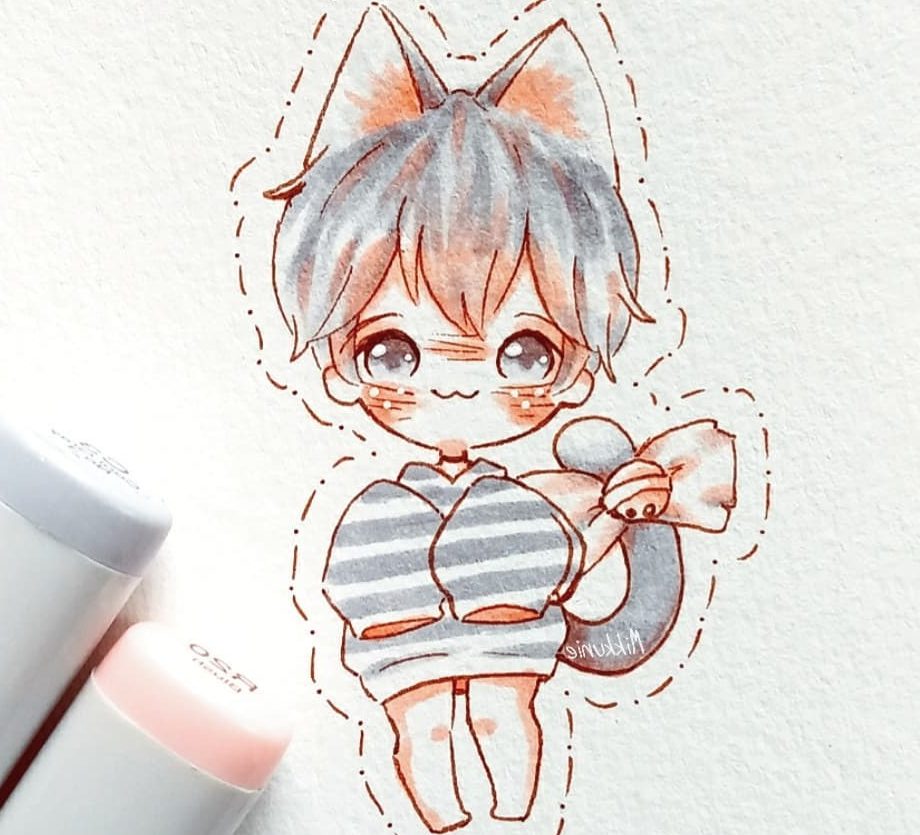
Use this pair for expression rather than anatomy. Change one thing at a time—eyebrow angle, lid shape or mouth curve—and see how much the mood shifts. If you alter all three together, you learn less about what actually made the expression work.
Build expressions from three controls
Most anime expressions can be understood through three large decisions before tiny details enter:
- Eyebrow angle: raised inner brows can suggest worry or sadness; lowered inner brows can add intensity or anger.
- Upper-lid shape: a flatter, lower lid can make the eyes feel tired or serious; a higher curve can make them feel alert or surprised.
- Mouth shape: the width, corner direction and openness of the mouth usually matter more than teeth or tongue detail.
Change one control at a time on the same head construction. That is a better exercise than drawing ten completely different faces because you can see which change actually created the emotion.
Do not let the expression break the head
An exaggerated mouth still belongs to the lower face. Wide eyes still sit on the same turning head. When the expression becomes extreme, beginners often enlarge individual features until the face stops fitting its skull. Keep the center line and jaw structure visible underneath the expression.
For a 3/4 face, remember that the mouth and nose also compress toward the far side. Expression should follow the head turn rather than flattening it back into a front view.
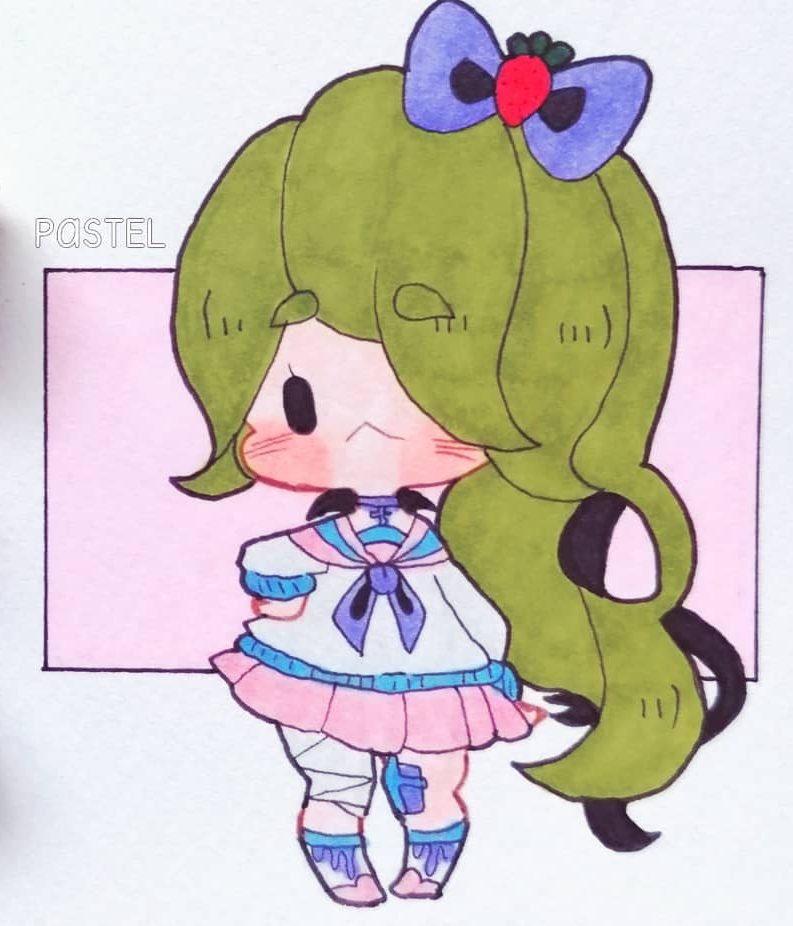
For hair, decide the silhouette first. Think fringe, side sections and back mass. A handful of strand breaks is usually enough once those larger shapes read clearly.
Draw anime hair as volume, not as hundreds of strands
Hair sits on top of the skull, so give it its own outer volume instead of tracing it directly against the head circle. Mark the hairline lightly, then build the hairstyle in large clumps:
- Fringe: the front mass that overlaps the forehead.
- Side sections: the shapes framing the cheeks, ears or jaw.
- Back mass: the larger volume behind the head.
- Accent strands: a few smaller breaks that add rhythm after the main silhouette works.
Each clump should have a root direction, a broad shape and a taper. If every strand begins and ends independently, the hairstyle becomes noisy. If every clump is the same width, it becomes mechanical.
Hair should react to the head turn
On a 3/4 view, the hairline, fringe and side masses wrap around the skull. The far side is compressed just like the face. The back mass may remain visible even when the cheek and ear shift forward.
A useful check is to temporarily hide the hair. If the bald head underneath still turns correctly, the hairstyle is supporting the construction. If the head only looks correct once the hair covers it, fix the skull and feature placement first.
Full-body and character studies — Tutorials 7–10
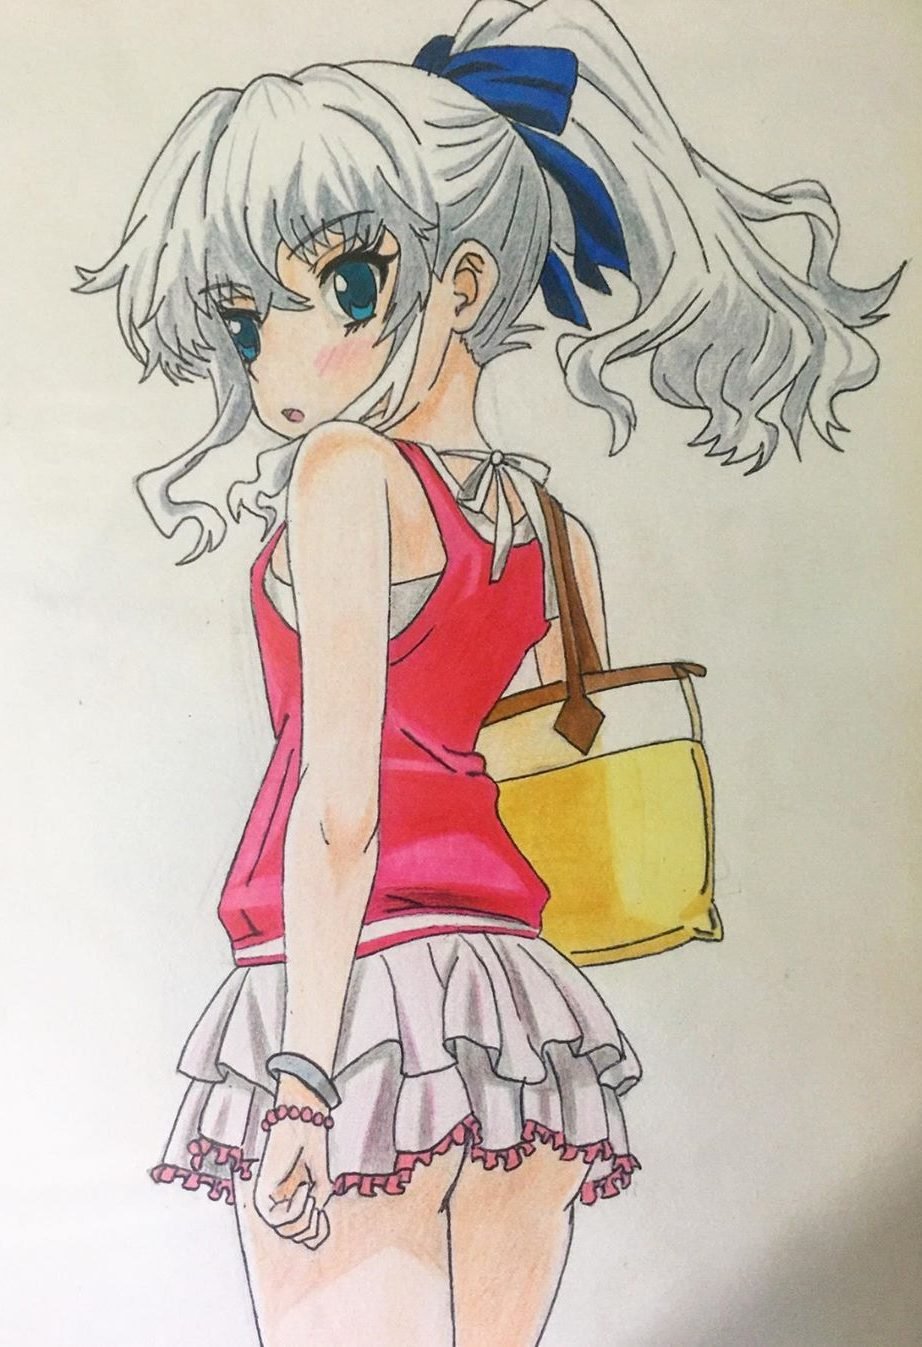
Check the pose before clothing. Mark the head, rib cage and pelvis, place the limbs, then see where the weight sits. Sleeves, shoes and folds come after the figure can already stand on its own.
Build the body from gesture before proportion
Before counting head lengths, find the pose. Draw one action line through the body, place the rib cage and pelvis, then send the limbs out with simple directional strokes. A character with imperfect proportions can still feel alive; a perfectly measured character can still feel stiff.
Once the movement works, choose the proportion system used by the tutorial. Chibi, youthful and more naturalistic anime characters use different head-to-body ratios. The useful rule is not one fixed number. It is consistency inside the same drawing.
Use the rib cage and pelvis to control the torso
Treat the rib cage and pelvis as two separate masses. They can tilt, twist and shift against each other. That relationship creates most of the torso gesture.
In a relaxed standing pose, one hip may rise while the shoulders counter-tilt. In an action pose, the rib cage may turn farther than the pelvis. If both masses remain perfectly horizontal and stacked, the figure often looks like a doll even when the limbs are technically correct.
Place limbs as directions before drawing anatomy
Use long lines for upper arms, forearms, thighs and lower legs before giving them thickness. Mark knees and elbows only where the direction changes. Then build simple tapered forms around those lines.
Hands and feet can stay simple until the pose works. If the character cannot balance without detailed shoes or fingers, the structural problem is earlier in the drawing.
Clothing belongs to the body underneath
Do not draw a sleeve as a separate tube floating beside the arm. First know where the shoulder, elbow and wrist are. Then let the fabric hang, stretch or bunch around those landmarks.
- Stretch folds: appear where fabric is pulled between two points.
- Compression folds: gather near bent elbows, knees and waistlines.
- Gravity folds: hang downward from loose fabric.
- Overlap folds: appear where one garment layer sits over another.
Anime clothing can be simplified heavily, but the fold direction should still come from the pose rather than from decorative zigzags.
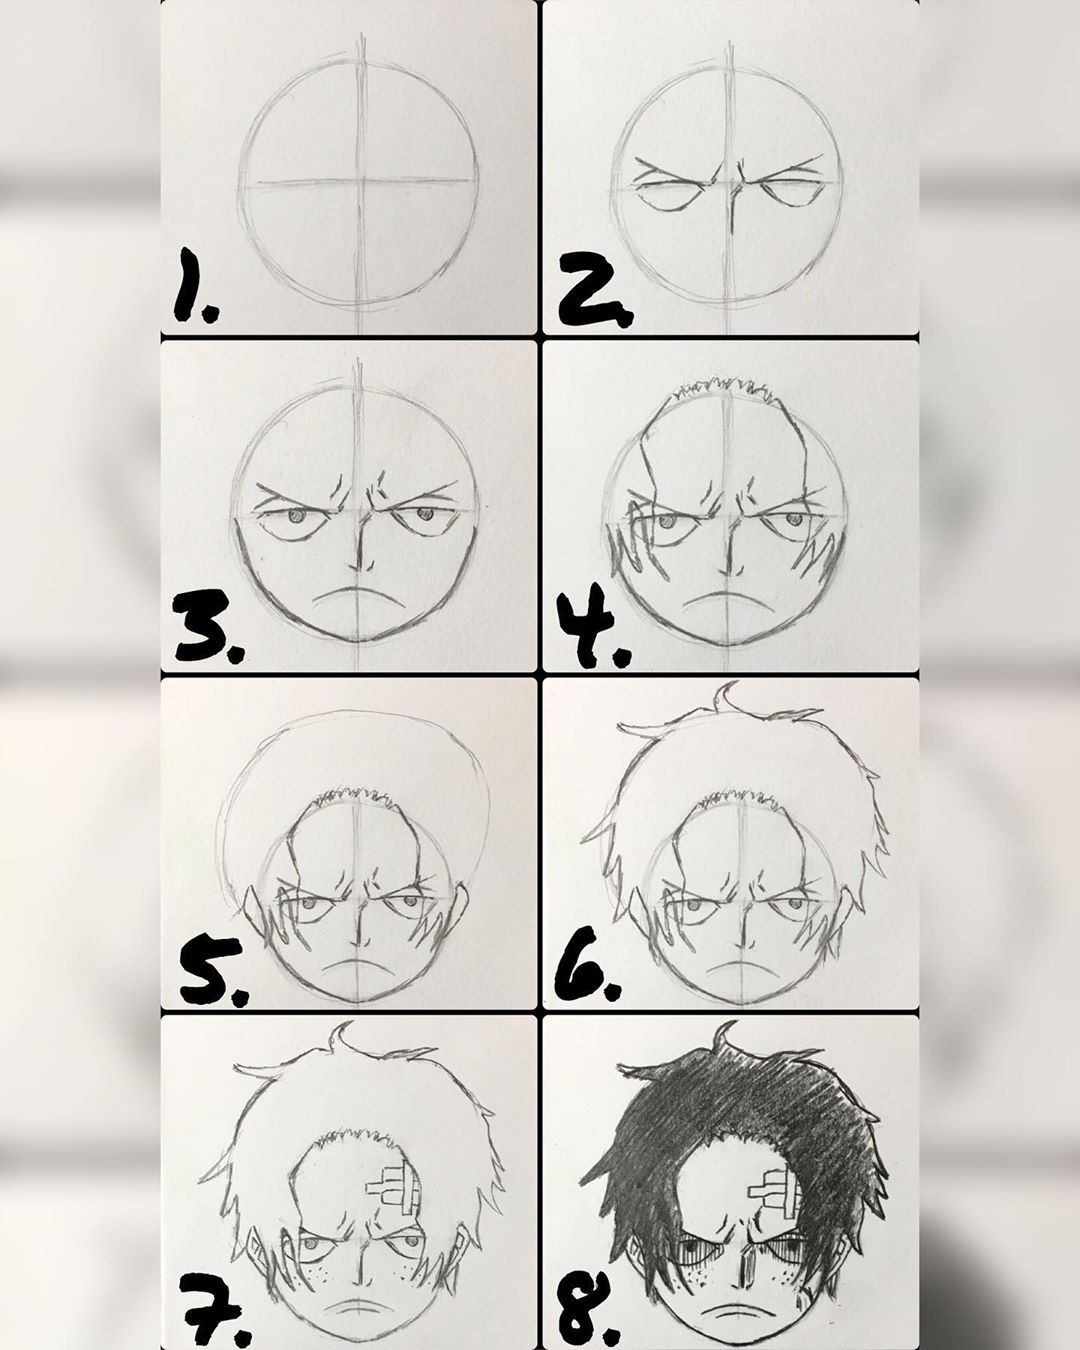
These references do not all use the same proportions, and that is useful. Measure the head-to-body ratio in the tutorial you chose and stay consistent with that one drawing instead of forcing every character into a single formula.
Use the head as a measuring unit, not a law
Once the pose is established, lightly compare the figure height to the head height. You do not need to write a number on the page. The point is to notice whether the design is intentionally compact, youthful, elongated or closer to realistic proportions.
If you redesign the character, change one proportion deliberately. A larger head and shorter limbs usually make the character feel younger or more chibi. A smaller head, longer legs and narrower torso can create a taller or more mature silhouette. Keep the change consistent through the whole body instead of stretching only one limb.
Silhouette matters before costume detail
Fill the character mentally as one dark shape. Can you still read the pose, hairstyle and overall design? If not, more belts, folds and accessories will not solve the problem.
Strong anime character designs usually have a clear large-shape hierarchy: head/hair silhouette, torso mass, leg direction and one or two distinctive costume shapes. Small decorative details work best after that hierarchy is readable.
A four-pass anime drawing practice that transfers
- Pass 1 — copy the construction: follow the tutorial with the center line, eye line, rib cage, pelvis and limb guides still visible. Do not aim for a clean finished drawing.
- Pass 2 — redraw from memory: close or cover the tutorial and rebuild the same head or pose. Check the reference only after you reach the point where you genuinely get stuck.
- Pass 3 — change one variable: turn the head slightly, change the expression, shorten the hairstyle, bend one arm or alter the costume silhouette.
- Pass 4 — design a new character: keep the construction method but change the face, hair, proportions and clothing enough that the result is no longer a copy of the tutorial character.
If the second drawing goes wrong, do not restart at the eyelashes or clothing. Find the first large shape that drifted. That is usually where the useful correction is.
Common anime drawing problems and the first thing to check
- The face looks crooked. Recheck the head center line and eye band before redrawing individual eyes.
- The 3/4 face looks flat. Compress the far side of the face and make the far eye narrower instead of sliding both eyes sideways.
- The jaw looks detached from the skull. Rebuild the cranium first, then attach the cheeks and chin beneath it.
- The hair looks like a helmet. Separate the hair into fringe, side masses and back volume; add strand breaks only after the silhouette works.
- The body is stiff. Remove the contour and redraw only the action line, rib cage, pelvis and limb directions.
- The character cannot stand naturally. Find the supporting leg and check whether the body weight sits over it.
- The clothes look pasted on. Mark the shoulders, elbows, hips and knees underneath the garment, then rebuild the folds around those landmarks.
- The style changes halfway through. Compare eye size, jaw shape, head-to-body ratio and hand/foot simplification across the whole drawing.
A 10-minute head-turn drill
Use one simple anime head design and draw it five times: profile left, 3/4 left, front, 3/4 right and profile right. Keep the hairstyle simple so you can concentrate on the construction.
- Minute 1–2: draw all five cranial masses and center lines before adding any features.
- Minute 3–4: add the eye bands and jaw shapes. Compare how much the far side compresses in each 3/4 view.
- Minute 5–6: place the eyes, nose and mouth as groups rather than finishing one face at a time.
- Minute 7–8: add the ears and one simple hair mass that wraps around each head.
- Minute 9–10: compare the five drawings. Check whether the same character still looks like the same character as the head turns.
If the front view looks right but the 3/4 views look like different people, the problem is usually not “anime style.” Recheck feature spacing, jaw width and how much of the far side you compressed.
Before you clean the line art
- Does the head still read correctly with the hair hidden?
- Do both eyes belong to the same eye band?
- Does the jaw attach naturally to the cranium?
- Does the body balance over its supporting leg?
- Can you read the pose as a silhouette?
- Do the clothes follow the joints and body underneath?
- Are the biggest hair and costume shapes clear before small details?
If two or more answers are no, stay in construction. Clean line art makes decisions look more final; it does not make weak construction more correct.
How to turn a tutorial into your own anime character
Do not change everything at once. Keep the construction method and alter the design in layers:
- Change the silhouette: hairstyle length, fringe shape, jacket width, skirt/pants shape or shoulder profile.
- Change the face language: eye shape, eyebrow weight, nose simplification and jaw proportion.
- Change the proportion system: slightly larger head, longer legs or a broader/narrower torso.
- Change the pose: shift the weight, turn the torso or move one arm.
- Change the costume logic: redesign the garment shapes instead of swapping only colors or accessories.
The goal is not to hide that you used a tutorial. The goal is to keep the useful construction decisions while making new design decisions on top of them.
A 7-day anime drawing plan
- Day 1 — front-view heads: use Tutorials 1–2. Draw three heads with center and eye lines visible.
- Day 2 — 3/4 turns: redraw one head turning left and right. Focus on far-side compression.
- Day 3 — expressions: use Tutorials 5–6 and make four expressions on the same head construction.
- Day 4 — hair: draw one bald head, then add three different hairstyles as large masses before strands.
- Day 5 — body construction: use Tutorials 7–10. Draw gesture, rib cage, pelvis and limbs only; no clothing detail.
- Day 6 — clothing: take one body from Day 5 and add a simple outfit that follows the pose.
- Day 7 — original character: build a new character from scratch using the same construction order, then compare it with the week’s tutorial studies.
Keep the rough construction drawings. Improvement usually appears first as better spacing, cleaner head turns and more stable poses—not as prettier eyelashes or smoother line art.
Anime drawing questions
Should I learn realistic anatomy before drawing anime?
You do not need to master realistic anatomy first, but basic structure helps. Learn enough about the skull, rib cage, pelvis, joints and weight to understand what your stylization is simplifying.
Why do my anime eyes never match?
They are often being drawn as two separate illustrations. Place both eye shapes on the same eye band before refining either iris, lash line or highlight.
How do I draw a 3/4 anime face?
Turn the head construction first: curve the center line, shift it toward the far side and compress the far eye, cheek and jaw. Do not start by moving finished features sideways.
Should I draw hair strand by strand?
No. Start with the overall hair volume and a few major clumps. Individual strands are finishing accents.
How do I make anime poses less stiff?
Draw the action line and torso masses before the outside contour. Check which leg supports the weight and let the shoulders and pelvis tilt naturally around that support.
Where to go next
Use this page as the foundation, then move to the page that matches the skill you actually want to improve:
- Faces and head turns: use the anime girl drawing tutorial for a slower face-focused study.
- Male faces and hairstyles: browse the anime guy drawing references.
- Original character design: use the anime character design references for silhouettes, outfits and broader design variation.
- Movement and posing: use the gesture drawing guide before adding costume detail.
- Hands: use the hand drawing guide when simplified anime hands stop being enough.
- General fundamentals: use the beginner drawing tutorial hub for proportion, objects and broader construction practice.
If you want a break from character work entirely, the easy things to draw page is a lighter place to sketch without anatomy or character design pressure.


imma rat
muito bom cara, vim do brasel aprender aqui por que lá nimguém ensina assim como tu
Very cool ? get animemaker and u can do digital art. It’s an app check it out it’s 12+ and on it I’m it’s the Bunny Queen :3
Nice drawing