
Rose is probably the most beautiful flower in the world. In any case, a bouquet of roses is a pleasure to receive as a gift to any girl, and even just a beautiful rose drawing, painted with paints, can cheer up. How to draw a rose, let alone a bouquet of roses, if you have never painted flowers? How to convey in a rose drawing with a pencil the beautiful shape of the petals? Rose petals have a complex shape, and drawing an opened rosebud is not easy. But, if you draw a rose in stages, step by step adding new details to the original contour, then the picture of the rose will turn out like a real one. Let’s check if this is the case, and draw the rose in stages together. If you will draw a rose on the stem, and even more so a bouquet, it is also advisable to draw a vase at the end of the picture.
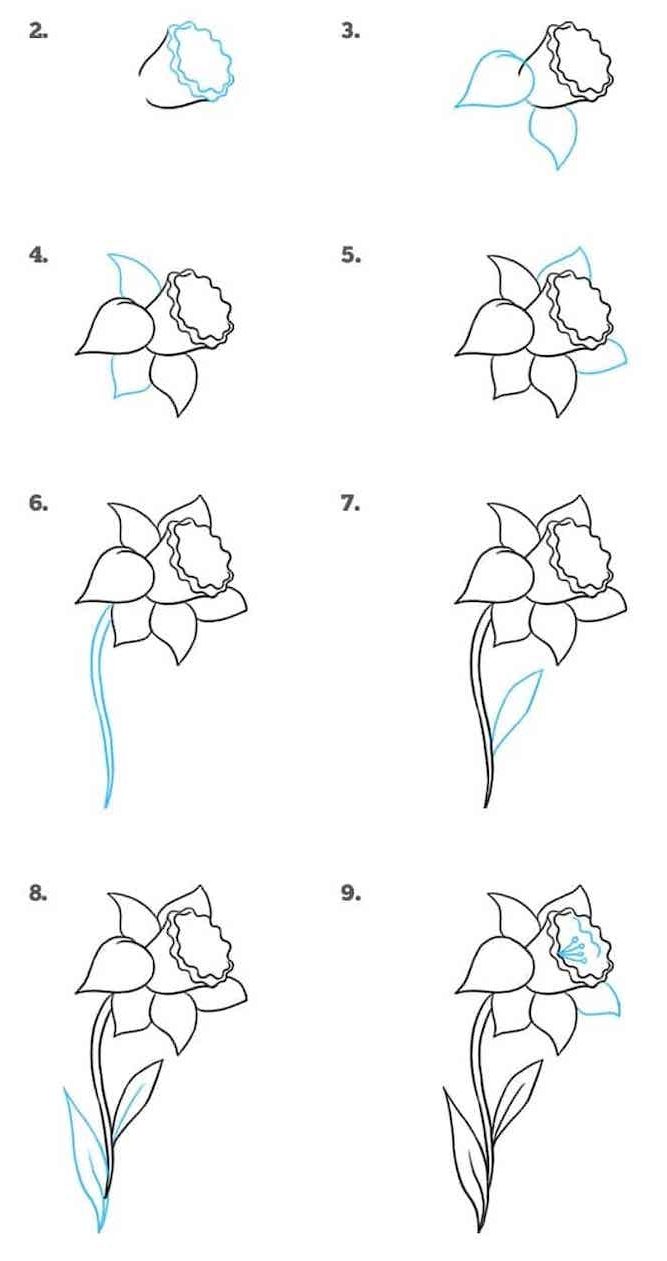
First, you need to outline the petals of the rosebud. It’s not difficult to draw a circle on top of a piece of paper. It is not necessary to draw it perfectly even, it is important to consider that the rose flower will be inside this outline, so immediately draw the appropriate size of the outline of the bud. Do not forget that the bright lines are secondary and in the next steps of the drawing we will delete them. We will continue to draw the rose in the next step, but for now, add the stem to the bud.
First, draw an unopened portion of the bud in the center of the rose. After that, divide the bud into two parts by a line (in the figure it is blue). Now it will be convenient and easy to draw the lines of the petals of the left and right side of the bud.
Flower Drawing Step by Step
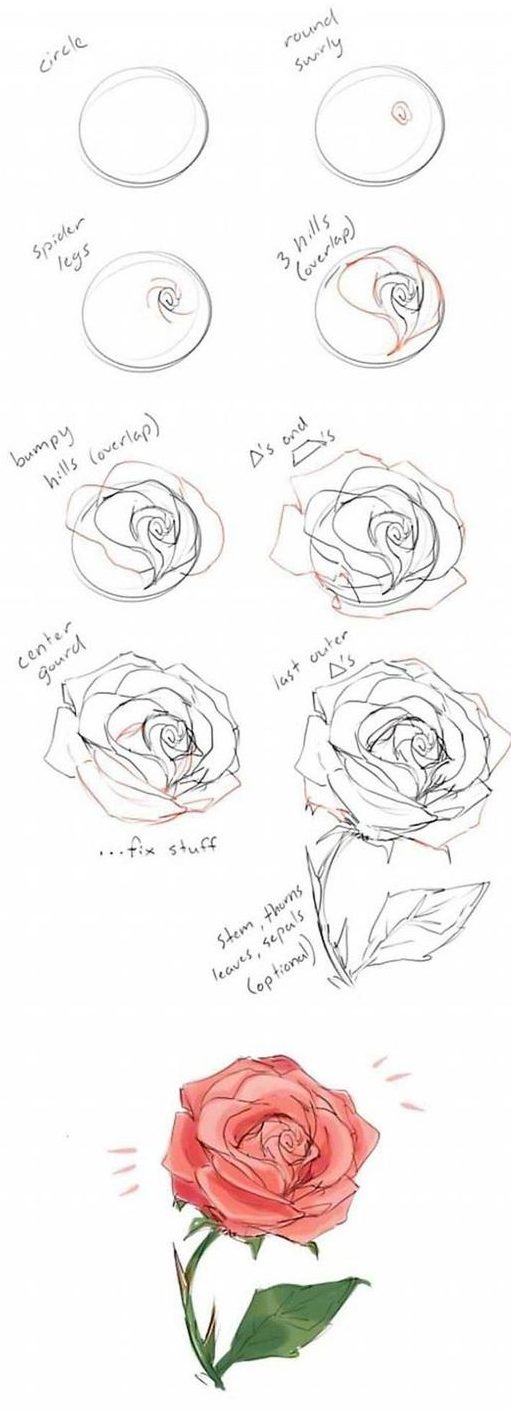

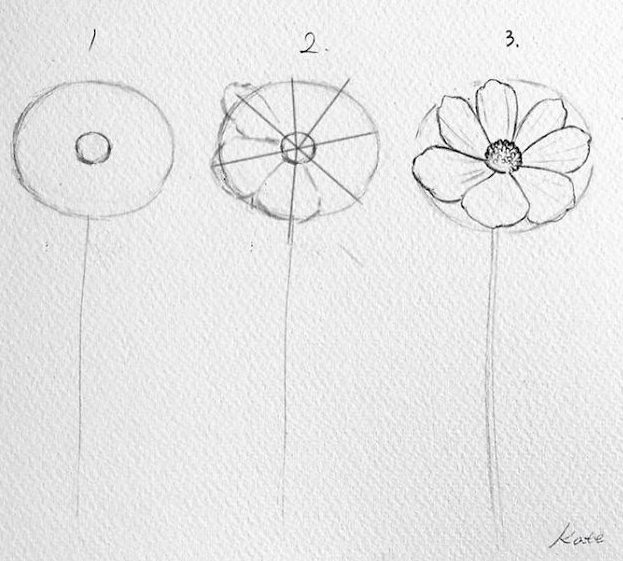
Now you need to draw rose petals in detail. The contours of the petals do not have to be copied exactly from my drawing, they may have a different shape.
To begin, draw a flower stalk with leaves. Draw the number of twigs and leaves arbitrarily. Most importantly, do not make the leaves too big. Note that rose leaves have streaks. For greater realism, they also need to be drawn. It remains to remove the extra contours and draw the petals in detail. In the correct image of the petals lies the whole beauty of the rose’s pattern. The upper contour of each petal is drawn by two lines connecting at the edge of the petal. This gives the impression that the edges of the petals are bent. This will also help us in the next step to create shadows in the bud, which will make the rose pattern voluminous.
At this stage, you have already drawn a real rose, it remains only to add shadows to the flower drawing will become voluminous. Imagine which side the bright light source will be to determine which side of the rose will be more illuminated. Where there will be recesses between the petals, you need to draw the shadows “thicker” by pressing the pencil harder. Shadows should be at the junction of the petals. Using your finger, rub all areas shaded with a pencil. This method smooths out the sharp lines of the pencil, and the rose pattern will look softer.
Easy Flower Drawing

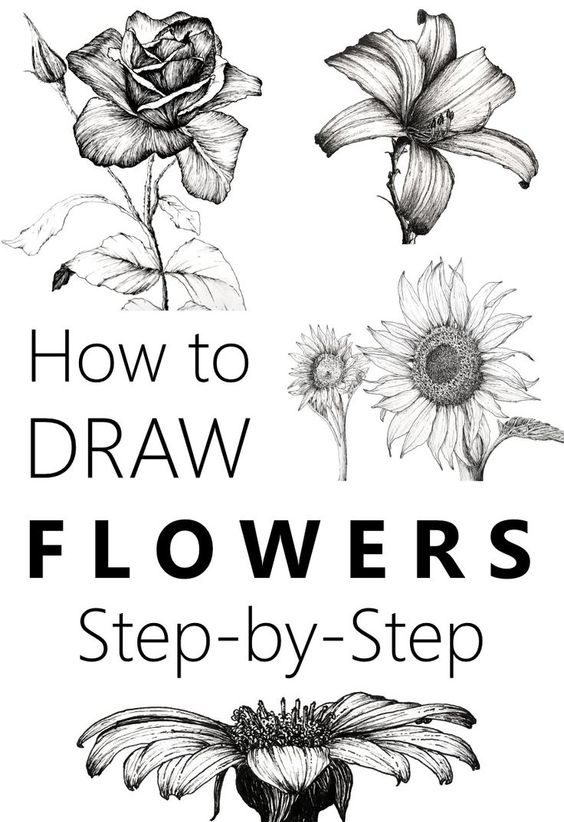
Realistic Flower Drawing
The picture will look much more spectacular if, instead of tinting with a simple pencil, paint the rose with paints or colored pencils. Be sure to consider lighting when painting with colored pencils. Without shadows, the rose will look “flat,” two-dimensional. A picture of a rose with a simple pencil can even be slightly “tinted” with colored pencils. Something like this I made a picture of a rosebud (see below).
Coloring a rose’s drawing would be just perfect, but only if you have them, and if you know how to use them.
A rose can be drawn in many ways. In this way, it is convenient to draw an opened bud, detailing each rose petal in detail. Do not forget that the bright lines are secondary and in the next step of the drawing we will delete them. This step of the drawing lesson is without comment; it is in addition to the main lesson. At each stage, you need to add selected lines with a pencil. They are painted blue.
After you learn how to draw a picture of a single rose correctly, you can begin a more difficult task – to draw a beautiful bouquet of roses. Pay attention to how real roses stand in a vase, some of them have small, not yet opened buds, the stems are tilted, the leaves have different sizes. The best way to draw a bouquet of roses is to draw a living bouquet, first with a simple pencil, and then paint with paints. But even if you do not have a real bouquet of roses, you can draw roses from a color picture or photo.
This the Best Showing How to MAke flower Steps Has help me to prove on my flowers…..
Thank you
l have enjoyed drawing your flowers and l feel so confident at how my drawing has improved so much since l have had a go at your steps which has speeded me up no end………. thank you lots
loved them