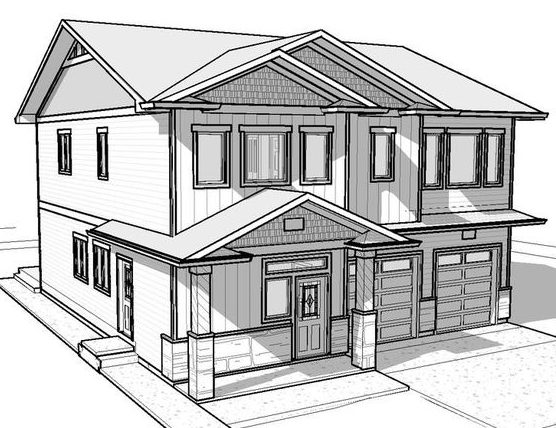
Drawing a house in 3D can seem like a daunting task, but with some basic techniques and practice, it can be a fun and rewarding experience. In this article, we will guide you through the process of drawing a 3D house step by step with a pencil.
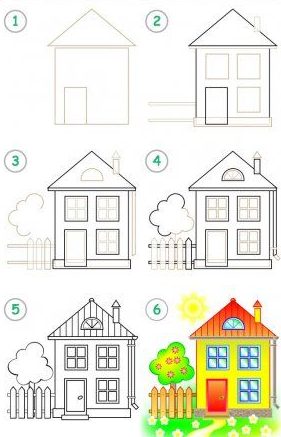
Step 1: Sketch the Basic Shape
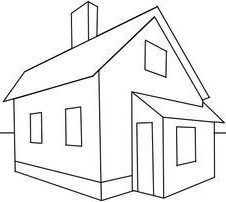
Start by sketching the basic shape of the house using your pencil. Draw a rectangle for the main body of the house, and then draw a triangle on top of it for the roof. Be sure to use light, loose strokes for this step, as you will be making adjustments later.
Step 2: Add Depth to the Roof
Next, add depth to the roof by drawing lines from the top of the roof to the bottom of the house. These lines should be parallel to the sides of the house and converge at a vanishing point on the horizon line. This will create the illusion of depth and make the roof appear 3D.
Step 3: Draw the Windows and Doors
Now, draw the windows and doors of the house. Use your ruler to make sure they are straight and evenly spaced. To add depth, draw the frames of the windows and doors slightly thicker on the bottom than on the top.
Step 4: Add Shading and Texture
To make the house look more realistic, add shading and texture to the different elements of the drawing. Use your pencil to create shadows under the roof and overhangs, and add texture to the walls by drawing horizontal lines to represent bricks or siding.
Step 5: Final Adjustments
Finally, make any final adjustments to the drawing. Erase any unnecessary lines, and darken the lines that are meant to be permanent. You can also add more detail, such as plants, a fence, or a chimney, to make the drawing more interesting.
Conclusion:
Drawing a 3D house with a pencil can be a fun and rewarding experience, and with some basic techniques, anyone can create a realistic-looking drawing. By following these steps and practicing regularly, you will be able to create more complex drawings in the future. So grab your pencil and paper, and start drawing your dream home in 3D!


How do you draw a 3D house from a two-point perspective?
Drawing a 3D house from a two-point perspective is a bit more advanced than drawing a basic house from a one-point perspective. However, with some practice and patience, anyone can learn how to draw a 3D house from a two-point perspective. Here are the steps:
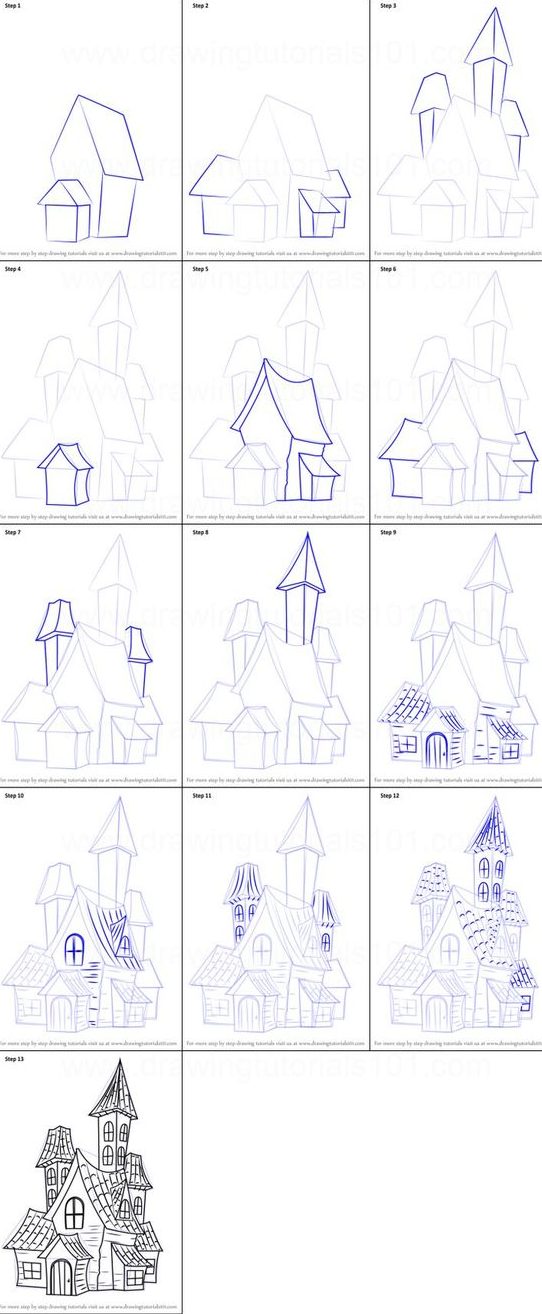
Step 1: Draw the Horizon Line
Start by drawing a straight line across your paper. This is your horizon line, and it represents the viewer’s eye level. Make sure the line is straight and level.
Step 2: Draw the Vanishing Points
Next, draw two dots on the horizon line, one on the left side and one on the right side. These are your vanishing points, and they represent the points at which parallel lines converge.
Step 3: Draw the Basic Shape
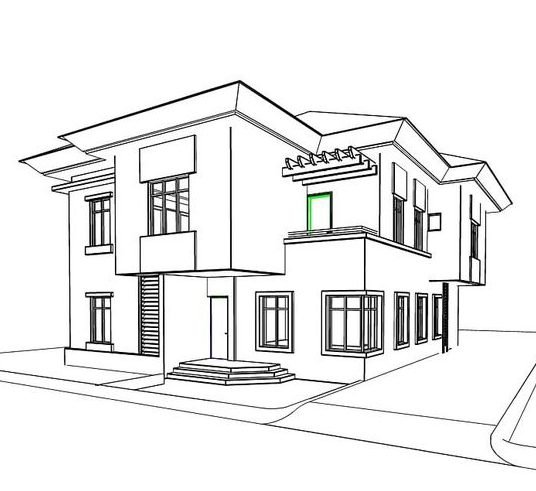
Using your ruler, draw a rectangle that will represent the main body of the house. This rectangle should be drawn at an angle toward the vanishing points. This will give the illusion of depth and make the house look 3D.
Step 4: Draw the Roof
Next, draw a triangle on top of the rectangle for the roof. Make sure the triangle is angled towards the same vanishing points as the rectangle.
Step 5: Draw the Windows and Doors
Using your ruler, draw the windows and doors of the house. Make sure they are evenly spaced and angled towards the vanishing points. You can add depth to the windows and doors by drawing them slightly larger on the bottom than on the top.
Step 6: Add Shading and Texture
To make the house look more realistic, add shading and texture to the different elements of the drawing. Use your pencil to create shadows under the roof and overhangs, and add texture to the walls by drawing horizontal lines to represent bricks or siding.
Step 7: Final Adjustments
Finally, make any final adjustments to the drawing. Erase any unnecessary lines, and darken the lines that are meant to be permanent. You can also add more detail, such as plants, a fence, or a chimney, to make the drawing more interesting.
Conclusion:
Drawing a 3D house from a two-point perspective can be challenging, but with some practice and patience, anyone can learn how to do it. By following these steps and practicing regularly, you will be able to create more complex drawings in the future. So grab your pencil and paper, and start drawing your dream home in 3D!
These drawings help me. Thank you!