Realistic Elephant Drawings Step by Step
Large and immense individuals, somewhat similar to extinct dinosaurs. Elephants are exactly the kind of wild animals that, despite their enormous weight and large size, were tamed by people and began to be used as irreplaceable assistants in harvesting, entertaining tourists and even building houses and non-residential premises.
In today’s article at doitbeforeme.com, we offer to our readers to draw an elephant in various motifs. Several of the step-by-step variations suggested below will help show how an elephant can be depicted in a light (simple), complex, or very intricate technique.
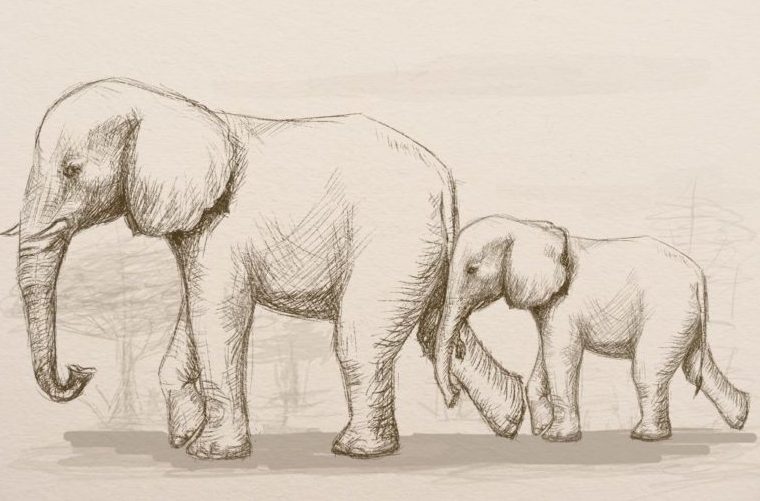
Adults are unlikely to like a simple drawing based on lines. But the “living” likeness, including anatomy, shape, and outline, is quite suitable for the beginning of creativity. An artist’s work always begins with anatomy. First, the author studies the structure of the skeleton, the location of each bone, its shape, length, and even proportionality. And only after that starts drawing. First, a sketch is drawn, which later acquires distinctive features and drawing. The photo below shows what should be taken into account in creating the picture.
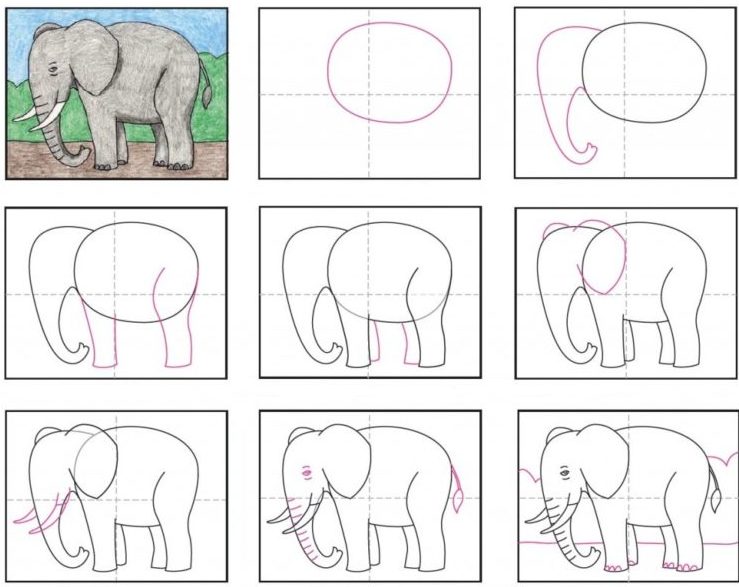
How to draw a realistic elephant step by step?
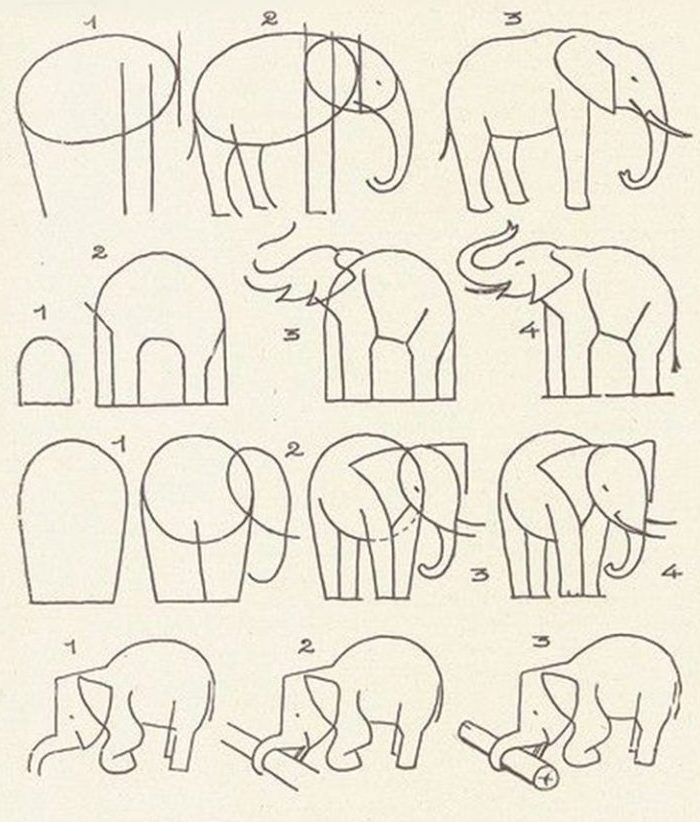
Begin the drawing with the original outline in the form of a large circle for the trunk. At a small distance to the right, draw a circle of smaller diameter for the head. Connect these figures, approximately as shown in my figure, it will be the neck of an elephant. It is not necessary to observe the geometric accuracy of these contours, you see, for me, these contours are also drawn rather casually. These are just the preliminary contours necessary for marking the proportions and location in the drawing of the parts of the trunk of the elephant, which will need to be removed in the future.
Just below the main circle, draw two more elongated ovals for the elephant’s legs.
2. Draw the contours of the trunk and legs
Start this step with the contour of the trunk, it is easiest to do it, you just need to draw an arc and a circle on its edge. It will be required to accurately observe the proportions of the massive head and trunk. Next, from the contour of the head to the back, draw another arc, this will be the upper border of the ear. Well, now you need to draw the lower line of the abdomen. The elephant is a very massive animal, and this must be conveyed in the drawing, so this line will ensure you against errors. Well, at the end of this stage, add also two more contours for the legs.
3. The general outline of the shape of the body of an elephant
Well, now it will be much easier to draw an elephant, we have the main contours, it remains only to add foot contours to the drawing.
The elephant in our figure is moving, this movement can be transmitted using the position of the legs. Draw the left leg slightly raised, to do this, lift the contour of the upper part of the leg a little, and turn the lower part to the left. In the next step, we will draw a general outline of the elephant, and then it will be seen that he is walking.

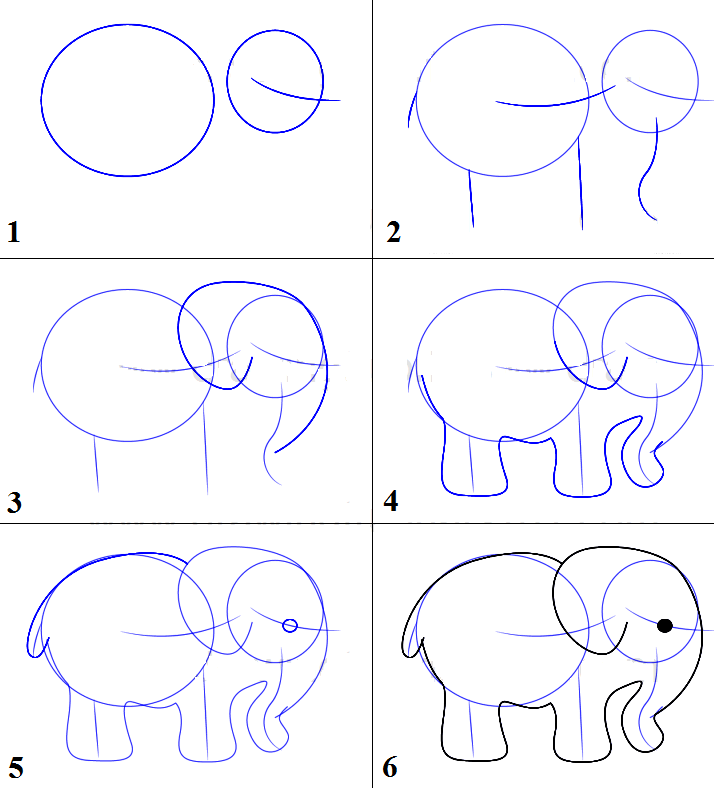
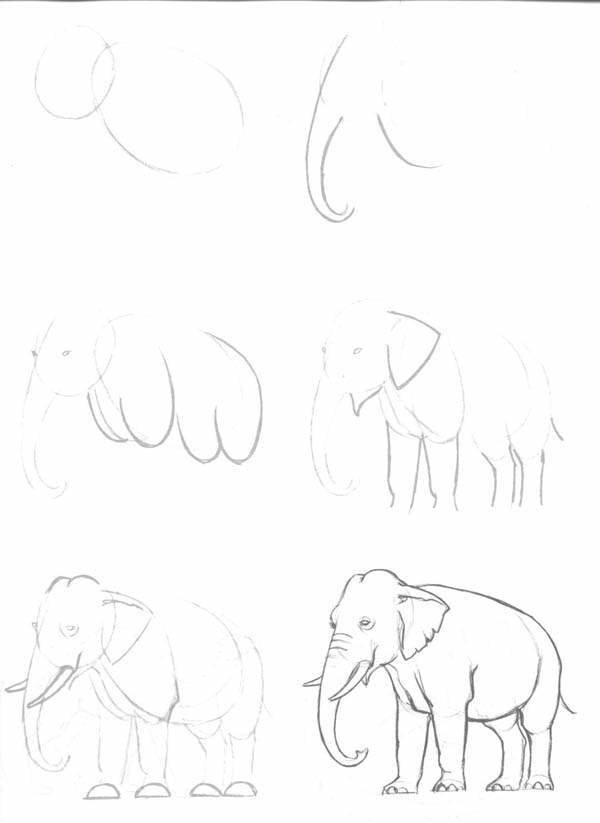
4. The drawing of an elephant in detail
Start this step by outlining the trunk and the huge ear of an elephant. By the way, the scope of his ears is equal to the length of an elephant, keep this in mind. It is not difficult to draw a trunk according to the existing contour marking, and the ear can be drawn in any shape. Do not make the elephant’s trunk too thin or too thick. Compare, for example, with the thickness of the legs. By the way, the elephant’s legs are like columns, and the feet are flattened, almost round.
I hope it will not be difficult for you to trace the general outline of the trunk and legs of an elephant. You see, how simple we were able to draw an elephant, it remains only to add simple small details and the drawing will be finished.
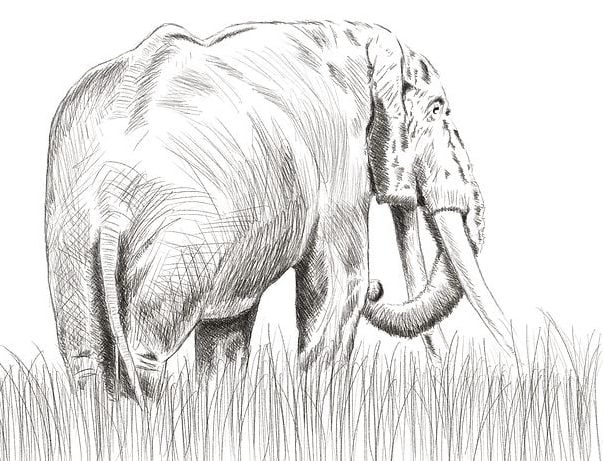
5. How to draw elephant skin
First of all, remove the extra contour lines, because you want to see what we get. After that, start drawing with the simplest. Draw an eye, then you can draw two tusks and a tail. It will be a little harder to draw an elephant’s ear, but I think you can easily cope with it by looking at my drawing. Importantly, note that the edge of the second ear is also visible in the figure, but you can not draw it.
After we succeeded in drawing the torso and head of the elephant correctly in stages, we will begin to draw the skin. In some places, it can be covered with wrinkles, folds (trunk). You can do this with pencil strokes. And on the rest of the skin, apply a fine “mesh” in the form of intersecting lines. Do not press hard on the pencil, the lines should be barely noticeable. Try to draw the eye of the elephant correctly. To better see the details of the eye, you can enlarge my drawing.
6. How to draw a realistic elephant – Final step
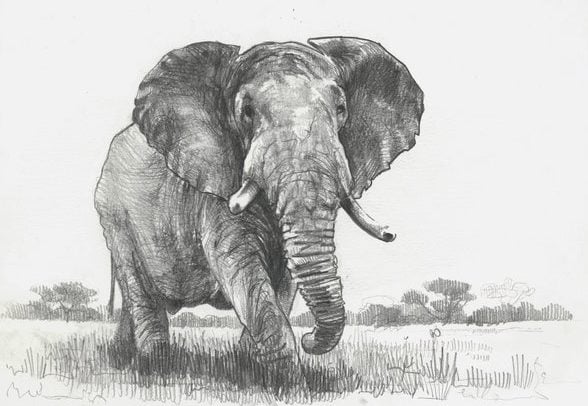
By this step, you should already completely draw the elephant and begin painting the picture. If you decide to draw only with a simple pencil, then you need to take a soft pencil (2M) and apply shadow. Shadows will add volume and the image of an elephant will be more realistic. To accurately draw shadows on the body of an elephant, you need to imagine from which side the light is falling or the sun is shining. That which is closer will be brighter. At the junction of the legs with the body, ears with the head, the shadows will be denser.
If you draw an elephant next to its other relatives or a small elephant calf, as well as the surrounding African landscape, then your drawing will become more vibrant, realistic and attractive. Also you can check other respected articles about elephant drawing: